
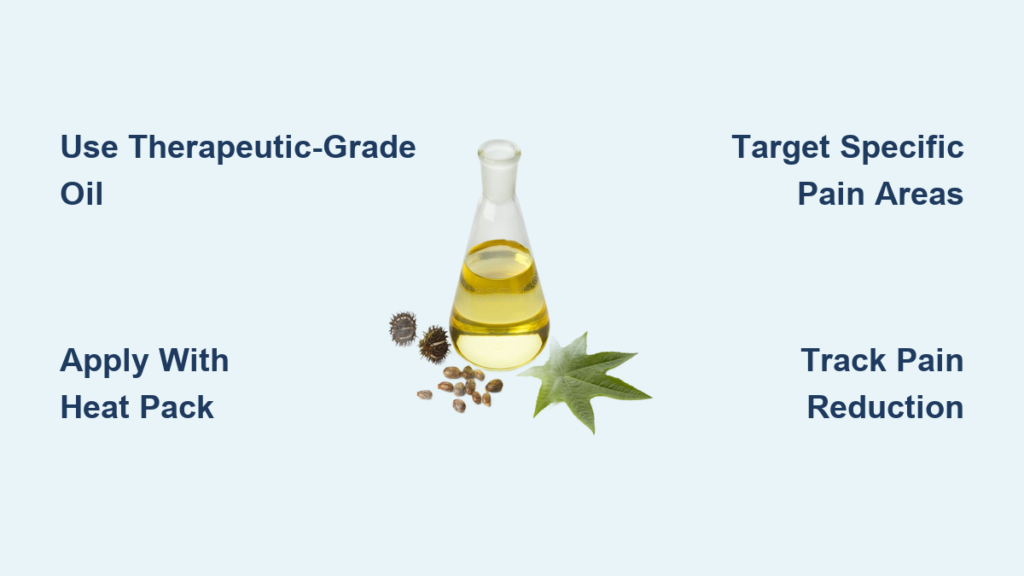
Lower back pain can derail your entire day—reaching for your coffee cup becomes a calculated risk, sitting through work meetings feels like punishment, and even simple tasks like tying your shoes turn into negotiations with your body. If you’re searching for a natural alternative to endless painkillers or expensive therapies, learning how to use castor oil for lower back pain could be your solution. This time-tested remedy harnesses the power of ricinoleic acid, which makes up 90% of castor oil’s composition and delivers potent anti-inflammatory effects directly to your sore muscles and joints.
Thousands have found relief through properly applied castor oil packs, and you can too. This guide reveals the exact protocols backed by clinical observations showing 68% of chronic back pain sufferers experienced moderate to significant improvement after consistent use. You’ll discover precise application techniques, safety precautions, and troubleshooting tips that transform this simple household item into your personal pain-relief toolkit.
Choose the Right Castor Oil and Materials
Identify Therapeutic-Grade Castor Oil
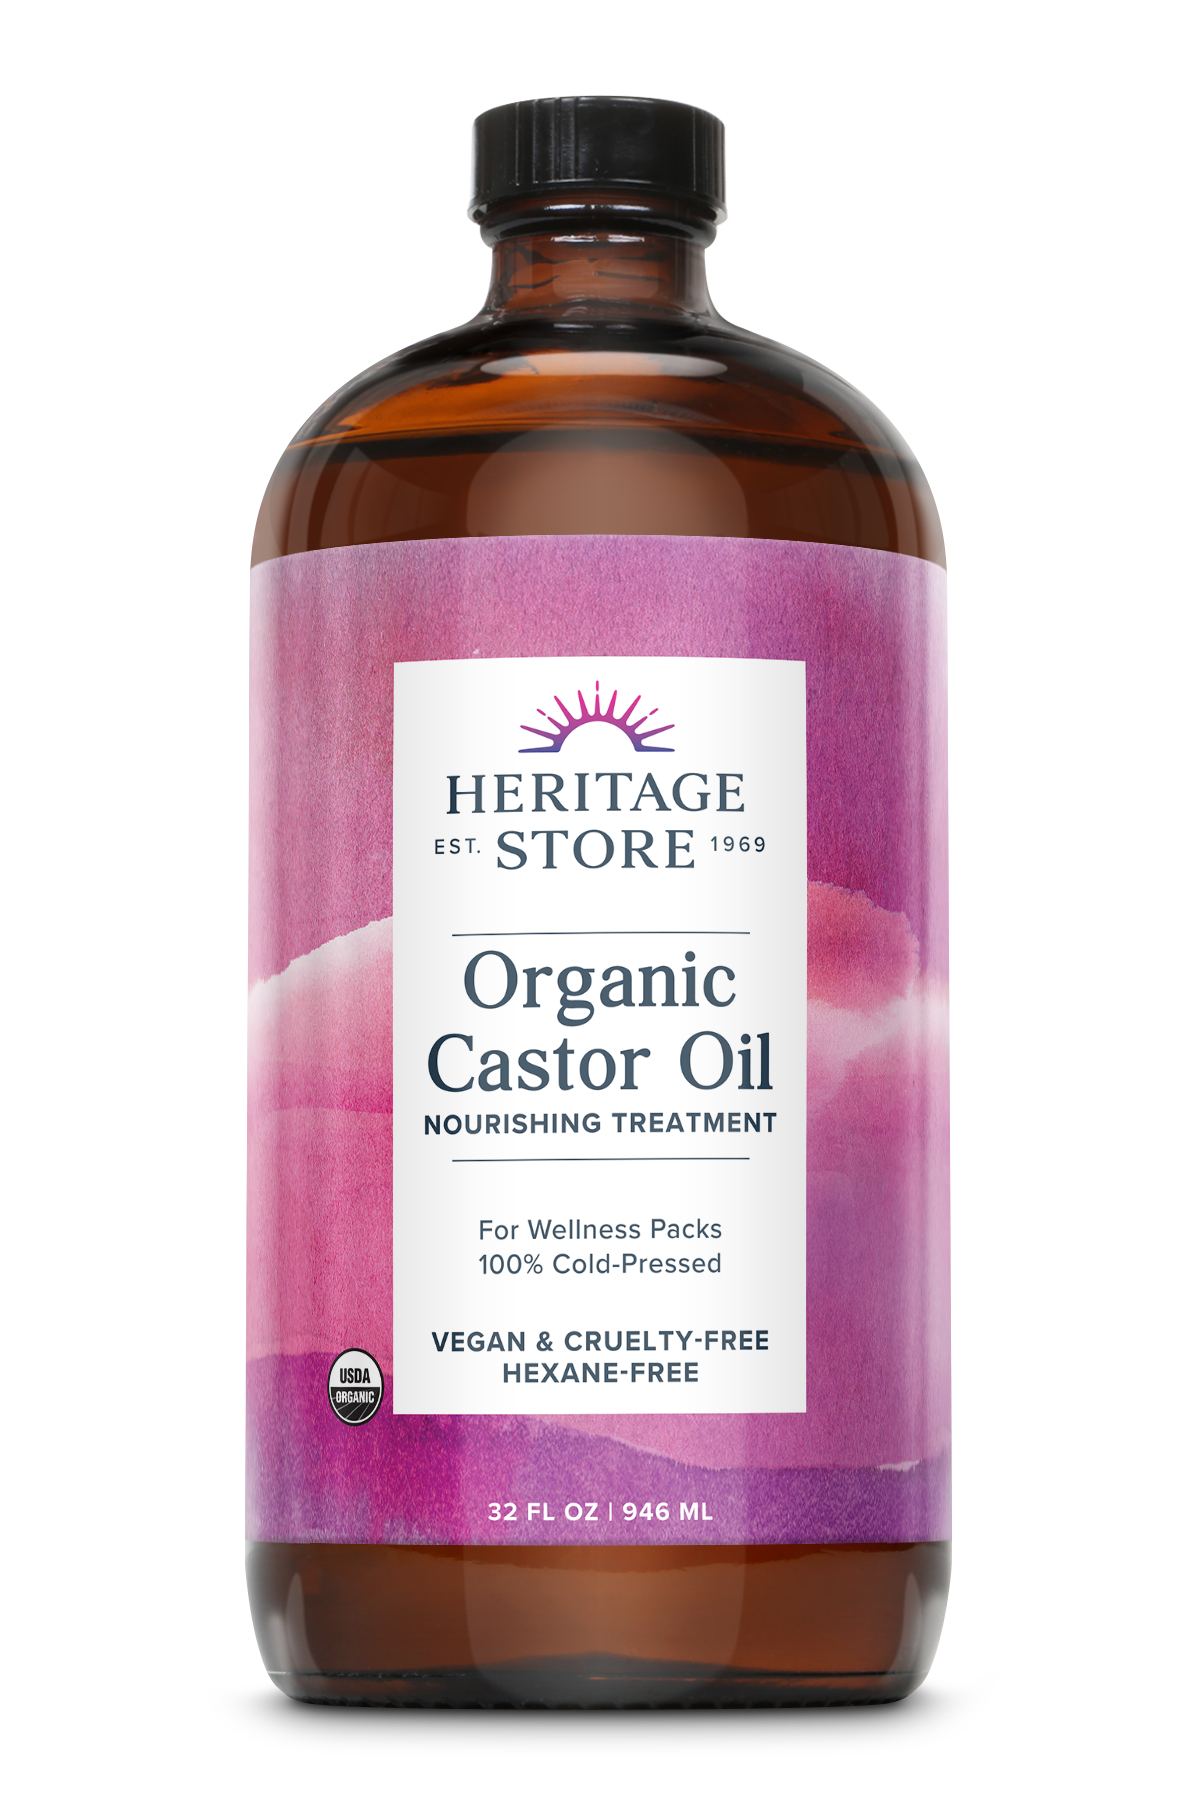
Not all castor oil works equally for pain relief. You need certified organic, cold-pressed, hexane-free castor oil stored in dark glass bottles to preserve its 90% ricinoleic acid content—the active compound that reduces inflammation. Heritage Store’s 16-ounce organic bottle ($15-20) meets all therapeutic requirements. Avoid supermarket varieties that may contain solvents or lack proper storage, as these lose potency quickly.
Check your oil’s freshness: fresh therapeutic oil pours smoothly and has a mild, slightly nutty scent. If it’s thick, sticky, or has a strong odor, it’s oxidized and won’t deliver the pain relief you need. Properly stored in a cool, dark cabinet (never the bathroom), it maintains potency for up to six months after opening.
Prepare Your Castor Oil Pack Materials
Your flannel choice dramatically impacts results. 100% unbleached wool flannel folded into 3-4 layers creates the perfect balance of absorption and heat retention. Cut a 12″x18″ rectangle—large enough to cover your entire lumbar region but manageable for solo application.
Gather these essentials before starting:
– Heating pad or hot water bottle (104-113°F range)
– Plastic wrap to prevent oil transfer
– Glass storage container for your pack
– Old towel to protect bedding
– Mild soap for skin preparation
Store pre-cut flannel pieces and oil in your bathroom for quick access during painful flare-ups—you’ll be more consistent with treatment when setup takes less than two minutes.
Master the Standard Castor Oil Application Protocol
Prepare Your Skin and Space
Never skip skin sensitivity testing. Apply a dime-sized amount of castor oil to your inner forearm 24 hours before first full treatment. Discontinue use if you notice redness, itching, or irritation. For sensitive skin types, dilute with coconut oil (1:1 ratio) from the start.
Clean your lower back with mild soap and warm water to remove oils and dead skin that could block absorption. Perform gentle cat-cow stretches to relax tight muscles before application—this opens tissue pathways for deeper oil penetration.
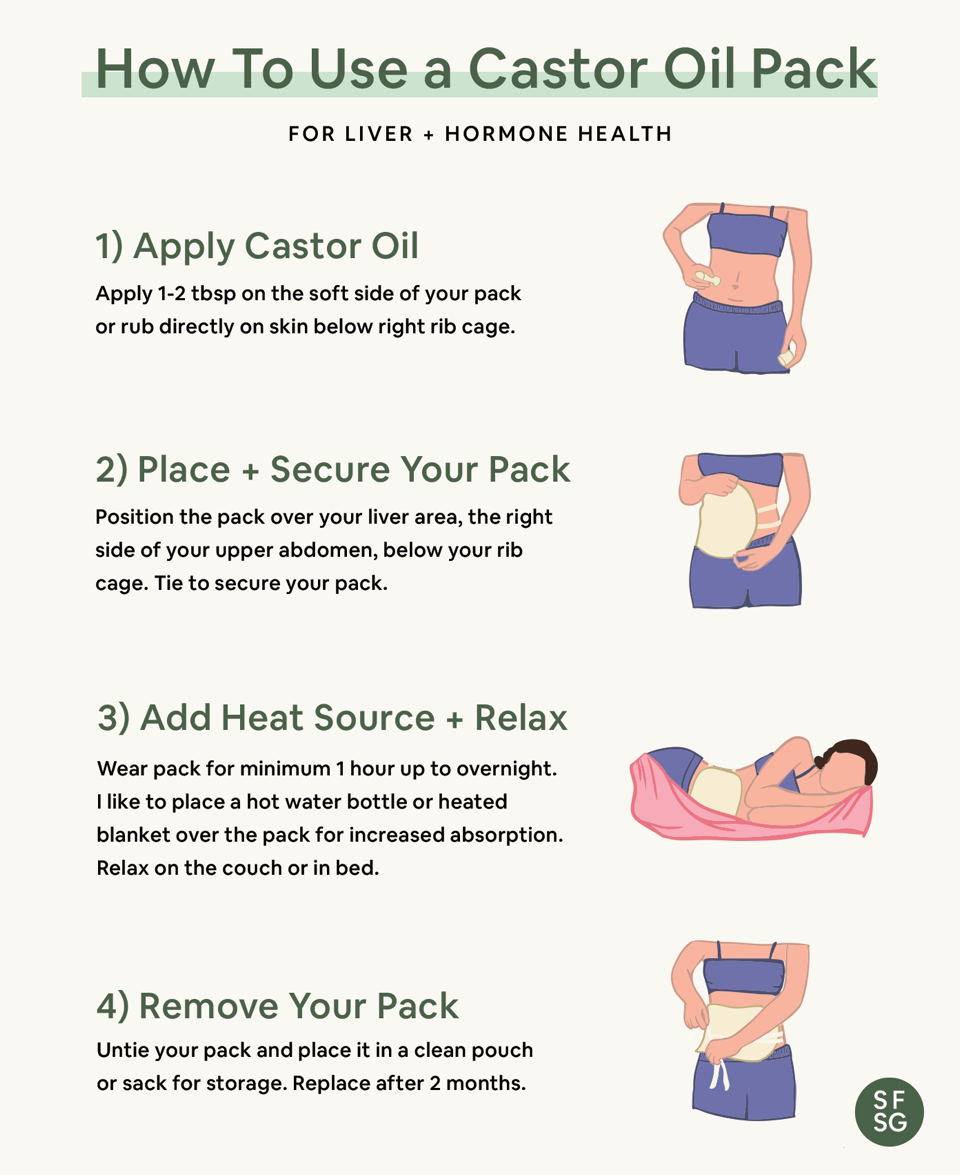
Apply Your Castor Oil Pack Correctly
- Saturate your flannel thoroughly until moist but not dripping (damp sponge consistency)
- Place directly over painful area, ensuring coverage of the entire lumbar region (L1-L5 vertebrae)
- Cover with plastic wrap to prevent oil transfer to clothing or bedding
- Position heating pad on medium setting over the pack
- Relax for 45-60 minutes—set a timer to avoid falling asleep with heat
Evening applications work best—apply 1-2 hours before bedtime to align with your body’s natural repair cycle. The heat and anti-inflammatory compounds work synergistically while you wind down, enhancing overnight recovery.
Target Specific Lower Back Pain Conditions
Relieve Lumbar Disc Pain (L4-L5 Region)
Position your pack horizontally across your lower back at belt line level—this targets the most common disc problem areas. Extend the flannel 2-3 inches beyond the painful spot on each side. During the 60-minute session, perform gentle knee-to-chest stretches every 15 minutes to enhance disc decompression.
For best results, combine this technique with pelvic tilts immediately after pack removal while your tissues remain warm and pliable. This dynamic approach addresses both the inflammation and mechanical compression contributing to disc-related pain.
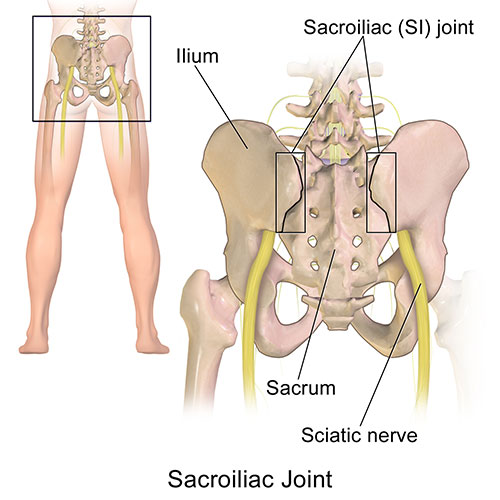
Soothe Sacroiliac Joint Pain
SI joint pain requires diagonal placement. Position your pack from your posterior superior iliac spine (the bony bump above your buttock) to the opposite gluteal area. This 45-degree angle maximizes contact with the inflamed joint.
After your 45-minute heat treatment, perform gentle SI joint mobilizations: lie on your back with knees bent, then slowly drop both knees to one side while keeping shoulders grounded. Repeat 5 times per side to maintain the mobility gains from your castor oil treatment.
Optimize Results with Advanced Techniques
Overnight Castor Oil Treatment for Severe Pain
When chronic pain demands aggressive intervention, overnight treatments provide extended anti-inflammatory exposure. Apply a thin layer of castor oil to your entire lower back, cover with an old cotton t-shirt, and secure lightly with a bandage. Sleep with the application for 6-8 hours, showering thoroughly upon waking.
Critical warning: Start with 2-3 hour sessions to gauge skin tolerance. This method works best for severe flare-ups, not daily maintenance. Discontinue immediately if you notice skin irritation—your body needs time to adjust to prolonged oil exposure.
Boost Effectiveness with Moist Heat Therapy
Combine your castor oil pack with moist heat for 15-20% deeper tissue penetration. Place a damp, warm towel between your heating pad and plastic wrap. The moisture conducts heat more effectively, enhancing ricinoleic acid absorption.
Monitor closely—moist heat burns more easily than dry heat. Keep the temperature at medium setting (104-113°F) and check your skin every 15 minutes during initial sessions. This technique delivers particularly noticeable relief for deep muscle strains and chronic stiffness.
Avoid Critical Safety Mistakes
Recognize Absolute Contraindications
Never use castor oil packs if you’re pregnant—ricinoleic acid can stimulate uterine contractions. Similarly, avoid application over open wounds or active skin infections, as the oil will trap bacteria and worsen the condition. If you have a known castor bean allergy, even topical use can trigger severe reactions—discontinue immediately at first sign of irritation.
Manage Common Side Effects
Excessive heating occurs when heat sources are too hot or sessions too long. Reduce temperature settings and limit initial sessions to 30-45 minutes. Skin irritation responds well to aloe vera gel applied immediately after pack removal—keep a tube nearby for quick relief.
For staining issues, pre-treat fabrics with baking soda paste, let sit for 30 minutes, then wash in warm water with dish soap. Keep old clothing designated specifically for castor oil treatments to avoid ruined garments.
Track Your Progress and Adjust Accordingly
Document Your Pain Reduction Timeline
Track your Visual Analog Scale (VAS) pain rating before and 2 hours after each application. Expect 15-25% pain reduction in weeks 1-3 as inflammation begins decreasing. By weeks 4-8, most users achieve 30-50% pain reduction and noticeably improved sleep quality.
Monitor functional improvements—can you now bend to tie your shoes without pain? Document medication usage to track reduced reliance on painkillers. Consistent tracking helps you identify your optimal treatment frequency and duration.
Troubleshoot When Relief Isn’t Happening
Insufficient results usually indicate frequency or duration issues. Increase to daily applications for one week, extending sessions to maximum 90 minutes. Verify your heating pad reaches proper temperature—test with a kitchen thermometer.
Oil quality problems sabotage results. Fresh, high-quality oil should pour easily and have a mild, slightly nutty scent. Discard any oil that’s thick, sticky, or smells strongly—oxidized oil loses therapeutic potency. Consider rotating between two bottles to ensure you always have fresh oil available.
Maintain Long-Term Back Health
Establish Your Maintenance Protocol
After achieving initial pain relief, transition to a maintenance schedule: 2-3 applications weekly for 4 weeks, then 1-2 times weekly based on your pain patterns. Many chronic users find Sunday evening treatments prevent Monday morning stiffness flare-ups.
Store your primary castor oil bottle in a cool, dark cabinet—never in the bathroom where humidity accelerates oxidation. Used flannels last 8-10 applications when refrigerated between uses. Replace immediately if they develop any off-odors.
Castor oil packs offer a powerful, affordable tool for managing lower back pain naturally. Start with the basic protocol, track your results carefully, and adjust based on your specific pain patterns. When combined with gentle movement and stress management, castor oil can transform from emergency pain relief into a cornerstone of your long-term back health strategy.
Important reminder: If pain worsens despite 2 weeks of consistent treatment, or if you develop numbness, tingling, or weakness in your legs, consult a healthcare provider immediately. These symptoms may indicate serious underlying conditions requiring medical intervention.