
Your shoulders ache by 10 AM. Your upper back screams by dinner. Sound familiar? New parents worldwide face this daily reality—lifting their growing baby up to 50 times per day, often without proper technique or preparation. The weight progression from 7-pound newborn to 30-pound toddler creates a perfect storm for upper back pain that can last months if left unaddressed.
Here’s the good news: this pain is preventable and treatable. The strategies below will help you lift smarter, strengthen key muscles, and finally find relief from the constant upper back tension that’s become your unwelcome parenting companion.
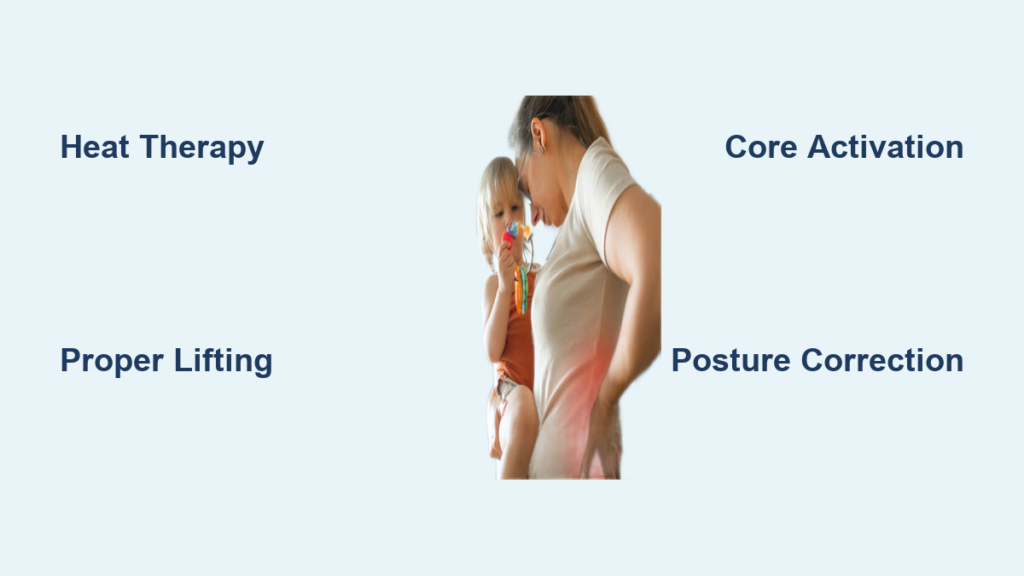
Why Your Upper Back Hurts When Carrying Baby
Weight Amplification Effect
Every pound your baby gains multiplies the strain on your back muscles. A 25-pound toddler lifted 50 times daily equals lifting 1,250 pounds—equivalent to hoisting a grand piano over your head. Your upper back muscles weren’t designed for this repetitive load, especially when combined with poor lifting mechanics.
Postural Breakdown Patterns
Forward Head Posture: You naturally lean forward when checking on your baby, creating a 60-pound effective weight on your neck and upper back. This becomes permanent as you spend hours feeding, changing, and soothing.
One-Sided Carrying: Hip-carrying positions force your spine into unnatural curves, overloading the muscles between your shoulder blades. Your dominant side compensates, creating muscle imbalances that worsen over time.
Hidden Contributors
- Ligament Laxity: Postpartum hormones keep your joints loose for 6-8 weeks, making proper lifting form crucial
- Core Weakness: Pregnancy stretches your abdominal muscles, removing your natural back support system
- Multi-tasking Strain: Checking your phone or reaching for items while holding baby adds rotational stress
Quick Pain Relief That Actually Works
Immediate Tension Release
Heat Therapy: Apply a warm compress between your shoulder blades for 15 minutes while your baby naps. The heat increases blood flow, relaxing tight muscles faster than stretching alone.
Doorway Stretch: Stand in a doorway, place forearms on doorframe, and gently lean forward. Hold 30 seconds, repeat 3 times. This opens chest muscles that pull your shoulders forward during feeding.
Tennis Ball Massage: Place a tennis ball between your back and wall, roll gently over trigger points. Target the area between your spine and shoulder blade where pain concentrates.
Safe Medication Guidelines
Over-the-Counter Options: Ibuprofen reduces inflammation effectively, but timing matters. Take it 30 minutes before your most active period (often morning routines). Always consult your doctor, especially if breastfeeding.
Natural Alternatives: Magnesium supplements can reduce muscle tension within 2-3 weeks. Topical magnesium spray offers localized relief without systemic effects.
Professional Touch Points
Partner Massage Exchange: Trade 10-minute back rubs during evening routines. Focus on the trapezius muscle that spans from neck to shoulder blade—this bears the brunt of baby-carrying strain.
When to Seek Help: Contact a physiotherapist if pain radiates down your arm, causes numbness, or prevents sleep for more than 3 consecutive nights.
Master Proper Lifting Techniques

The Core Activation Sequence
Before Every Lift: Engage your core by imagining pulling your belly button toward your spine. This creates internal support for your back muscles.
Step-by-Step Proper Lift:
1. Foot Position: Place feet shoulder-width apart, one foot slightly forward
2. Knee Bend: Squat down by pushing hips back, keeping chest lifted
3. Close Contact: Bring baby to your chest before lifting
4. Leg Power: Push through your heels, not your back
5. Neutral Spine: Maintain natural curve in lower back throughout
Common Lifting Mistakes
❌ Reaching Out: Extending arms while lifting adds 500% more pressure to your back
❌ Twisting Turns: Rotating while lifting increases injury risk by 300%
❌ Forward Bends: Bending at the waist instead of knees overloads upper back muscles
Equipment-Specific Strategies
Car Seat Mastery: Install seat while empty, then place baby inside. Kneel on vehicle seat when securing buckles. Use your legs to lift the carrier, not your arms.
Stroller Transitions: Park stroller close to car before removing baby. Face stroller directly when lifting to avoid twisting. Use stroller’s storage basket instead of carrying diaper bag.
Strengthen Your Back for Long-Term Relief
Essential Daily Exercises
Wall Angels: Stand against wall, slowly raise arms to goalpost position and back down. Perform 3 sets of 10 daily to strengthen upper back muscles.
Modified Rows: Use resistance bands anchored at chest height. Pull handles to sides, squeezing shoulder blades together. Start with 2 sets of 8, progress weekly.
Bird Dog: On hands and knees, extend opposite arm and leg while keeping core engaged. Hold 5 seconds, repeat 5 times per side to build spinal stability.
Progressive Loading Program
Week 1-2: Focus on bodyweight exercises and stretching
Week 3-4: Add light resistance bands (5-10 pounds)
Week 5-8: Increase to medium resistance (15-20 pounds)
Week 9+: Integrate functional movements with baby as resistance
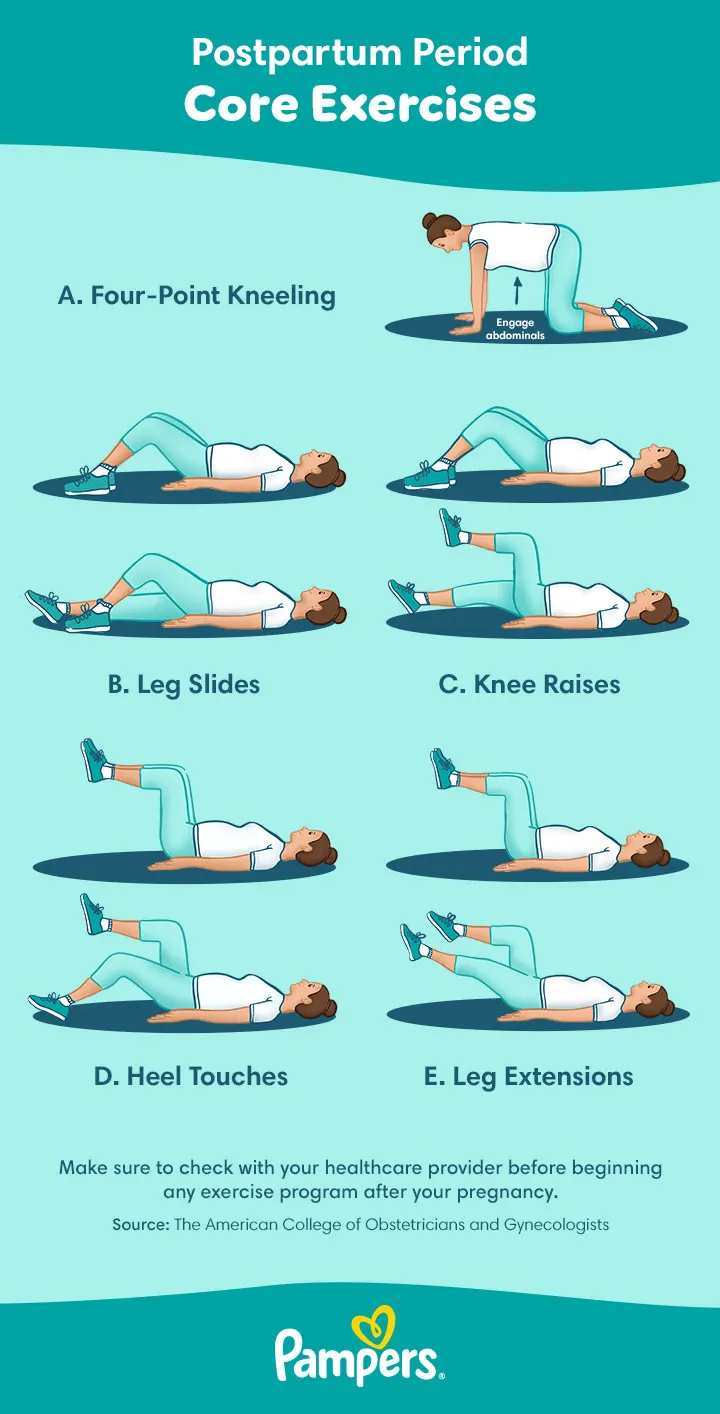
Core Restoration Sequence
Pelvic Tilts: Lie on back, gently flatten lower back into floor, hold 3 seconds. Complete 15 reps to rebuild deep core muscles.
Dead Bug: Lie on back, extend opposite arm and leg while keeping core engaged. This retrains core stability for lifting movements.
Bracing Practice: Practice core engagement during daily activities—while brushing teeth, doing dishes, or walking with baby.
Equipment Solutions That Reduce Strain

Carrier Selection Guide
Front-Forward Carriers: Distribute weight evenly across shoulders and hips. Look for padded shoulder straps and waist belts rated for 25+ pounds.
Wrap Techniques: Learn the “pocket wrap cross carry” for newborns, transitioning to “back wrap cross carry” for older babies. These methods use your strongest muscles instead of straining your upper back.
Key Features to Demand: Wide shoulder straps, lumbar support, multiple carrying positions, and easy adjustment mechanisms.
Nursing Station Setup
Chair Height: Your feet should rest flat on floor with hips slightly above knees when seated. Add a footstool if needed.
Support Pillow Positioning: Place nursing pillow to bring baby to breast level, eliminating the need to hunch forward. Stack multiple pillows if one isn’t sufficient.
Phone/Book Holder: Use a gooseneck holder positioned at eye level to avoid looking down during long feeding sessions.
Smart Home Modifications
Changing Table Height: Adjust to waist level to prevent bending
Crib Side Access: Lower crib side completely before lifting baby
Diaper Supply Stations: Create multiple stations throughout house to reduce carrying distance
When Professional Help Becomes Essential
Red Flag Symptoms
Immediate Medical Attention: Pain accompanied by chest tightness, difficulty breathing, or radiating down left arm requires emergency evaluation.
Physiotherapy Triggers: Schedule an appointment if pain:
– Persists beyond 5 days despite home treatment
– Wakes you from sleep consistently
– Causes numbness or tingling in arms/hands
– Prevents you from lifting your baby safely
Treatment Path Options
Postnatal Physiotherapy: Specialized programs address postpartum core weakness and ligament laxity. Most insurance covers 12 visits annually.
Chiropractic Care: Gentle adjustments can restore spinal alignment disrupted by pregnancy and repetitive lifting. Choose practitioners experienced with postpartum care.
Massage Therapy: Weekly sessions during peak baby-carrying months (6-12 months) significantly reduce chronic tension buildup.
Building Your Support Team
Primary Care Coordination: Your OB-GYN can provide referrals and coordinate care between specialists. Request this at your 6-week postpartum checkup.
Local Resources: Many hospitals offer postpartum exercise classes and parent groups focused on back health. These provide both treatment and peer support.
Partner Training: Ensure your partner learns proper lifting techniques and can temporarily take over physically demanding tasks during flare-ups.
Your Next Steps: Implement Changes Today
Start with the immediate relief techniques—apply heat and practice the doorway stretch today. This weekend, set up your nursing station with proper pillow support. By next week, begin the core strengthening sequence. Most parents see 50% pain reduction within 2 weeks of implementing these changes consistently.
Pro Tip: Place sticky notes on your changing table and car seat with “Knees, Not Back” as a visual reminder during those automatic parenting moments.
Remember: Your baby’s weight will only increase, but your back pain doesn’t have to. These strategies transform daily lifting from a pain source into a strength-building opportunity. By addressing your upper back pain from holding baby now, you’ll protect your body for years of parenting ahead—without sacrificing the precious moments of holding your little one close.