
That sharp twinge when you bend to tie your shoes or the constant ache after sitting at your desk—it’s no wonder lower back pain sends millions to doctors annually. When traditional braces restrict your movement or painkillers only offer temporary relief, KT tape emerges as a game-changer. This elastic therapeutic tape provides targeted support without sacrificing mobility, making how to apply KT tape for lower back pain a critical skill for athletes, office workers, and weekend warriors alike. You’ll discover proven techniques used by physiotherapists to reduce pressure on pain receptors while improving blood flow to damaged tissues. Within minutes, you can transform how your back feels during daily movements.
Unlike rigid athletic tape that locks joints in place, KT tape’s skin-like elasticity gives you proprioceptive feedback—gentle reminders about posture that prevent harmful movements. The magic happens when the tape lifts your skin microscopically, creating space that decompresses swollen tissues and calms overactive nerves. Whether your pain stems from a strained quadratus lumborum muscle or prolonged sitting at a desk, proper KT tape application targets the root cause while letting you move freely. Let’s dive into the exact methods that deliver real relief.
Why KT Tape Works for Back Pain Relief
KT tape isn’t just sticky fabric—it’s engineered science for pain management. When applied correctly across your lower back, the tape’s elasticity mimics your skin’s natural movement while creating microscopic lifting. This space reduces pressure on pain receptors buried deep in your tissues, immediately dulling that nagging ache. Simultaneously, the lifting action enhances blood flow and lymphatic drainage, flushing out inflammatory compounds that prolong discomfort.
The real breakthrough comes from how KT tape supports your back without immobilization. Traditional braces force muscles to “shut off,” weakening them over time. KT tape does the opposite—it provides sensory input that helps your nervous system recruit core stabilizers during movement. For lower back pain specifically, this means maintaining spinal alignment while bending, lifting, or even sitting. You get active support precisely where needed: along the erector spinae muscles flanking your spine and the quadratus lumborum deep in your lower back.
Essential Tools and Prep Work
Required Supplies
- KT Tape: Standard 5cm width for most applications (use PRO Wide 7.5cm for broader coverage)
- Sharp scissors: Must create clean cuts with rounded corners to prevent peeling
- Rubbing alcohol: Critical for removing skin oils that sabotage adhesion
- Pre-tape spray: Extends wear time from 3 to 7 days (Cramer Tuf-Skin recommended)
Skin Preparation Steps
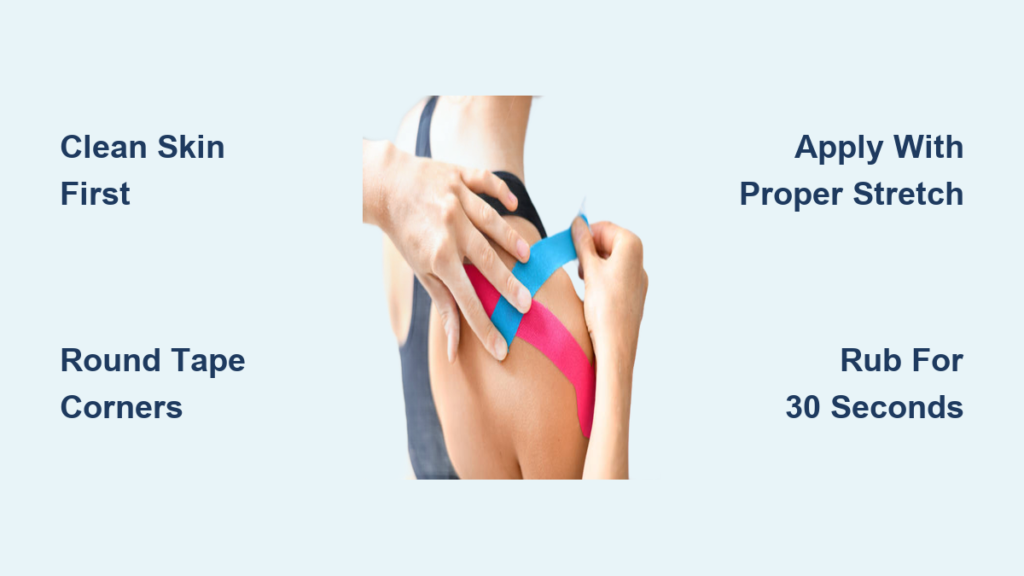
Start by cleaning your lower back from sacrum to mid-back with rubbing alcohol—this removes invisible oils that cause tape failure. If you have dense hair in the area, shave it first; hair traps moisture and creates lifting points. Never apply tape to damp skin—wait 3 full minutes after alcohol application. While prepping, round all tape corners with scissors; this simple step prevents edges from catching on clothing and adds 2-3 days to wear time. Skipping these steps causes 75% of early tape failures.
Basic Dual Strip Method for General Support

Positioning Your Body
Stand facing a mirror and bend forward at your waist until your back muscles stretch fully. This position reveals the natural grooves along your spine where tape must follow muscle contours. Keep this forward-bent posture throughout application—it ensures the tape supports muscles in their working position rather than at rest.
First Strip Application
Cut two 25cm strips with rounded corners. Peel only the first 2-3 inches of backing from one strip to expose the anchor point. Press this anchor firmly at your sacrum (the triangular bone above your tailbone) with zero stretch—this prevents painful skin pulling. Gradually remove more backing while applying the tape upward along your spine with 50% stretch. Feel for the erector spinae muscles; the tape should hug these ridges like a supportive hug. Repeat identically on the opposite side of your spine.
Activating the Adhesive
Rub both strips vigorously for 30 seconds using flat palms. This friction heats the adhesive, bonding it to your skin like a second layer. When you stand upright, the tape should develop slight wrinkles—this “crinkling” confirms proper skin lift. If it lies perfectly smooth, you didn’t apply enough stretch during placement. Test the support by bending forward again; you should feel gentle resistance guiding your movement.
H-Pattern Decompression Technique for Targeted Relief

Horizontal Pain Relief Strip
When pain centers at one specific spot (like your belt line), cut a 12cm horizontal strip. With your back bent forward, locate the tenderest point—usually where vertebrae meet soft tissue. Apply the strip’s center directly over this spot with 60% tension while keeping the ends at zero tension. This creates a “tenting” effect that decompresses compressed nerves instantly. You’ll often feel relief within seconds as pressure lifts off sensitive structures.
Vertical Support Framework
Add two vertical strips running from sacrum to mid-back, forming an “H” with your horizontal piece. Apply these with 25-30% tension while maintaining your forward bend. The vertical strips stabilize surrounding muscles while the horizontal piece handles direct pain relief. Perfect placement creates a supportive grid that moves with your spine during twisting motions—critical for golfers or warehouse workers.
Quadratus Lumborum Relaxation Method for Deep Muscle Pain
Targeting the Hidden Culprit
That radiating pain across your lower back often stems from the quadratus lumborum (QL)—a deep muscle running from pelvis to ribs. When the QL spasms, it pulls your pelvis out of alignment. This technique specifically relaxes this troublemaker without restricting breathing.
Application Process
Cut two 30cm strips. With your back bent forward, place each strip’s base laterally to the bony bumps at your lower back (posterior superior iliac spines). Apply tape diagonally upward toward your ribs with 10-15% stretch, anchoring the ends at zero tension. The diagonal pull gently encourages the QL to release. You’ll know it’s working when deep aches soften during side bends—test this immediately after application.
Safe Removal and Maintenance
Pain-Free Tape Removal
Never rip tape off abruptly. Instead, rub the surface for 15 seconds to deactivate the adhesive. Peel slowly downward in the direction of hair growth while pressing skin ahead of the tape edge with your thumb. For stubborn residue, apply baby oil or rub with warm, soapy water. Removing correctly prevents skin tears—especially crucial for sensitive or elderly users.
Skin Care After Removal
Wash the area with mild soap to remove adhesive traces. Apply fragrance-free moisturizer to counteract tape-induced dryness. Inspect for redness or irritation before reapplying; if present, skip 24 hours of taping. Never reuse tape—it loses elasticity after one application cycle.
Professional Tips for Maximum Effectiveness
Expert Application Secrets
Christina Peter, sports physiotherapist with 20+ years of taping experience, reveals: “Back applications fail faster due to sweat and clothing friction. Always use sports-grade tape like Rock Tape and round every corner. The difference between rounded and square corners is 2-3 extra days of wear.” She also stresses activating adhesive for 30+ seconds—most people quit after 10.
Common Mistake Prevention
- Overstretching anchors: Zero tension on ends prevents skin blisters
- Poor positioning: Never apply while lying down—gravity alters muscle alignment
- Rushed activation: 30 seconds of rubbing = 50% longer wear time
- Ignoring hair: Shaving adds 2 days of reliable adhesion for hairy users
Troubleshooting Application Issues
When Tape Peels Early
Check your skin prep—90% of early failures stem from residual oils. Re-clean with alcohol and apply pre-tape spray before reapplying. For problem areas like the lower back’s sweat zones, use CureTape Sports’ extra-sticky formula. Always round corners; square edges catch on waistbands.
Skin Irritation Solutions
Test a small patch 24 hours before full application if you have sensitive skin. Remove immediately if burning occurs. For ongoing use, switch to hypoallergenic KT Tape Max variants. Never apply over cuts or rashes—this risks infection.
Wear Time and Activity Guidelines
Optimal Wear Duration
Standard applications last 3-4 days with normal activity. With pre-tape spray and perfect application, expect 5-7 days of support. Replace immediately if tape loses elasticity or significant portions lift—worn-out tape provides zero benefit. Never sleep in tape for more than 48 hours; skin needs recovery time.
Exercise Compatibility
KT tape enhances performance during all activities. During swimming or intense workouts, the tape actually works better as muscle contractions boost its lifting effect. For post-exercise soreness, wear tape continuously for 48 hours—this maximizes recovery by maintaining blood flow to fatigued tissues. The moment you notice tape wrinkling excessively during movement, it’s time for replacement.
Mastering how to apply KT tape for lower back pain puts drug-free relief at your fingertips. Start with the basic dual strip method to build confidence in tension control, then progress to the H-pattern for targeted nerve decompression. Remember: consistent daily application yields better results than occasional “perfect” taping. Within a week of proper use, you’ll move through daily tasks with noticeably less guarding and hesitation. For persistent pain beyond 2 weeks, consult a physical therapist—but for immediate, movement-friendly support, KT tape remains your most versatile ally.