
That sharp twinge when standing up, the constant ache during grocery runs, the fear of tripping on uneven sidewalks—back pain transforms ordinary life into a daily obstacle course. If sciatica, herniated discs, or chronic lower back pain has stolen your confidence in movement, a properly used walking stick becomes your most powerful ally. This isn’t about surrendering independence; it’s about reclaiming it. Within minutes of applying these techniques, you’ll feel reduced pressure on your spine and renewed control over your mobility. Stop white-knuckling countertops for support—discover exactly how to use a walking stick for back pain to walk farther, stand taller, and live fully again.
Choose the Right Walking Stick for Your Back Pain Relief
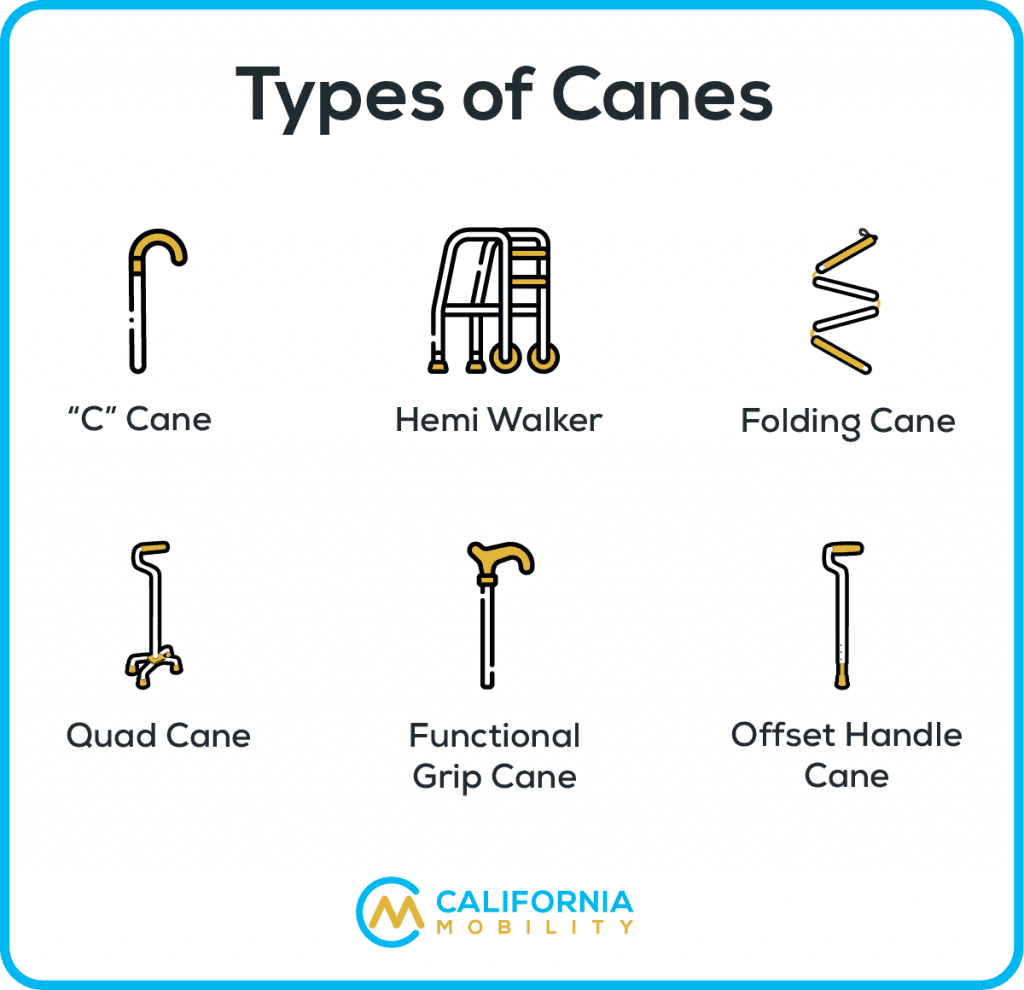
Standard vs. Quad Cane: Which Solves Your Specific Pain?
Grab a standard single-point cane if you need moderate support while preserving natural posture—ideal for most chronic back pain sufferers. Its lightweight design redistributes weight without altering your gait. Reach for a quad cane only if you regularly grab furniture for balance; those four contact points stabilize severe instability but add bulk that strains your shoulders during prolonged use. Remember: if you’re supporting more than 20% of your body weight through the aid, consult your doctor about walkers instead.
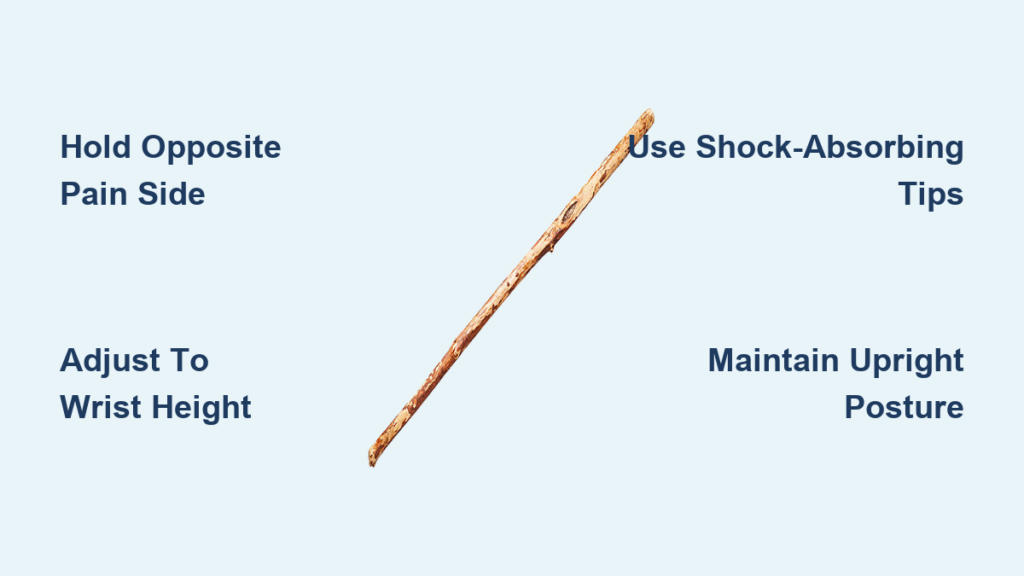
Height Matching That Prevents New Injuries
Stand barefoot on a hard floor wearing your typical walking shoes. Let your arms hang loosely. The top of your walking stick for back pain must hit your wrist crease exactly—no higher, no lower. Grip the handle: your elbow should bend 15-20 degrees. Too straight? Your stick’s too short, forcing you to hunch. Too bent? You’ll strain shoulders trying to reach the ground. This precise fit ensures weight shifts from your spine to your arms where it belongs.
Handle Design That Eliminates Hand Cramps
Skip basic T-handles if wrist pain compounds your back issues. Opt for ergonomic contoured grips that cradle your palm, distributing pressure evenly across your hand. Test handles by wrapping your fingers naturally—no gaps or overlapping knuckles. Choose non-slip rubberized materials that won’t betray you when sweat builds during longer walks. Your grip should feel effortless, not exhausting.
Lightweight Durability for All-Day Confidence
Prioritize aluminum or carbon fiber sticks weighing 8-12 ounces. They’re sturdy enough to handle curbs and gravel yet light enough to prevent arm fatigue. Avoid flimsy plastic models that wobble under pressure—your walking stick must feel like a reliable extension of your body, not a liability.
Set Up Your Walking Stick Correctly Before First Use
Height Adjustment Process in 30 Seconds
Wear your walking shoes. Place the stick vertically beside your foot. Adjust the shaft until the handle aligns with your wrist crease. Grip it: your elbow bends 15-20 degrees. Test it by taking three steps—your shoulder shouldn’t hike up or slump down. Recheck height monthly; swelling or changing footwear alters your ideal fit.
Handle Positioning That Prevents Wrist Strain
Hold the handle like you’re shaking hands—thumb on top, fingers wrapped comfortably. Your wrist must stay neutral, not bent upward. If your pinky lifts off the grip, the handle’s too small. If fingers overlap, it’s too large. A properly fitted handle lets you release tension while maintaining control.
Tip Selection That Stops Slips and Jolts
Install shock-absorbing rubber tips immediately—they cushion every step, reducing vibration up your arm and into your spine. Press the tip firmly against the floor: it shouldn’t slide or tilt. Replace tips every 3-6 months or at first sign of smooth patches. Worn tips turn your walking stick into a hazard.
Master Proper Walking Stick Technique for Immediate Pain Relief
Hold the Stick in the Hand Opposite Your Painful Side
Right leg or lower back pain? Use your left hand. This contralateral technique shifts weight away from inflamed nerves or discs. As you step forward with your painful right leg, plant the stick simultaneously with your left hand. This single adjustment instantly reduces spinal compression—most users feel relief within 10 steps.
Step Pattern That Mimics Natural Walking
Move your stick forward only as far as your opposite foot steps—not farther like a hiking pole. Right foot steps? Left hand moves stick forward together. Keep strides normal length. Critical mistake: Don’t lean heavily on the stick like a crutch. Let it share 5-10% of your weight while maintaining upright posture. Over-reliance strains shoulders and defeats the purpose.
Posture Maintenance That Stops Compounding Pain
Stand tall with shoulders relaxed back—not hunched over the stick. Scan 10-15 feet ahead, not at your feet. Your head should balance over your spine like a balanced weight. If you catch yourself staring down, you’re shortening your stride and increasing disc pressure. The stick supports you; you don’t support it.
Never Skip Indoor Practice
Use your walking stick consistently everywhere—even moving between rooms at home. Skipping indoor use weakens the muscle memory needed for outdoor stability. Practice turning corners without twisting your torso; take small semicircle steps while keeping shoulders square. This prevents rotational movements that aggravate herniated discs.
Safety Signs You Need a Walking Stick Now
Furniture Walking Is Your Body’s Distress Signal
Grabbing counters or walls while moving indoors means your back muscles are failing to stabilize you. This “furniture walking” creates dangerous muscle imbalances. A walking stick provides targeted support without forcing unnatural movements. Stop compensating—start using proper aid today.
Outdoor Instability Reveals Hidden Weakness
Feeling confident indoors but shaky on sidewalks? Uneven terrain exposes instability masked by handrails and flat floors. Your walking stick bridges this gap, letting you navigate cracks and curbs safely. Don’t avoid outings—equip yourself correctly.
Advanced Techniques for Painful Terrain
Uphill/Downhill Navigation Without Strain
Climbing: Shorten your stride. Plant the stick firmly before stepping up with both feet. Let it bear weight as you lift. Descending: Place the stick first, then step down slowly with your painful leg while controlling descent through the stick. Never rush downhill—speed multiplies spinal impact.
Stair Technique That Protects Your Discs
Going up: Lead with your stronger leg (“good foot up”). Bring your painful leg and stick together to the same step. Going down: Place stick and painful leg first (“bad foot down”), then follow with stronger leg. Always use railings too—your stick isn’t for stair rail replacement.
Maintenance Schedule for Lasting Relief

Monthly Inspection Checklist
- Tips: Press thumb into rubber—if it indents deeply or shows shiny spots, replace immediately
- Locks: Wiggle adjustable sections—zero play should exist
- Handle: Check for cracks where it meets the shaft
- Shaft: Run hands along length feeling for bends or dents
When to Replace Your Entire Stick
Swap out your walking stick if height adjustments no longer meet your needs, structural damage appears, or pain increases despite correct usage. Never “tough it out” with faulty equipment—your spine pays the price.
Style Choices That Boost Daily Use
Design Options That Make You Want to Use It
Choose walking sticks in rich wood grains, bold metallics, or vibrant patterns that match your personality—not clinical white. A stylish cane in your favorite color becomes an accessory you’ll grab instinctively, not hide in the closet. Add reflective strips for evening walks; personalize it until it feels like yours.
Customization That Builds Confidence
Attach a small wrist strap so you can momentarily release grip without dropping it. Select handles wrapped in soft-touch silicone for sweaty palms. When your walking stick reflects who you are, you’ll use it consistently—and consistency is everything for back pain relief.
Mastering how to use a walking stick for back pain transforms daily suffering into sustainable mobility. Start today by verifying your stick’s height—stand in shoes, check that 15-20 degree elbow bend. Use the contralateral technique (stick opposite pain) for immediate weight redistribution. Replace worn rubber tips monthly—they’re your first defense against slips that trigger re-injury. Remember: this isn’t a sign of weakness, but a strategic tool for spinal relief. Within one week of consistent indoor/outdoor use, you’ll walk farther with less ache. Your back deserves this support—stop enduring pain and start moving freely again. The path to pain-free steps begins with your next grip on the handle.