
That familiar ache in your lower back isn’t just bad luck—it’s your body screaming for help after hours in the wrong position. Millions suffer daily from preventable sitting-related back pain, often unaware that their chair is the real culprit. The truth is, how to sit to relieve lower back pain isn’t complicated, but it requires precise adjustments most people miss.
Poor sitting posture compresses spinal discs, weakens core muscles, and strains ligaments. Within just 20 minutes of improper sitting, pressure on your lumbar spine increases by 40% compared to standing. The solution? Strategic positioning that transforms your chair from enemy to ally. This guide delivers exactly how to sit to relieve lower back pain with actionable techniques you can implement immediately.
Align Your Spine Correctly While Sitting
Your spine’s natural S-curve is your body’s built-in shock absorber, but sitting destroys this alignment without intervention. To maintain proper spinal positioning:
Position your hips slightly higher than your knees by adjusting your chair height. This creates a subtle forward pelvic tilt that preserves your lower back’s inward curve. Your feet must rest completely flat on the floor—no dangling legs. If your feet don’t reach, add a footrest immediately.
Critical alignment checks every 30 minutes:
– Your ears stack directly over shoulders (not jutting forward)
– Shoulders remain relaxed and slightly back (not hunched)
– Lower back maintains its natural inward curve
– Head stays level (not tilted up or down)
Fix Forward Head Posture Instantly
Forward head posture increases spinal load by 10 pounds for every inch your head drifts forward. Combat this by placing a sticky note on your monitor with “CHIN BACK” in bold letters. Every time you see it, gently tuck your chin toward your neck as if making a double chin. Hold for 5 seconds, release, and repeat 3 times. This simple micro-correction prevents neck strain that radiates to your lower back.
Configure Your Chair for Maximum Back Support
Most office chairs come pre-set for pain, not relief. Proper chair configuration is non-negotiable for how to sit to relieve lower back pain effectively.
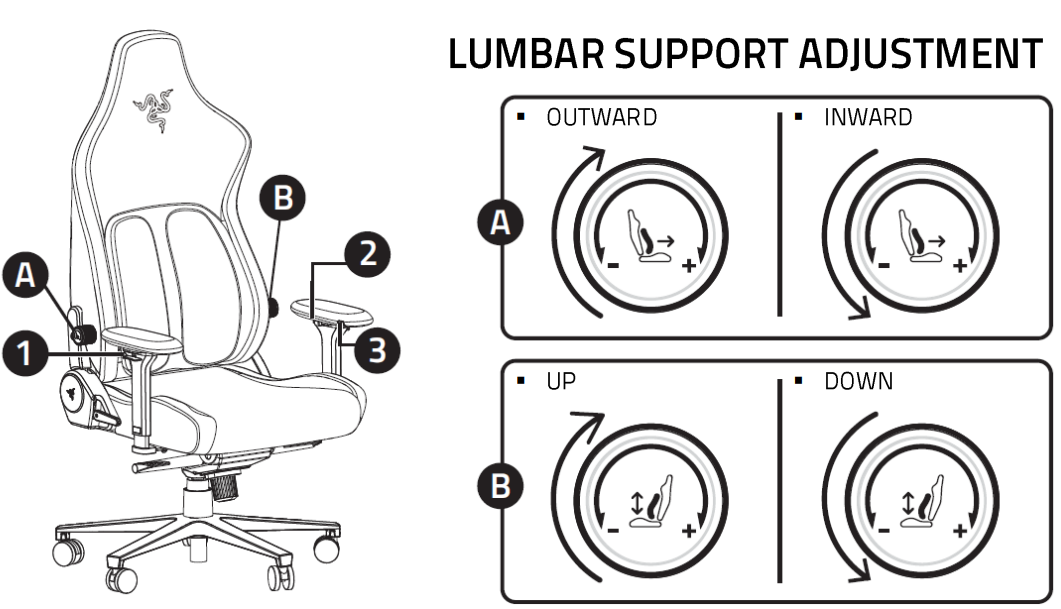
Position Lumbar Support at Belt Level
Your chair’s lumbar support must hit the small of your back precisely at belt height—the natural inward curve of your spine. If your chair lacks proper support (most do), roll a standard bath towel into a firm cylinder and secure it with rubber bands. Position it so it fills the space between your lower back and the chair without forcing your spine into an unnatural curve.
Warning: Lumbar support that’s too high causes neck pain, while support that’s too low does nothing for your lower back. Adjust until you feel comfortable pressure in the hollow of your lower back.
Adjust Seat Depth to Prevent Knee Pressure
Your seat pan should allow 2-3 fingers of space between the back of your knees and the chair edge. Too deep and you’ll slouch to avoid pressure behind your knees; too shallow and you’ll lose proper back support. If your chair lacks depth adjustment, sit fully back in the chair, then scoot forward until you achieve the proper knee clearance while maintaining full back contact.
Optimize Your Entire Workspace for Back Health

Your chair is just one piece of the puzzle—your entire workstation must work together to support proper posture.
Position Your Monitor at Eye Level
Looking down at screens—even slightly—triggers forward head posture that cascades into lower back strain. Raise your monitor so the top third sits at eye level. Use books or monitor stands if needed. Maintain 20-26 inches of distance to prevent leaning forward. This simple change reduces neck strain by 60%, directly decreasing lower back pressure.
Set Up Proper Arm Positioning
Your desk height must allow elbows to rest at 90 degrees with shoulders relaxed. If your shoulders hike toward your ears while typing, your desk is too high. If you reach forward, it’s too low. Your wrists should float neutrally—never bent up, down, or to the side. Add a thin keyboard tray if necessary to achieve perfect alignment.
Implement Movement Every 30 Minutes
Sitting still is the enemy of back pain relief. Your spine needs movement to nourish discs and prevent stiffness.
Take Effective Micro-Breaks
Set a timer for every 30 minutes. When it chimes:
– Stand completely from your chair
– Place hands on lower back and gently arch backward 3 times
– Walk 20 steps to restore circulation
– Squeeze shoulder blades together for 10 seconds
These 60-second breaks reduce disc pressure by 50% compared to continuous sitting. Pro tip: Use bathroom or water breaks as natural movement prompts—keep your water bottle just out of arm’s reach.
Try Dynamic Sitting Options
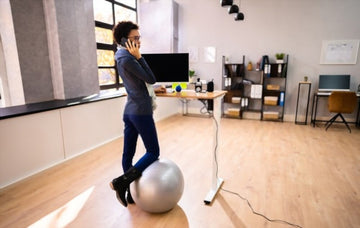
Sit-stand desks are game-changers but require proper implementation. Start with 15 minutes standing per hour, gradually increasing as your body adapts. Standing too long creates different back problems. Balance balls work for 15-20 minute intervals to engage core muscles but shouldn’t replace proper chairs. Active sitting discs allow subtle movement while seated—ideal for maintaining engagement during focused work.
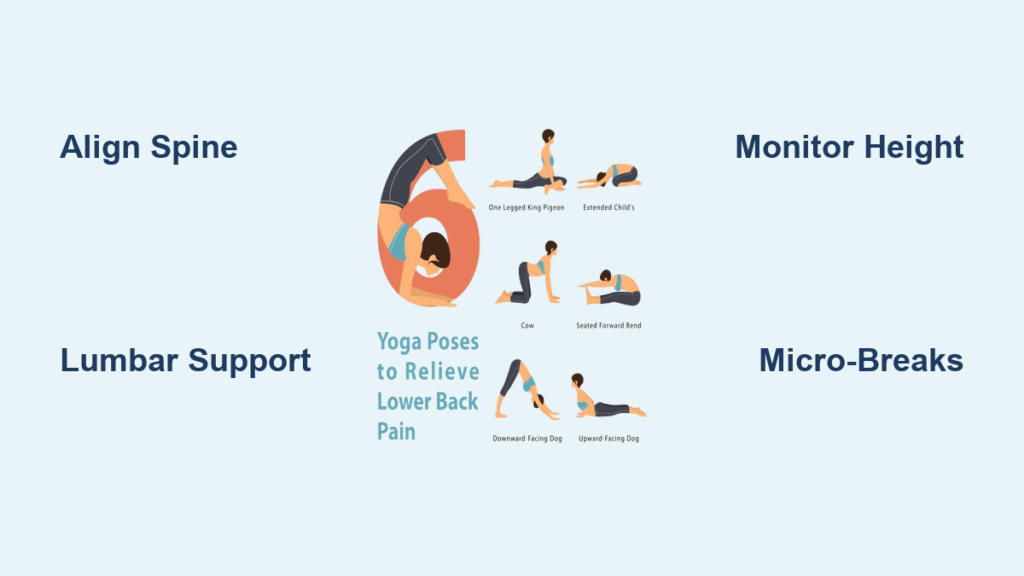
Execute Targeted Stretches While Seated
You don’t need to leave your desk for immediate back pain relief. These office-friendly stretches deliver results in minutes.
Perform the Seated Spinal Twist
Sit tall at the front edge of your chair. Place your right hand on your left knee and your left hand on the chair back. Inhale to lengthen your spine, then exhale as you gently twist left, looking over your shoulder. Hold 20 seconds while breathing deeply. Repeat on the other side. Do this every 2-3 hours to release spinal tension and improve disc hydration.
Complete the Chair Forward Fold
Scoot to the edge of your seat with feet flat. Slowly bend forward from your hips (not waist), letting your arms hang toward the floor. Rest your hands on shins or the floor if possible. Hold 25 seconds, focusing on releasing tension in your lower back. This stretch reverses the spinal compression caused by sitting.
Build Long-Term Sitting Resilience
True back pain relief comes from consistent habits, not quick fixes.
Follow a Progressive Sitting Schedule
Don’t expect perfection overnight. For the first two weeks, focus on maintaining proper posture for just 20-30 minute intervals before taking a movement break. Weeks 3-4, extend to 45-60 minutes. By week 5, you’ll comfortably sit with perfect alignment while incorporating regular micro-movements. This gradual approach builds sustainable habits without overwhelming your body.
Invest in Key Equipment First
Prioritize purchases strategically: Start with a quality lumbar support cushion ($20-40), then add an adjustable footrest if needed. Month two, upgrade to a fully adjustable ergonomic chair. Months 3-4, consider a sit-stand converter. This phased approach delivers maximum pain relief without breaking the bank.
Recognize Danger Signs Requiring Immediate Action
Stop and adjust immediately if you experience:
– Numbness or tingling in legs or feet (sign of nerve compression)
– Progressive pain increase throughout the day
– New neck or shoulder pain
– Headaches at the base of your skull
– Fatigue despite adequate sleep
These indicate your current setup is causing harm, not relief. Reset your posture completely or consult a physical therapist if symptoms persist beyond 48 hours.
Mastering how to sit to relieve lower back pain transforms your workday from painful to productive. Start today with just two changes: proper lumbar support and 30-minute movement breaks. Within one week, add monitor height adjustment and the seated spinal twist. By implementing these techniques consistently, you’ll retrain your body to sit pain-free. Your back doesn’t have to suffer for productivity—proper sitting posture boosts both comfort and performance. Take that first step now and feel the difference before your next coffee break.