
Lower back pain affects 80% of adults at some point, turning simple movements like bending or sitting into daily struggles. When your lumbar region tightens up, foam rolling provides immediate relief by releasing tension in surrounding muscles that pull your spine out of alignment. This guide shows you exactly how to use a foam roller for lower back pain safely—without risking further injury or worsening your condition.
Unlike expensive treatments or medications, foam rolling puts pain relief directly in your hands. You’ll discover which areas to target (and which spots to avoid), how much pressure to apply for maximum benefit, and the specific sequence that delivers results in minutes. Most importantly, you’ll learn the common mistakes that actually intensify lower back pain during self-treatment.
Select Your Ideal Foam Roller for Lower Back Relief

Medium-density EVA foam rollers provide the perfect balance for lower back pain sufferers—firm enough to release tension but forgiving enough to prevent bruising. Choose a 6-inch diameter by 36-inch length model that supports your entire back without awkward positioning. High-density rollers deliver deeper pressure but can overwhelm sensitive tissues if you’re new to foam rolling.
Avoid ultra-soft options that collapse completely under your weight—they fail to create the necessary tissue mobilization. Test potential rollers by pressing your thumb into the surface; quality foam should compress about 25-30% then spring back to shape. Textured rollers with ridges target stubborn trigger points but save these for after 2-3 weeks of consistent smooth rolling.
Prepare Your Space for Effective Lower Back Rolling
Position your foam roller on a non-slip yoga mat in a clear 6×8 foot area to prevent dangerous sliding during movements. Hard floors create excessive spinal compression while carpet absorbs too much pressure—opt for hardwood or tile with mat protection. Maintain room temperature between 68-72°F to keep muscles warm between positions.
Keep a tennis ball within reach for indirect lower back relief. When lumbar pain flares, direct rolling often proves too intense—this smaller tool allows precise glute and hip releases that alleviate referred pain to your lower back. A small pillow nearby provides crucial neck support during upper back work.
Identify Critical Safety Red Flags Before Rolling
Stop immediately if you have acute disc herniation, spinal stenosis with leg symptoms, or osteoporosis (T-score below -2.5). Recent lumbar surgery (within 6-8 weeks) or unexplained weight loss with back pain requires medical clearance first. Pregnant women beyond the first trimester should consult their doctor before attempting any self-treatment.
Seek emergency care for fever, bowel/bladder changes, or progressive leg weakness—these indicate serious conditions that foam rolling won’t help. When in doubt about your specific condition, get evaluated first; self-treating spinal infections or tumors could have devastating consequences.
Warm Up Properly Before Foam Rolling
Never roll cold lower back tissues. Start with 3-5 minutes of light cardio like marching in place or gentle walking to increase blood flow. Follow with cat-camel stretches (10 repetitions) and pelvic tilts (15 repetitions) to prepare spinal segments for mobilization.
Test your readiness by touching your toes. If you feel significant restriction or pain, spend extra time warming up—cold, tight tissues respond poorly to pressure and increase injury risk. Proper warm-up boosts effectiveness by 30% while reducing post-rolling soreness.
Master Upper Back Rolling for Lower Back Relief
Position the roller horizontally across your mid-back with knees bent and feet flat. Cross arms over your chest and lift your hips into a bridge position. Slowly roll from mid-back to base of neck over 30-45 seconds, avoiding direct spine pressure by shifting weight slightly left or right.
When you hit tight spots, extend backward over the roller for 15-20 seconds. Perform only 2-3 passes total—this upper back release often reduces compensatory lower back tension by improving overall spinal mobility. Focus on smooth, controlled movements rather than aggressive grinding.
Apply Safe Lower Back Release Methods
Direct lumbar rolling can worsen pain—use these safer approaches instead:
Sacral rocking: Position the roller under your sacrum (triangular bone at spine base) with knees bent. Gently rock side-to-side for 30-60 seconds to decompress the lumbar spine without direct pressure.
Figure-4 stretch: From the sacral position, cross right ankle over left knee. Gently tilt knees left and right, holding 20-30 seconds per side to release piriformis tension that refers pain to your lower back.
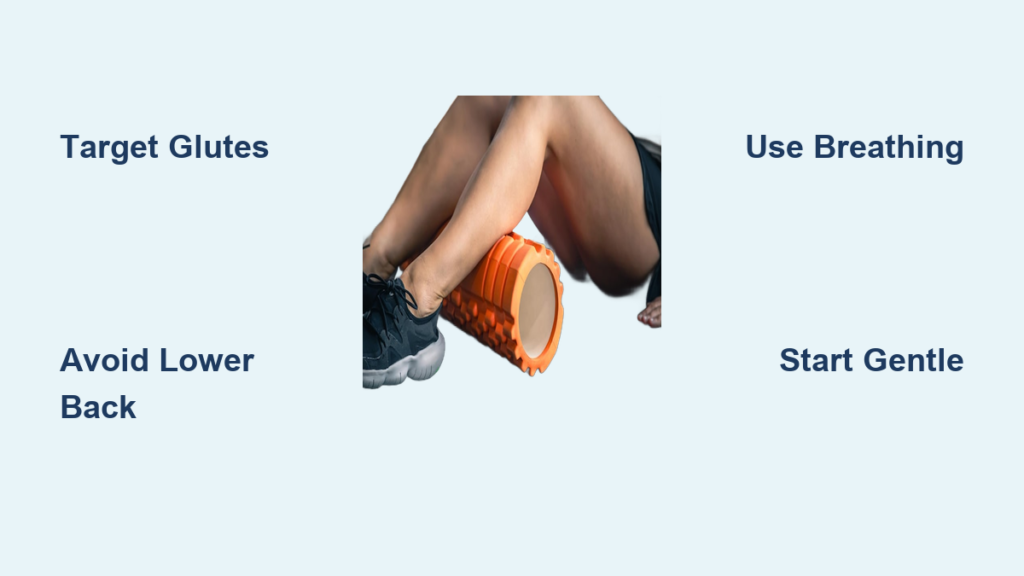
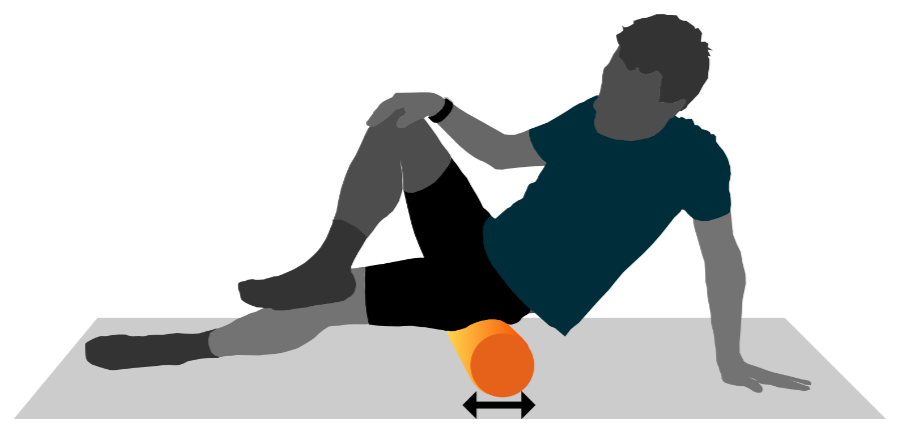
Perform Glute and Hip Release Sequence
Sit on the roller with knees bent, feet flat. Cross right ankle over left knee creating a figure-4. Lean toward your right hip, rolling over glute muscles for 60-90 seconds. Pause on tender spots for 30-45 seconds until tension releases—this indirect approach often provides more relief than direct lumbar work.
Switch sides and repeat. Tight glutes frequently cause lower back pain by pulling the pelvis out of alignment. Focus on deep, rhythmic breathing during this sequence to enhance tissue release.
Execute Proper Hip Flexor Release Technique
Lie face-down with roller positioned horizontally under your upper thigh/hip flexor region. Using forearms for support, slowly roll from hip bone to mid-thigh. Flex and extend your knee 5-8 times when you find tight spots to encourage muscle relaxation.
Warning: Avoid direct contact with your hip bone (ASIS)—stay on soft tissue only. Tight hip flexors tilt your pelvis forward, increasing lumbar strain throughout daily activities. Perform this sequence for 60-90 seconds per side.
Integrate Correct Breathing Patterns
Coordinate breathing with rolling movements: inhale while rolling away from tight areas, exhale while rolling into them. Use diaphragmatic breathing—breathe deep into your belly, not shallow chest breathing—to activate your parasympathetic nervous system.
Try this: During static holds on trigger points, exhale fully while imagining the tight tissue melting into the roller. This technique reduces protective muscle guarding by 25-30% compared to rolling without conscious breathing.
Establish Your Daily Rolling Routine
For chronic pain: Perform 10-15 minutes daily focusing on glutes, hamstrings, and hip flexors before finishing with thoracic extension work. Consistency trumps intensity—gentle daily rolling outperforms aggressive weekly sessions.
During acute flare-ups: Limit to 5-10 minutes, 2-3 times daily, focusing only on indirect areas. Avoid direct lumbar pressure until inflammation subsides. Ice for 10-15 minutes post-rolling during acute phases.
Progress Pressure Safely Over Time
Start with 30-second intervals per muscle group, progressing to 90-120 seconds over 4-6 weeks. Increase density gradually—switch from soft to medium to firm foam as your tolerance improves.
Pressure test: You should feel “good pain”—intense but manageable. Sharp, shooting pain means stop immediately. Numbness or tingling indicates nerve involvement—reduce pressure and reposition.
Activate Muscles After Rolling
Immediately after rolling, perform these exercises within 5 minutes while tissues remain pliable:
- Bird-dogs: 2-3 sets of 10-15 reps per side for core stability
- Glute bridges: Hold for 5 seconds, 2-3 sets of 15 reps
- Dead bugs: 2-3 sets of 10 reps for anterior core control
This sequence locks in new mobility by training muscles in their improved range of motion.
Track Your Improvement Systematically
![]()
Record weekly measurements:
– Standing toe touch distance (in inches)
– Straight leg raise angle while lying down
– Pain level (0-10 scale) before and after sessions
Expect 5-10% mobility gains over 4-6 weeks. Document daily pain levels to identify triggers. A 1-2 point immediate pain reduction post-rolling is normal, with cumulative effects building over 8-12 weeks.
Troubleshoot Common Rolling Problems
Overactive pain response: Switch to gentler techniques like tennis ball release. Persistent pain lasting 24+ hours indicates excessive pressure—reduce intensity and duration.
Insufficient pressure: Stack legs (one on top of the other) or use a tennis ball for smaller contact surfaces. Wall rolling offers better pressure control through body positioning.
Symptom rebound: Perform gentle mobility movements every 30-60 minutes post-session. Apply heat for 10-15 minutes if muscle guarding persists beyond 6 hours.
Maintain Your Foam Roller Properly
Clean your roller weekly with mild soap and warm water. Replace immediately when permanent indentations exceed 0.5 inches or surface shows significant wear. High-quality EVA foam lasts 6-12 months with daily use; cheaper options need replacement every 3-4 months.
Store vertically away from sunlight—UV exposure degrades foam integrity, making your roller less effective over time. Proper maintenance ensures consistent pressure delivery for optimal results.
Know When to Seek Professional Help
Consult immediately if you experience bowel/bladder changes, progressive leg weakness, or pain worsening at night. Schedule an appointment if no improvement occurs after 4-6 weeks of consistent, proper foam rolling.
Combine approaches—research shows foam rolling plus physical therapy accelerates recovery by 15-25%. Your lower back pain relief journey works best as part of a comprehensive treatment strategy.
Effective foam rolling for lower back pain isn’t about aggressive pressure or enduring intense discomfort. It’s about strategic, consistent release of the muscle groups pulling your spine out of alignment. Start gentle, stay consistent, and let your body guide the intensity—your lower back will reward you with improved mobility and reduced pain within weeks.