
Eight in 10 Americans will experience lower back pain this year, with over 25% suffering right now. Whether you’re hunched over a desk all day, lifting heavy groceries, or simply bending to tie your shoes, that sharp twinge or constant ache can derail your life. The right physio stretches for lower back pain provide targeted relief—but only when matched precisely to your specific condition. This guide delivers the exact evidence-based stretches physical therapists prescribe, eliminating dangerous guesswork while addressing disc issues, spinal stenosis, and everyday muscle strain.
You’ll discover which stretches actually work for your unique pain pattern, how to perform them with perfect form, and critical red flags requiring immediate medical attention. Each exercise includes precise timing, positioning cues, and progression strategies so you can move from acute discomfort to lasting spinal resilience within days. No vague advice—just actionable techniques backed by clinical protocols used in physiotherapy clinics worldwide.
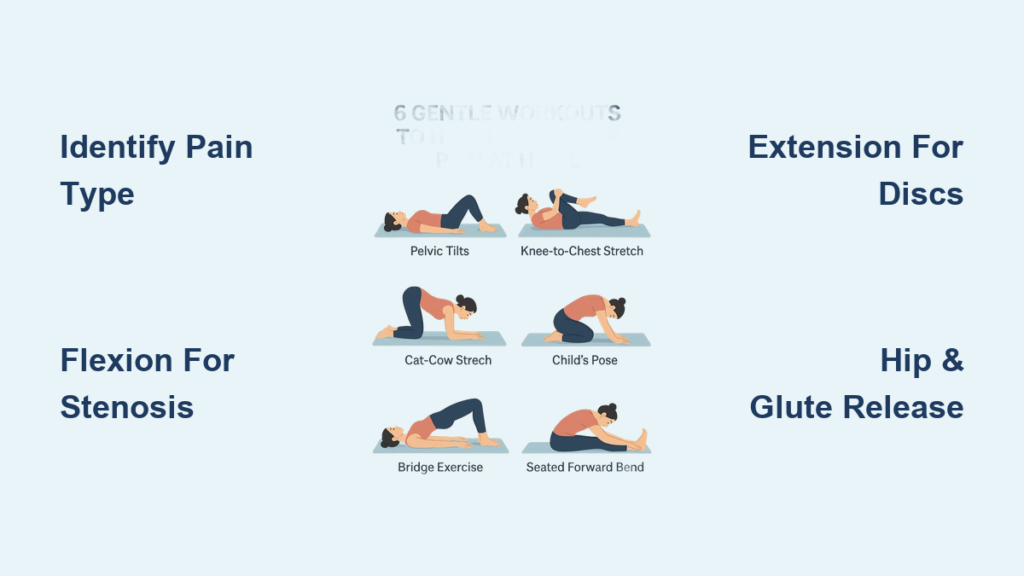
Identify Your Pain Type Before Stretching

Emergency Symptoms Requiring Immediate Care
Stop all stretching immediately if you experience saddle-area numbness, bowel or bladder dysfunction, or weakness spreading down your leg. These neurological red flags indicate potential nerve compression that requires emergency evaluation—call 911 if you lose control of bodily functions. Persistent leg pain worsening over 72 hours despite conservative care also demands professional assessment before continuing any physio stretches for lower back pain.
Disc Herniation vs. Spinal Stenosis Stretching Protocol
Disc pain sufferers must avoid deep forward bends like toe touches that increase disc pressure. Instead, gentle backward arches (extension) often provide relief by creating space around compressed nerves. Spinal stenosis patients experience the opposite: extension narrows the spinal canal, so flexion stretches like knees-to-chest become essential to open compressed nerve pathways. Misdiagnosing your condition can worsen pain—when in doubt, consult a physiotherapist before starting any new routine.
The 0-3 Pain Scale Safety Rule
Never stretch into sharp or escalating pain. A mild tension sensation (0-3/10 on pain scale) is acceptable during physio stretches for lower back pain, but exceeding this threshold signals potential harm. For example, if knee-to-chest stretches cause radiating leg pain, reduce the range immediately. Remember: temporary discomfort is normal during therapeutic stretching, but worsening symptoms require modification or cessation of that specific exercise.
Immediate Relief Flexion Stretches (For Stenosis & Acute Pain)
Single Knee-to-Chest Technique for Targeted Release
Lie flat on your back with knees bent and feet flat on the floor. Grasp your right thigh just below the knee and gently pull it toward your chest until you feel a stretch in your lower back—not your hip. Hold for 20-30 seconds while consciously engaging your abdominal muscles (imagine pulling your belly button toward your spine). Return slowly and repeat with the left leg. Perform 2-5 repetitions per side up to five times daily during flare-ups.
Pro tip: Place a pillow under your head to maintain neutral neck alignment. If you feel hamstring tension instead of back release, bend your raised knee slightly—this isolates the lumbar stretch.
Child’s Pose for Acute Flare-Ups
Kneel with big toes touching and knees spread wider than hip-width. Sit your hips back toward your heels while walking your hands forward on the floor. Lower your chest toward the ground, resting your forehead on the mat. Hold for 30 seconds, breathing deeply into your lower ribs to enhance spinal decompression. Repeat three times hourly during severe pain episodes. This position naturally creates space between vertebrae—making it ideal when sitting or standing becomes unbearable.
Seated Forward Bend for Stenosis Relief
Sit upright in a chair with feet flat and spine tall. Hinge forward from your hips (not your waist), reaching hands toward the floor while keeping your neck relaxed. Only go as far as you feel gentle tension—never force the stretch. Hold for 5 seconds, then slowly return to upright. Perform 10 repetitions, completing 1-3 sets hourly. This controlled flexion opens narrowed spinal canals, providing significant relief for stenosis-related leg pain during walking.
Disc-Friendly Extension Stretches (Avoid With Stenosis)
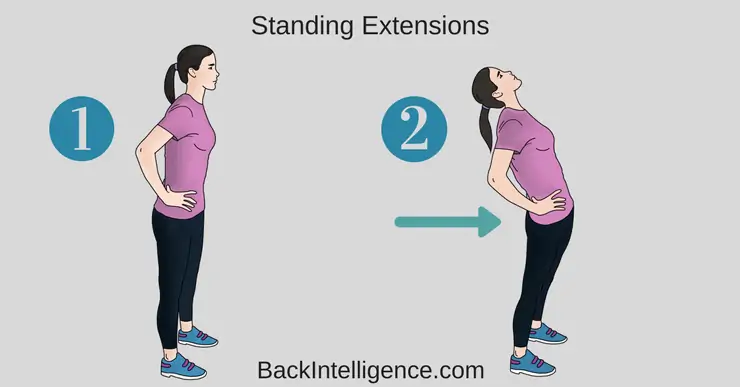
Standing Back Extension Reset
Stand with feet hip-width apart and place your hands firmly on your hip bones. Gently lean backward while keeping your chest lifted, creating a comfortable arch in your lower back. Use your hands to control the movement—never jerk backward. Hold for 5 seconds, then return to neutral. Perform up to 10 repetitions hourly, especially after prolonged sitting. This counteracts the forward-flexed posture causing disc aggravation.
Prone Press-Up Progression for Disc Pain
Lie face-down with forearms under your shoulders, elbows bent at 90 degrees. Press your upper body upward using your arms while keeping your pelvis firmly planted on the floor. Allow your lower back to arch gently—only go as far as pain-free. Start with 10-second holds for 10 repetitions. Once comfortable, progress to full press-ups on your hands for greater extension. Stop immediately if pain radiates down your leg—this indicates incorrect directional preference.
Hip & Glute Releases Preventing Recurrence
Supine Hamstring Stretch with Neural Glide
Lie on your back with one knee bent. Raise your straight leg toward the ceiling, holding behind your thigh (or use a towel looped around your foot). Gently straighten your knee until you feel tension along the back of your thigh—not your back. Hold for 5-30 seconds, then perform the neural glide variation: slowly bend and straighten your knee 5-10 times before the final 30-second hold. This flosses the sciatic nerve while releasing hamstring tension pulling on your pelvis. Repeat 5-10 times per leg.
Figure-Four Glute Stretch for Piriformis Relief
Lie on your back with knees bent. Cross your right ankle over your left thigh just above the knee. Grasp behind your left thigh and gently pull it toward your chest. Keep your right foot flexed to protect the knee joint. Hold 20-30 seconds while breathing deeply into tight areas. Complete 5 repetitions per side. This targets the piriformis muscle—a common culprit in sciatica that mimics lower back pain when tight.
Hip Flexor Release for Desk Workers
Kneel in a lunge position with your right knee on a cushioned surface. Tuck your pelvis under slightly to avoid overarching your lower back. Shift your weight forward until you feel a stretch in the front of your right hip. Hold 10-30 seconds while maintaining upright posture—never lean into the stretch. Repeat 2-5 times per side. Perform this hourly during workdays to counteract the hip flexor shortening that strains your lumbar spine.
Daily Maintenance Strategies
Hourly Workplace Reset Routine
Set phone alarms every 60 minutes. When they chime:
1. Stand up and place hands on hips
2. Perform 5 gentle back extensions (leaning backward)
3. Follow with 5 seated pelvic tilts (flattening then arching lower back)
4. Finish with 10 shoulder blade squeezes
This 90-second sequence prevents the cumulative stress causing 80% of office-related back pain.
Core Bracing During Daily Tasks
Before lifting anything—even your coffee mug—activate your deep core muscles. Imagine crushing a soda can with your abdomen while continuing to breathe normally. Hold this gentle contraction for 10 seconds during:
– Rising from chairs
– Bending to pick up objects
– Standing in line
This “bracing” technique reduces spinal load by 30% during functional movements.
Critical Progression Timeline
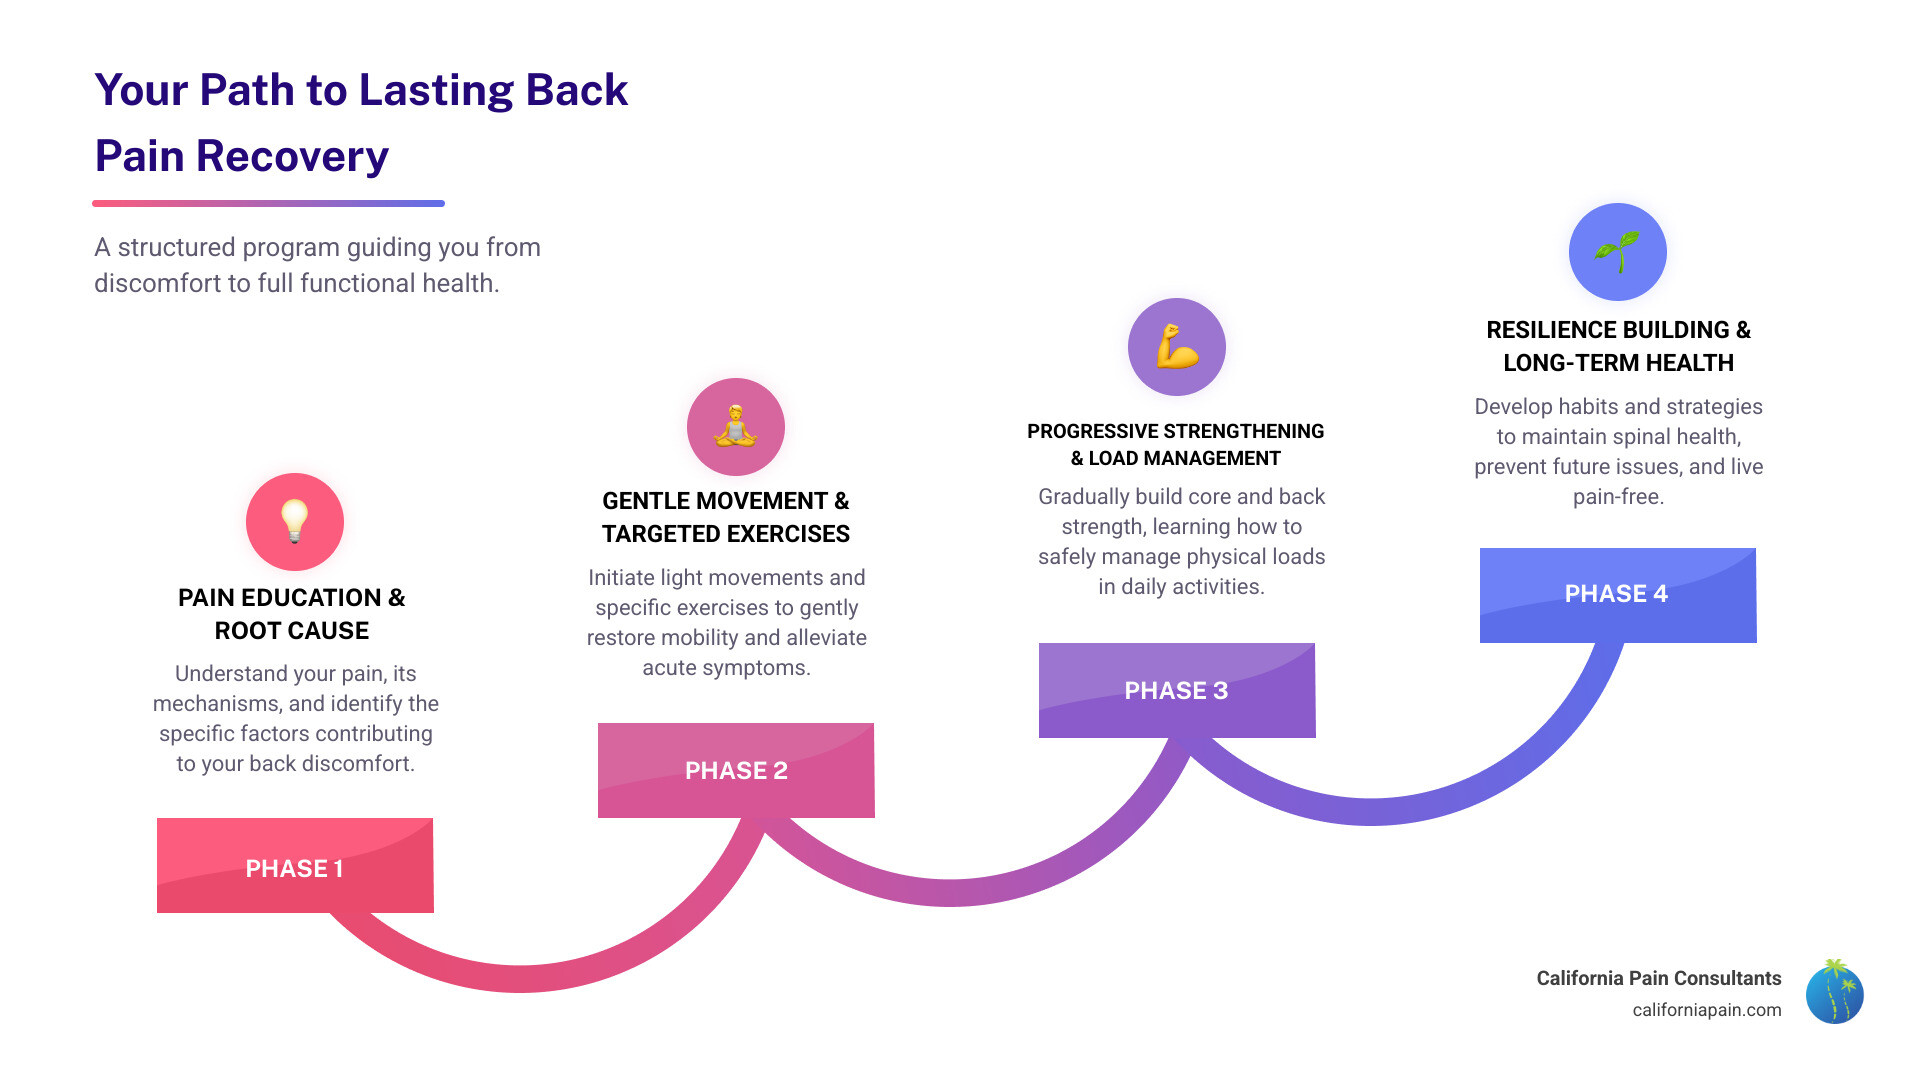
Weeks 1-2: Focus exclusively on pain-appropriate stretches (flexion for stenosis, extension for disc issues). Perform 2-3 exercises twice daily with 10-20 second holds. Master abdominal bracing during all movements—this foundational step prevents re-injury.
Weeks 3-4: Add dynamic movements like cat-cow (20 slow repetitions upon waking). Increase stretch duration to 30 seconds and introduce planks on knees (10-30 second holds). Monitor symptoms closely—any increase in leg pain means scaling back intensity.
Beyond Month 2: Integrate strengthening with stretching 2-3 times weekly. Continue daily mobility work as preventive “spinal hygiene.” Only progress to advanced variations when current exercises feel effortless—rushing causes setbacks.
When to Stop and Seek Professional Help
Discontinue all physio stretches for lower back pain if you experience:
– New or worsening leg numbness/weakness
– Pain persisting beyond 72 hours despite correct stretching
– Night pain disrupting sleep
– Loss of bowel/bladder control (emergency)
These indicate underlying issues requiring imaging and specialized treatment. Remember: 619 million people worldwide suffer back pain, but proper physiotherapy resolves 90% of cases without surgery when addressed early. A qualified physiotherapist can tailor these stretches to your specific spinal mechanics—especially crucial if you have stenosis versus disc pathology.
Final tip: Keep a simple pain log tracking which stretches provide relief within 24 hours. Note exact positioning, duration, and symptom changes. This data becomes invaluable for both self-management and professional consultations—turning guesswork into targeted recovery. Consistent 5-minute daily mobility sessions prevent 70% of recurrent episodes, making back care as essential as your morning coffee routine.