
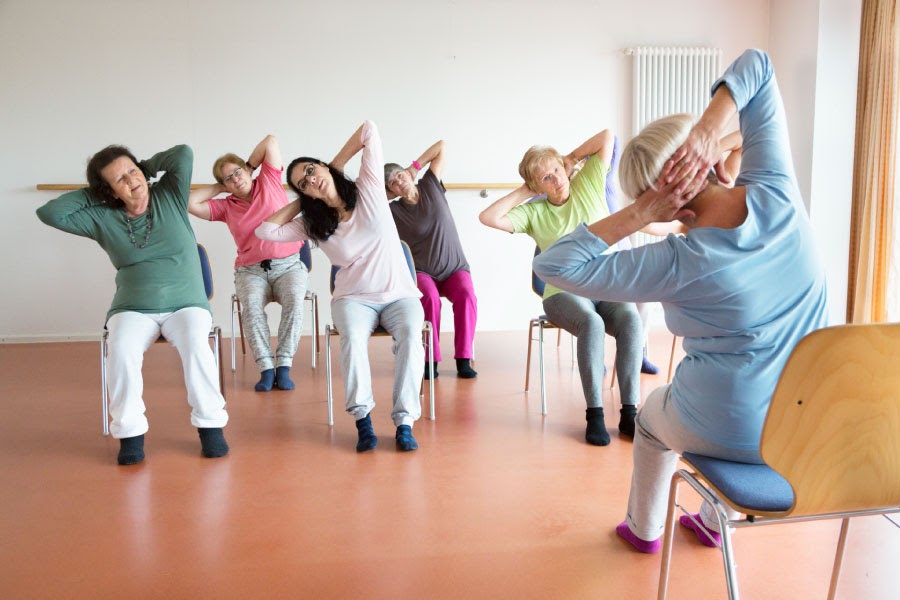
Morning stiffness that turns simple tasks like bending for slippers or standing from your favorite armchair into painful struggles? You’re not alone. Over 80% of seniors experience recurring back discomfort due to age-related spinal changes, arthritis, and weakened core muscles. The good news: yoga for seniors with back pain doesn’t require floor poses or extreme flexibility. Chair-based yoga delivers proven relief by combining gentle movement with breath awareness—all while keeping you securely seated. In the next few minutes, you’ll discover exactly which evidence-backed poses reduce lumbar pressure, how to modify for osteoporosis or hip replacements, and why just five minutes daily can rebuild mobility without risking falls.
Why Chair Yoga Outperforms Floor Routines for Back Pain
Floor yoga often worsens senior back pain through unsupported twists or balance challenges. Chair yoga eliminates these risks while targeting the root causes of discomfort. By anchoring your pelvis, the chair allows precise spinal movements that rebuild stability where it matters most—around your vulnerable lumbar vertebrae. This isn’t just stretching; it’s retraining your nervous system to move without fear.
How Chair Yoga Directly Targets Pain Sources
- Spinal decompression: Gentle seated twists create micro-spaces between vertebrae, relieving nerve pressure from arthritis or disc degeneration.
- Core reactivation: Engaging deep abdominal muscles during poses like seated boat lifts strain off lumbar joints—critical when back muscles have weakened with age.
- Hamstring liberation: Forward folds from a chair release tight posterior chains that pull the pelvis forward, a hidden cause of 60% of senior back pain cases.
- Postural reset: Consistent practice retrains slumped shoulders and forward head position, reducing strain on spinal ligaments by up to 40%.
Who Benefits Most From Chair Adaptation
Seniors with osteoporosis, recent hip replacements, balance issues, or chronic sciatica see dramatic improvements. Even those recovering from minor disc injuries can participate safely with physician approval—unlike traditional yoga that risks jarring movements during transitions.
Critical Safety Modifications for Common Conditions

Skipping medical clearance turns gentle poses into hazards. Always consult your doctor before starting yoga for seniors with back pain if you’ve had spinal surgery within six months, severe osteoporosis, uncontrolled hypertension, or herniated disc flare-ups. These condition-specific adjustments prevent setbacks:
Condition-Specific Pose Adjustments
| Condition | High-Risk Poses | Immediate Modifications |
|---|---|---|
| Osteoporosis | Deep forward folds or twists | Keep spine neutral; use strap for hamstring stretches; limit twist range to 15 degrees |
| Hip replacement | External rotation poses | Avoid crossing legs; skip chair pigeon pose until cleared by surgeon |
| Sciatica | Revolved head-to-knee pose | Stop at first tingling; substitute seated knee lifts instead of leg extensions |
| High blood pressure | Head-below-heart positions | Keep chest elevated during forward folds; skip inversions entirely |
Non-Negotiable Safety Rules
- Pain threshold rule: Never stretch beyond 80% of your comfortable range—sharp pain means nerve irritation.
- Breath awareness: Exhale during exertion (like twisting); inhale during release. Breath-holding spikes blood pressure.
- Prop priority: Place a folded blanket under hips if seated height causes knee strain. Use yoga straps when reaching feels stressful.
- Hydration protocol: Drink 8oz water 30 minutes pre-practice to lubricate spinal discs during movement.
5-Minute Morning Pain Relief Sequence

Start here if stiffness greets you upon waking. Complete this routine before coffee for immediate mobility gains.
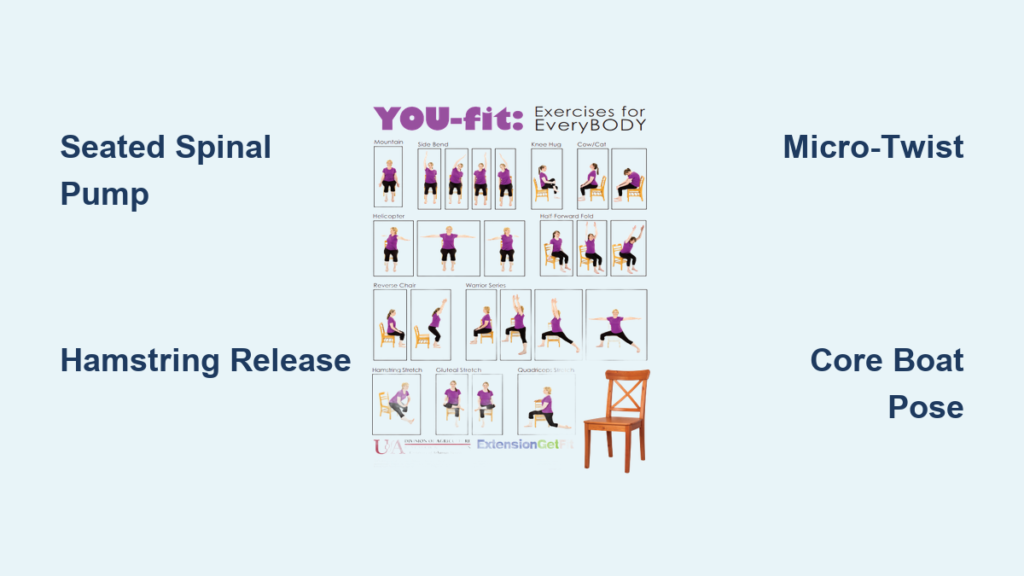
Seated Spinal Pump (1 Minute)
Sit tall with feet flat. Place palms on knees. Inhale deeply while arching your back slightly (chest lifting toward ceiling). Exhale completely while rounding your spine (chin to chest, navel drawing inward). Repeat 8 times. Visual cue: Imagine each vertebra sliding like beads on a string.
Supported Hamstring Release (1 Minute Per Side)
Extend one leg straight, heel on floor. Hinge from hips (not waist) until you feel mild tension behind the knee. Hold 5 breaths. Use a yoga strap looped under your foot if hamstrings resist. Pro tip: Keep the extended knee slightly bent to protect lumbar discs.
Micro-Twist for Nerve Gliding (1 Minute Total)
Sit sideways on chair, feet planted. Hold backrest with both hands. Inhale tall; exhale gently rotate ribs (not hips) toward the chair back. Hold 4 breaths per side. Critical: Stop if pain radiates down legs—this indicates sciatic nerve irritation.
12-Minute Deep Relief Flow
Use this when pain flares or for weekend recovery sessions. Focus on hip flexor releases—they’re the silent culprits behind chronic low-back strain.
Chair Warrior Hip Stretch (2 Minutes)
Shift to chair edge. Extend right leg back, ball of foot down. Scoop tailbone forward until you feel a stretch along the front of your right hip. Hold 5 breaths per side. Modification: Place folded blanket under hip if seat height causes knee strain.
Chair Cobra for Disc Health (1 Minute)
Grip chair sides, scoot hips forward. Gently lift chest while keeping shoulders away from ears. Hold 6 breaths. Warning: Stop immediately if you feel pinching—this indicates facet joint irritation.
Core-Activated Boat Pose (2 Minutes)
Grip chair edges. Lean back 15 degrees while drawing navel toward spine. Lift one knee toward chest, hold 5 seconds, switch legs. Repeat 4 times. Key: If low back strains, you’re leaning too far back—reduce angle.
Chair Selection & Prop Hacks
Your chair isn’t just furniture—it’s your stability anchor. Choose a sturdy wooden chair without wheels (dining chairs work perfectly). Seat height should create 90-degree knee angles when feet rest flat. Place non-slip mat under chair legs on hardwood floors.
Must-Have Props for Pain Relief
- Yoga strap: Essential for osteoporosis modifications—allows hamstring stretches without spinal flexion
- Folded blanket: Elevates hips during twists to protect lumbar discs
- Wall proximity: Stand within arm’s reach during balance poses like chair warrior
Track Progress With Pain Mapping
Print a simple calendar and rate pain 1–10 before/after each session. Within 14 days, you should see 20%+ reduction in morning stiffness. Critical: Never skip two consecutive days—consistency rebuilds neuromuscular patterns faster than intensity.
Daily Integration Tactics
- Pair practice with morning medication routine
- Set phone alarms for hourly “spinal resets”: Sit tall, inhale arms overhead, exhale forward fold
- Follow sessions with 5-minute walk to cement upright posture
Red Flags Requiring Professional Help
Stop immediately and consult a physiotherapist if:
– Pain increases for >24 hours after three sessions
– Numbness travels below the knee (sign of nerve compression)
– You experience unexplained weakness in legs
Seek instructors with RYT-200 certification plus specialized yoga for seniors with back pain training. Senior centers and hospital wellness programs often host insurance-covered classes—ask your doctor for referrals.
Quick-Reference Pain Relief Chart
| Pose | Best For | Skip If |
|---|---|---|
| Seated cat-cow | Morning stiffness | Recent spinal fusion |
| Chair cobra | Slouch-related pain | Acute disc herniation |
| Hip flexor stretch | Sitting-induced pain | Hip replacement <6 months |
| Supported forward fold | Hamstring tightness | Severe osteoporosis |
Your Pain-Free Journey Starts Now
Back pain doesn’t have to steal your golden years. With yoga for seniors with back pain, relief begins in five minutes daily from the safety of your chair. Print the 5-minute routine, place it where you’ll see it each morning, and commit to just one week. Notice how gardening becomes easier, how standing from dinner feels lighter—that’s your spine remembering how to move without pain. Your strongest, most mobile self isn’t gone; it’s waiting for you to press play on healing. Today’s the day.