
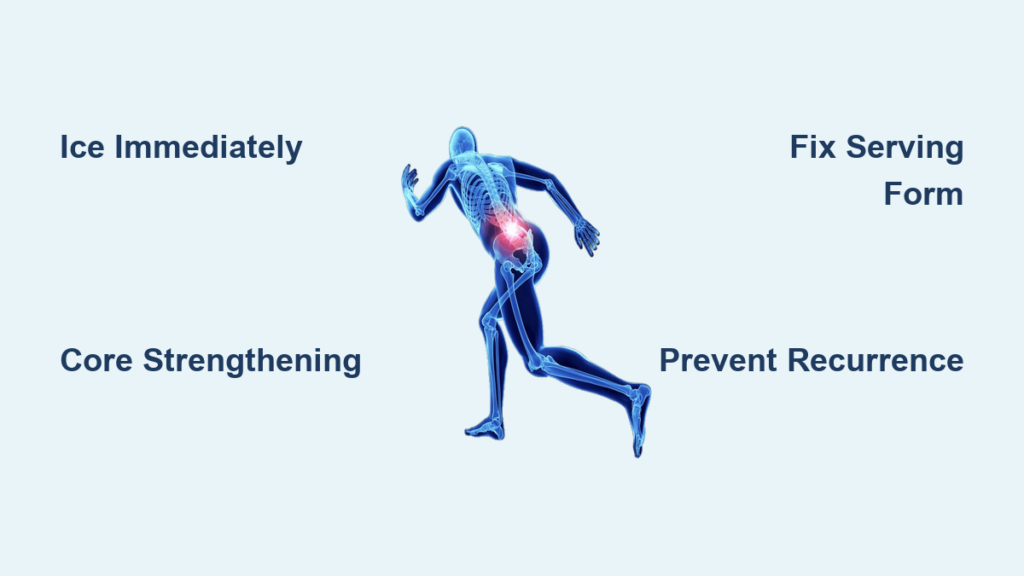
That sharp stab after your third jump serve isn’t just “part of volleyball.” Lower back pain sidelines more players than ankle sprains—robbing you of explosive jumps and tournament play. If you’re wincing during warm-ups or skipping post-game stretches because of aching lumbar muscles, you’re not alone. This precise guide delivers the exact steps to eliminate volleyball-induced back pain and prevent recurrence, based on proven rehabilitation protocols used by pro athletes.
Your spine endures brutal punishment during volleyball: hyperextending 100+ times per match during serves and spikes, absorbing landing impacts equivalent to 3-5 times your body weight, and twisting violently during powerful hits. The asymmetrical nature of volleyball—hitting from one dominant side—creates muscular imbalances that pull your vertebrae out of alignment. Without immediate action, these micro-injuries become chronic pain that could end your season. Follow this battle-tested system to return to the court pain-free.
Pinpoint Your Exact Pain Mechanism

Repetitive hyperextension during jump serves and spikes creates microscopic tears in lumbar tissues. Your spine arches backward thousands of times per season, wearing down facet joints like brake pads. Rotational forces from powerful hits twist lumbar discs beyond their safe range, while landing mechanics determine whether impact travels through your muscles or directly into your spine.
Your core muscles act as a natural weight belt—when they’re weak, your spine absorbs every landing. The asymmetrical nature of volleyball (favoring your dominant arm) creates muscular imbalances that pull your spine out of alignment. Ignoring these mechanics guarantees recurring pain.
Instant Pain Diagnosis Checklist
- Sharp, localized pain: Indicates muscle strain or facet joint irritation (common after hard landings)
- Dull, spreading ache: Points to disc involvement or muscular imbalance (worsens with sitting)
- Pain during specific moves: Arching back = hyperextension injury; twisting = rotational strain
- Pain-free window: If pain disappears within 24 hours of rest, it’s likely muscular—not disc-related
Halt Acute Pain Within 48 Hours
When back pain flares mid-tournament, immediate action prevents weeks of frustration. Apply ice for 15 minutes every 2-3 hours during the first 48 hours—always use a thin towel barrier to prevent skin damage. Take 400-600mg ibuprofen every 6-8 hours to reduce inflammation, but never mask pain during practice—this risks permanent damage.
Critical positioning trick: Lie on your back with knees bent and feet flat. Place a rolled towel under your lower back’s natural curve. This position unloads pressure from lumbar discs while maintaining gentle mobility—do this for 10 minutes hourly when resting.
Emergency Pain Shutdown Sequence
- McKenzie extension: Lie face down, push up onto elbows for 10 seconds, repeat 10 times (stops radiating pain)
- Cat-camel mobility: On hands and knees, alternate between arched and rounded positions (10 reps each)
- Pelvic tilts: Lying on back, gently flatten lower back against floor 20 times (activates core stabilizers)
- Heat transition: After 72 hours, switch to 15-minute heat sessions (promotes blood flow for healing)
Pro Tip: If pain radiates below the knee, skip extensions and consult a physical therapist immediately—this indicates possible nerve involvement.
Phase 1: Restore Pain-Free Movement (Days 1-14)
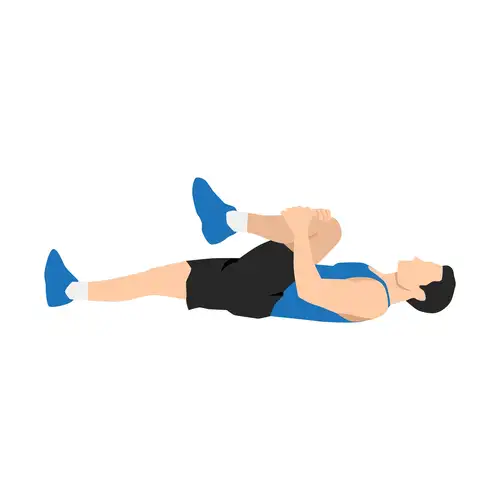
Begin with gentle movements that don’t increase pain. Supine knee-to-chest stretches restore hip flexibility without stressing your spine. Pull one knee toward your chest for 30 seconds—stop immediately if you feel sharp pain. Complete 3-5 repetitions per leg, twice daily. This targets tight hip flexors that pull your pelvis forward.
Pelvic tilts activate deep core muscles while lying down. Flatten your lower back against the floor by tightening abdominal muscles, hold for 5 seconds, release. Build to 15 repetitions, twice daily. Do this before getting out of bed to prevent morning stiffness.
Daily Movement Menu (5 Minutes)
- Hip flexor stretches: 30-second holds, 3 each side (in lunge position)
- Gentle spinal rotations: Rock knees side-to-side, 10 each direction (lying on back)
- Glute activation: Squeeze glutes while lying down, 20 repetitions (prevents “dead butt syndrome”)
- Walking protocol: Start with 5-minute walks, add 2 minutes daily—stop if pain increases
Warning: Avoid forward bending or twisting during this phase—these movements compress injured discs.
Phase 2: Build Core Armor (Weeks 2-4)
Once pain subsides below 2/10, strengthen muscles protecting your spine. Dead bugs teach core stability during limb movement. Lie on your back, extend opposite arm and leg while keeping your lower back pressed to the floor. Master 2 sets of 10 each side before progressing—if your back arches, reduce range of motion.
Bird dogs build volleyball-ready spinal stability. On hands and knees, extend opposite arm and leg while keeping your back flat. Hold 5 seconds, complete 3 sets of 10. Critical checkpoint: If your hips rock or back arches, you’re compensating—scale back immediately.
Core Progression Ladder
- Side planks: Start 15 seconds (knees bent), build to 45 seconds each side
- Glute bridges: 3 sets of 15, progress to single-leg variations (prevents landing injuries)
- Pallof presses: Resist rotation with cable or band, 3×15 each direction (mimics hitting forces)
- Breathing drills: 5 minutes diaphragmatic breathing while maintaining pelvic tilt
Pro Tip: Perform core work before practice—fatigued muscles can’t protect your spine during explosive moves.
Phase 3: Add Dynamic Stability (Weeks 4-6)
Integrate volleyball-specific patterns while maintaining perfect spinal alignment. Medicine ball rotations mimic hitting mechanics without impact. Stand in ready position, rotate torso side-to-side with 5-pound ball. Focus on generating power from hips and shoulders—not your lower back. Complete 3 sets of 15 each side.
Single-leg deadlifts develop safe landing mechanics. Stand on one leg, hinge forward while keeping your back straight, return to standing. This teaches glutes and hamstrings to absorb landing forces instead of your spine. Stop if you feel back rounding—quality trumps quantity.
Movement Quality Checkpoints
- Spine stays neutral during all exercises (no arching or rounding)
- Breathing remains normal (no breath-holding during exertion)
- Pain level stays below 3/10 (sharp pain = stop immediately)
- Landing control: Can you stick jumps without wobbling?
Fix Your Technique Flaws Now
Serving corrections: Reduce back arch by focusing on hip extension instead of lumbar hyperextension. Engage your core throughout the serve—think “brace like someone will poke your stomach.” Limit trunk rotation during follow-through; power should come from shoulder rotation, not spine twisting.
Hitting approach adjustments: Your final step should be controlled, not jarring. Generate arm swing power from shoulder rotation rather than trunk hyperextension. Keep your core engaged during take-off to maintain spinal alignment mid-air.
Quick Technique Tests
- Serve without back arch: Can you serve with neutral spine? (Record yourself)
- Landing control: Can you stick landings quietly? (No stomping)
- Core engagement: Can you maintain abdominal brace while hitting? (Place hand on stomach)
Prevent Future Pain Episodes
Daily Activation Routine (5 Minutes)
- 10 bird dogs: Wake up deep stabilizers before practice
- 15 glute bridges: Activate posterior chain for safe landings
- 20 dead bugs: Train core stability with limb movement
- 30 seconds side planks: Build lateral strength for defensive moves
Pre-Practice Warm-up: Start with 5 minutes of dynamic movements: leg swings, walking lunges, and torso rotations. Practice serving motions without a ball to groove proper mechanics. Finish with 10-15 controlled jumps focusing on soft landings.
Critical Recovery Protocol: 10-minute cool-down focusing on hip flexors and thoracic spine. Foam roll glutes for 5 minutes daily. Prioritize 7-9 hours of sleep—discs rehydrate during deep sleep.
Know When to Get Professional Help
Red flag symptoms require immediate attention:
– Numbness or tingling down your legs (nerve compression)
– Severe pain that prevents sleep (possible fracture)
– Pain worse at night than during activity (disc issue)
– Progressive leg weakness (neurological involvement)
Professional intervention timeline:
– Week 1-2: Persistent pain despite home treatment
– Week 3-4: Limited improvement in movement quality
– Week 6+: For return-to-sport guidance
Lower back pain doesn’t have to end your volleyball season. By following this systematic approach—immediate pain management, progressive strengthening, technique correction, and preventive maintenance—you’ll return to the court stronger and more resilient. Your vertical leap depends on a healthy spine; treat it like the performance engine it is. Start today—your next game-winning spike depends on it.