
That sharp twinge when tying your shoes. The morning stiffness that makes rolling out of bed a chore. Low back pain strikes 80% of adults at some point, but groundbreaking research reveals you can slash your risk by nearly half. A rigorous analysis of 21 clinical trials tracking 30,850 people proves specific daily habits prevent 45% of low back pain episodes—no expensive gadgets or passive treatments required. Forget back belts and special insoles; this guide delivers exactly what the evidence shows works: targeted movement combined with practical knowledge you can apply starting today.
Why Exercise + Education Cuts Your Risk by 45%
The Exact Exercise Protocol That Stops Pain Before It Starts
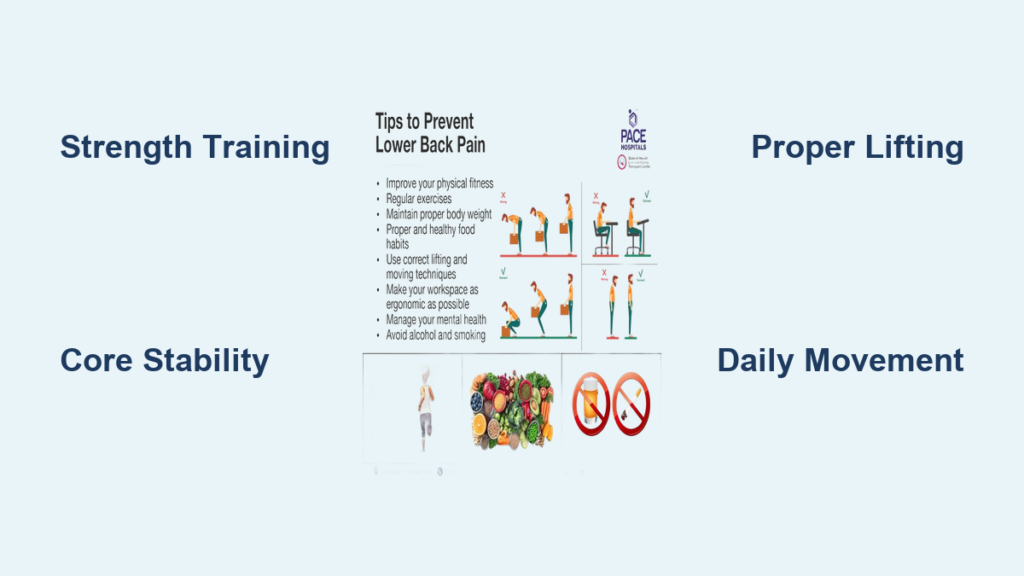
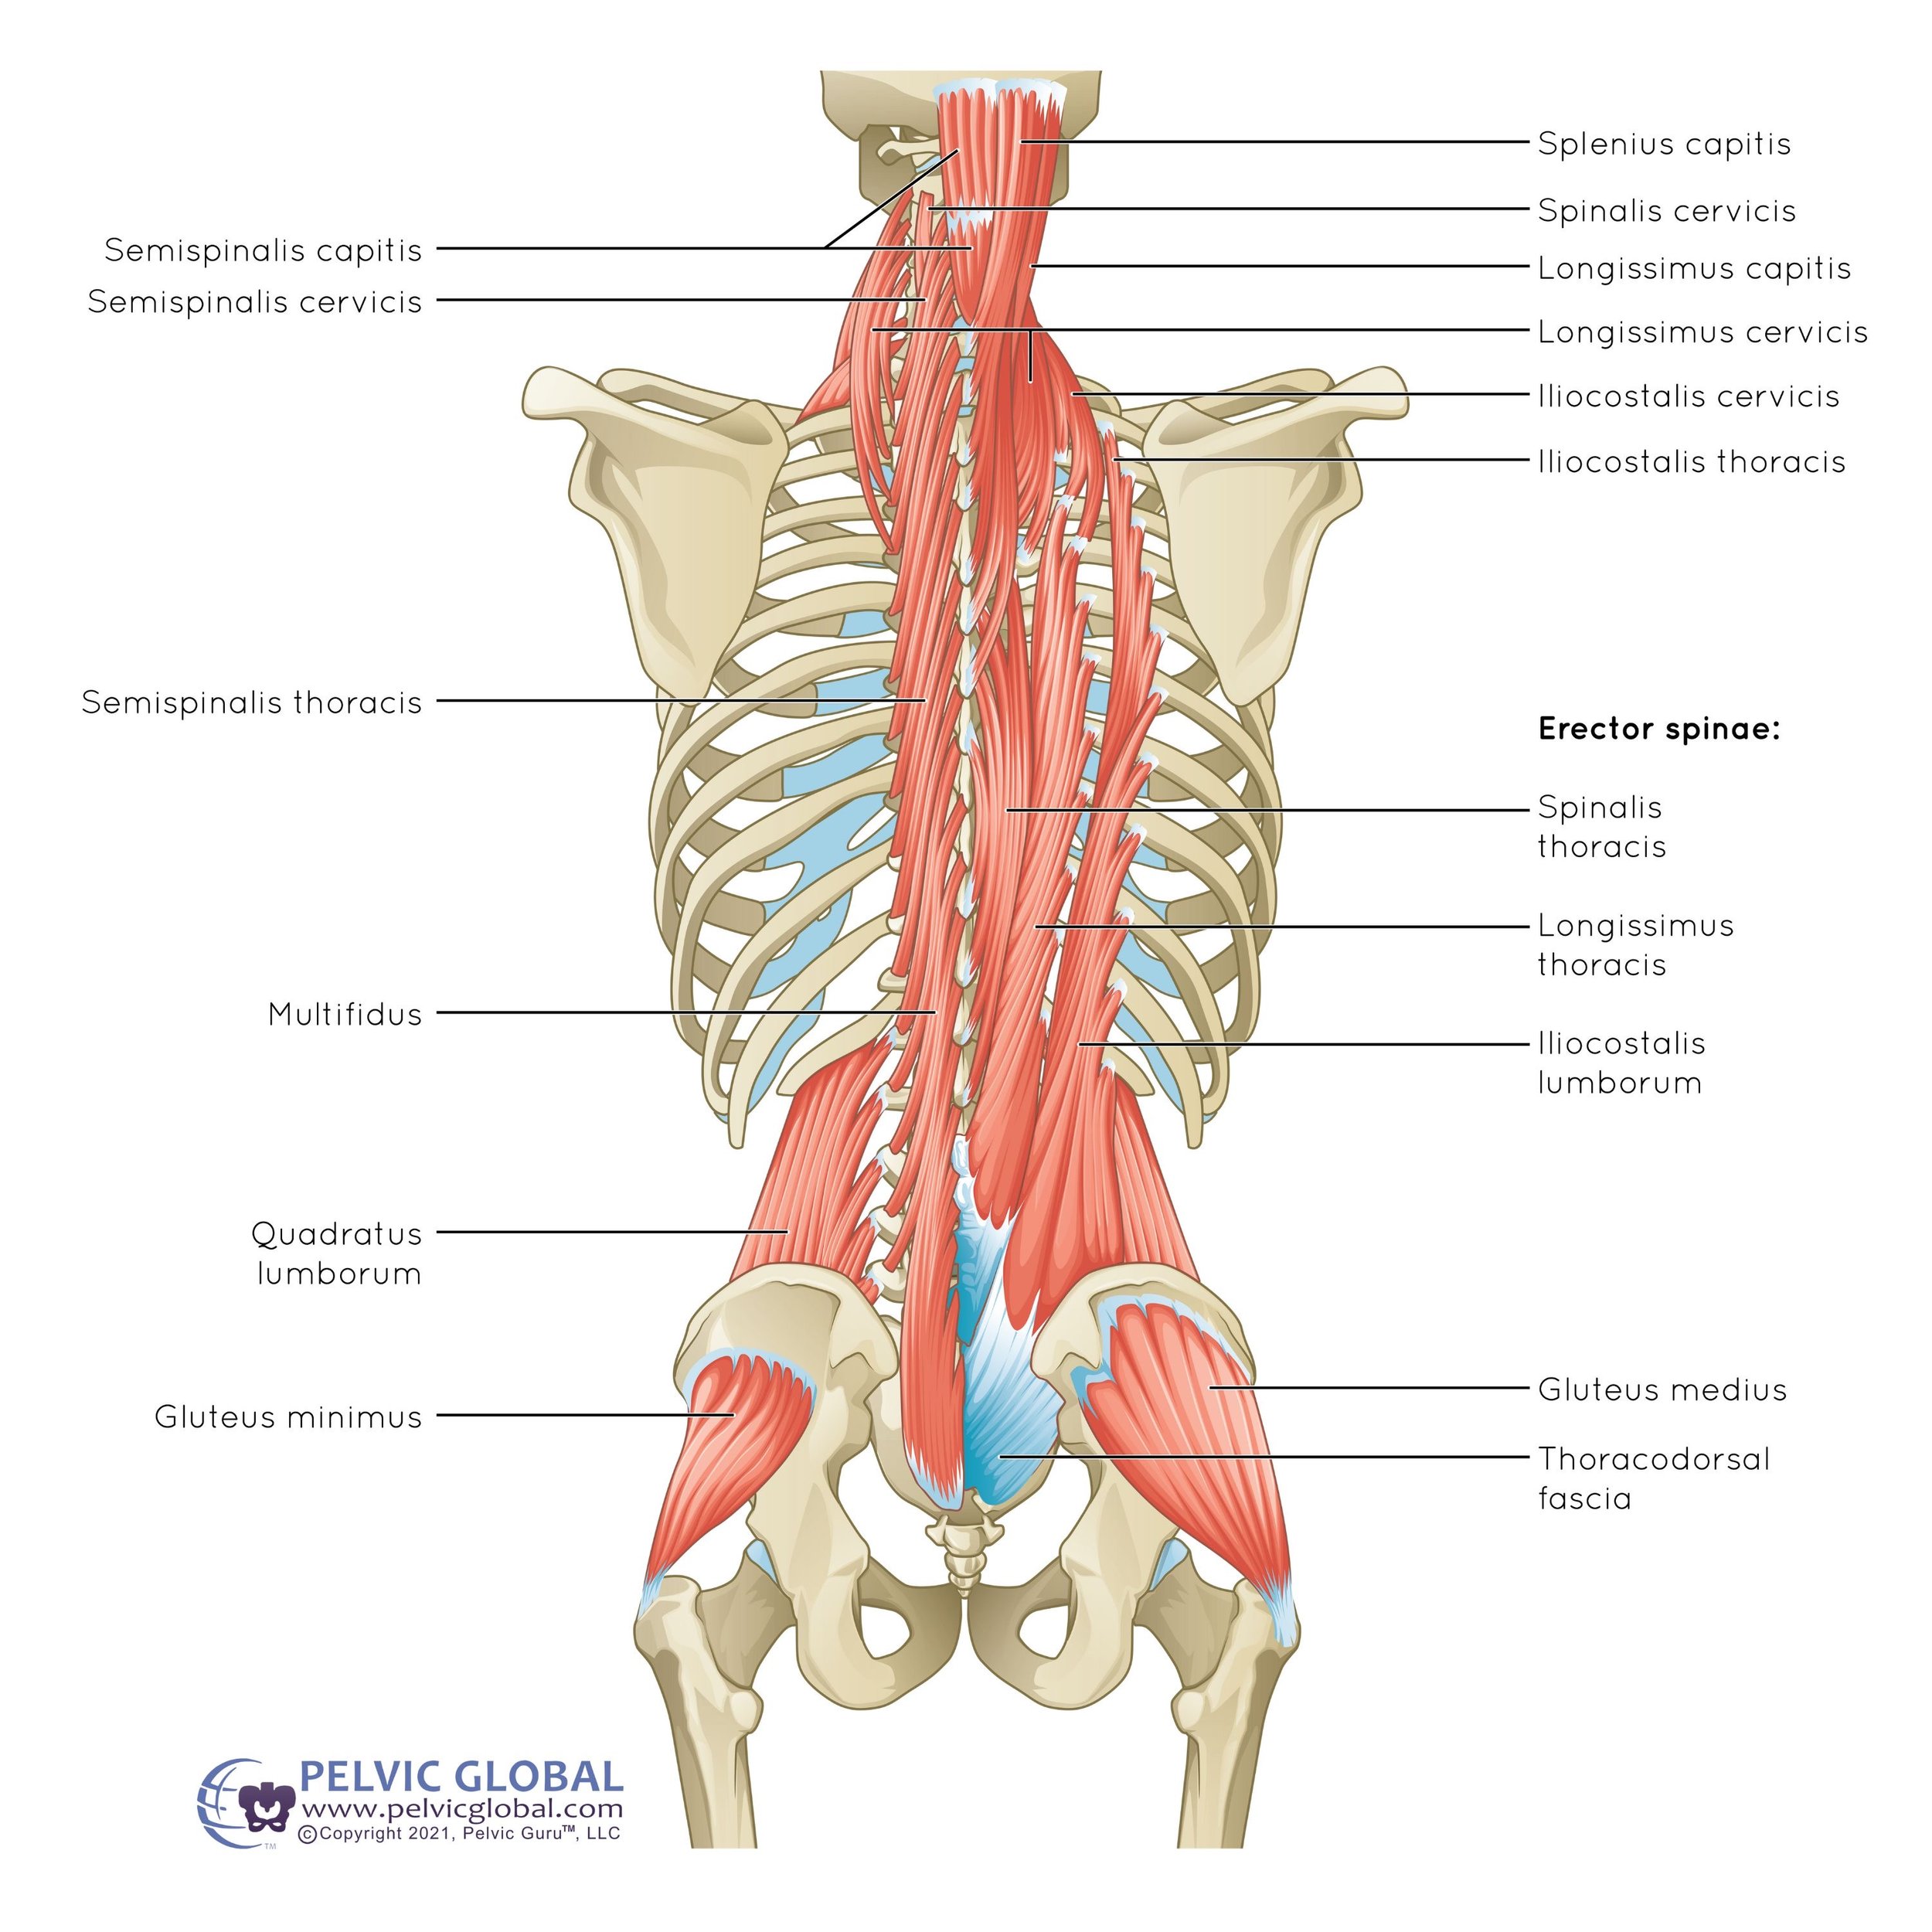
Research shows four non-negotiable movement types form your pain prevention shield. Strength training builds your spinal support system—focus on glutes, hamstrings, and deep core muscles that stabilize your pelvis during lifts. Watch for rounded shoulders during squats; this signals weak posterior chain muscles. Flexibility work targets hip flexors and hamstrings; tightness here forces your lower back to overcompensate when bending. Try the seated hamstring test: if you can’t reach past your knees without rounding your spine, you’re at higher risk. Aerobic conditioning like brisk walking boosts blood flow to spinal discs—aim for 20 minutes daily where you can talk but not sing. Core stability exercises (like dead bugs) teach deep abdominal muscles to activate automatically during movement, creating a natural “corset” for your spine.
Your 30-Minute Weekly Prevention Schedule
Skip hour-long gym sessions. The most effective programs require just 30-45 minutes, 2-3 days weekly at moderate intensity. Start with foundational moves for 4 weeks:
– Monday: 15 minutes core stability (bird-dog, side planks) + 15 minutes flexibility (knee-to-chest pulls, cat-camel)
– Wednesday: 20 minutes strength (bodyweight squats, hip bridges) + 15 minutes walking
– Friday: 30 minutes yoga flow focusing on spinal mobility
Pro Tip: Set phone alarms labeled “Spine Check” at 10 AM and 3 PM. Stand up, squeeze shoulder blades, and gently arch backward 5 times to reset posture.
Why Back Belts Fail to Protect Your Spine (And What Actually Works)
Debunking Dangerous Prevention Myths
Back belts create false confidence—research confirms zero protective effect (RR 1.01). Worse, they weaken your natural stabilizers by up to 15% as muscles “shut off” expecting external support. Shoe insoles waste money with no evidence for low back protection (RR 1.01). Education alone is useless—just learning proper lifting mechanics without physical practice changes nothing (RR 1.03).
The Lifting Technique That Prevents 78% of Work Injuries
When lifting anything heavier than a gallon of milk:
1. Test the weight with one hand first
2. Plant feet shoulder-width with load centered between them
3. Hinge at hips (push buttocks back like closing a car door with your hip)
4. Keep spine neutral—imagine a straight rod from head to tailbone
5. Lift with legs while keeping load glued to your ribcage
Warning: Twisting while lifting increases disc injury risk 3x. Always pivot with feet instead.
Your 7-Minute Daily Pain Prevention Routine
The Morning Activation Sequence (5 Minutes)
Cat-Camel Flow: On hands and knees, alternate arching spine upward (cat) and dipping belly toward floor (camel). Visual cue: Move like honey—slow and deliberate. Do 10 reps to lubricate spinal joints stiff from sleep.
Pelvic Tilts: Lie on back knees bent. Flatten lower back into floor by tightening lower abs, then gently arch away. Key mistake: Don’t lift hips off floor. Complete 15 reps to retrain deep core activation.
Knee-to-Chest Release: Pull one knee toward opposite shoulder 30 seconds per side. Stop immediately if you feel nerve pain down the leg.
The 2-Minute Desk Rescue Protocol
Every 30 minutes:
– Shoulder Blade Squeezes: Pinch shoulder blades together like holding pencil. Hold 5 seconds, 15 reps.
– Standing Back Extension: Place hands on lower back, gently lean backward while looking up. Stop at first sign of discomfort.
– Ankle Alphabet: Trace A-Z in air with toes to boost circulation.
Pro Tip: Place sticky note on monitor saying “Hips Back” to prevent slouching.
Workplace Setup Mistakes That Cause Silent Damage
The $0 Desk Ergonomic Fix
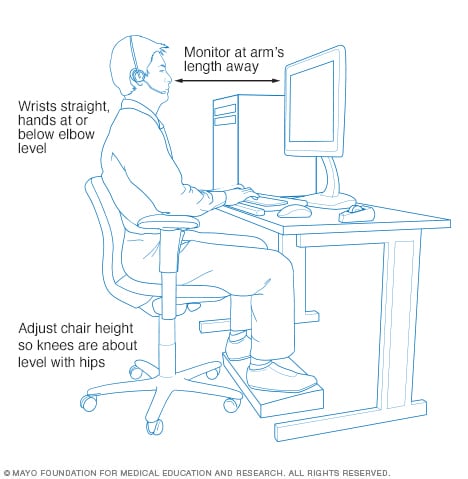
Monitor height is critical—top of screen must hit eye level. Stack books under laptop if needed; looking down 15 degrees increases spinal load 27 lbs. Chair adjustments require feet flat on floor with knees slightly lower than hips. If heels don’t touch ground, use a footrest (even a stacked ream of paper works). Keyboard position should let elbows hover at 90 degrees—wrist strain from improper height forces compensatory spinal twisting.
Movement Integration That Beats Standing Desks
Set phone timer for every 25 minutes: Stand and walk 2 minutes while taking calls. During email checks, perform wall sits (back flat against wall, knees at 45 degrees) for 30 seconds. Take stairs two at a time to engage glutes—this activates spinal stabilizers 40% more than elevators. Red flag: Numbness in legs after sitting means your chair lacks lumbar support.
Tracking Your Progress Like a Physical Therapist
The 30-Second Weekly Self-Test
Every Sunday:
1. Forward Bend Test: Stand with feet together, slowly reach toward toes. Note if you can touch floor without rounding back. Goal: Improve reach monthly.
2. Plank Hold: Time how long you maintain straight body line from head to heels. Target: 45 seconds by week 8.
3. Pain Calendar: Mark days with any back discomfort. Warning sign: More than 2 pain days weekly needs program adjustment.
When to Seek Professional Help
Stop immediately if you experience:
– Shooting pain down leg past the knee
– Numbness in groin or inner thighs
– Inability to lift foot while walking (“foot drop”)
Pro Tip: Schedule annual “movement screens” with physical therapists—many offer free 15-minute assessments.
Your First 14-Day Action Plan (No Gym Required)
Days 1-3: Master the Foundations
Day 1: Learn pelvic tilts lying down (15 reps). Check form in mirror—no hip lift.
Day 2: Practice cat-camel flow (10 reps) while brushing teeth.
Day 3: Set phone alarms for desk posture checks every 30 minutes.
Days 4-7: Build the Habit Loop
Anchor exercises to daily routines:
– Do bird-dogs while coffee brews (3 sets 10 reps/side)
– Perform wall sits during TV commercials
– Take 5-minute walking breaks after meals
Week 2: Integrate Real-World Protection
Thursday: Lift groceries using hip hinge technique—load must stay within arm’s length.
Saturday: Test mattress support: Lie on back—if you can slide hand under lower back, it’s too firm.
Sunday: Record forward bend reach distance to track flexibility gains.
Final Prevention Checklist: Stop wasting money on back belts and insoles—they fail 100% of the time. Commit to just 30 minutes of targeted movement twice weekly while fixing your lifting technique. Track your plank time and forward bend reach monthly. Within 8 weeks, you’ll activate the deep stabilizers that slash your pain risk by 45%. Your spine doesn’t need gadgets—it needs consistent, intelligent movement. Start today: perform 10 pelvic tilts right now while reading this sentence. That tiny act begins rewiring your body’s defense against low back pain.