
That constant ache between your shoulder blades from hours at your desk isn’t just annoying—it’s stealing your breath, limiting your movement, and disrupting your sleep. Millions suffer from upper back pain caused by poor posture, but there’s a simple, effective solution you can implement today: foam rolling. This guide shows you exactly how to use a foam roller for upper back pain to release tension, restore mobility, and reclaim your comfort without expensive treatments.
Unlike temporary pain relief methods, foam rolling targets the root cause of your discomfort—tight muscles, restricted joints, and trigger points. When done correctly, you’ll experience noticeable improvement within days. Let’s dive into the precise techniques that deliver real results.
Select the Right Foam Roller for Your Upper Back

Match Density to Your Pain Level
Your foam roller’s density directly impacts effectiveness. Soft rollers (20-30 kg/m³) work best when your upper back pain is fresh or severe—these provide gentle pressure that won’t overwhelm sensitive tissue. Medium density rollers (30-50 kg/m³) hit the sweet spot for most users, offering balanced pressure for regular maintenance. Firm rollers (50-80 kg/m³) deliver deep tissue work but require experience; reserve these for chronic tightness once your body adapts.
Choose Surface Texture Based on Target Area
Smooth rollers distribute pressure evenly across your thoracic spine, making them ideal for general upper back rolling and beginners. If you’re battling stubborn knots between your shoulder blades, grid-pattern rollers simulate a massage therapist’s fingers for moderate intensity release. For pinpoint trigger point work, knobbed rollers deliver focused pressure to rhomboid and trapezius trouble spots.
Size Matters for Upper Back Targeting
36-inch rollers support your entire spine during rolling sequences, while 18-inch models focus specifically on your upper back and travel easily. Most adults benefit from 6-inch diameter rollers, but if you’re petite or need deeper pressure, 4-inch rollers concentrate force on smaller muscle areas. Avoid oversized rollers—they won’t target your upper back precisely.
Essential Safety Checks Before Rolling
Rate Your Pain on the 0-10 Scale
Before you start rolling, assess your upper back pain intensity. Mild discomfort (0-3) allows standard rolling with light pressure. If you’re at moderate pain (4-6), use gentle techniques and monitor your body’s response closely. Severe pain (7-10) requires medical consultation before attempting foam rolling—you could worsen your condition.
Identify Contraindications Immediately
Stop immediately if you have acute injuries, fractures, osteoporosis, tumors, or recent surgery near your upper back. Proceed with extreme caution if you have rheumatoid arthritis flares, are in your third trimester of pregnancy, take blood thinners, or have varicose veins along your spine. When in doubt, consult your healthcare provider before starting.
Master Basic Thoracic Spine Rolling
Perfect Your Starting Position
Lie on your back with the foam roller positioned horizontally across your upper back, just below your neck. Bend your knees to 90 degrees with feet flat and hip-width apart. Interlace your fingers behind your head or cross your arms over your chest, keeping your neck neutral. Your hips should lift slightly off the floor to transfer weight onto the roller.
Execute Proper Rolling Technique
Engage your core to protect your lower back as you slowly roll from your upper thoracic spine (T1) down to your mid-back (T8). Move vertebra by vertebra—don’t rush through the motion. When you hit a tender spot, pause for 15-30 seconds while taking deep breaths. Use your legs to control movement, never letting your lower back take the brunt of the pressure.
Follow Proven Repetition Guidelines
Beginners should complete 8-10 slow passes over 60-90 seconds. Intermediate users benefit from 10-15 passes spanning 2-3 minutes. Advanced practitioners can do 15-20 passes for 3-5 minutes, focusing on specific problem areas. Quality always trumps quantity—stop if you experience sharp pain.
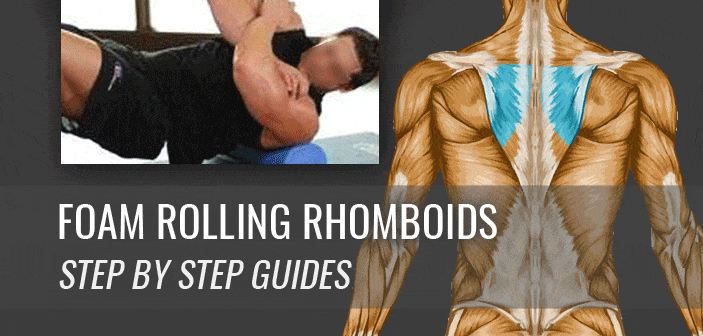
Target Rhomboids and Trapezius Effectively
Optimize Arm Positioning for Precision
Eagle arms deliver the best results for between-scapula pain—cross your arms over your chest with hands on opposite shoulders. For broader coverage, extend your arms to the sides at 90-degree angles in an “open book” position. Overhead reach with arms extended above your head accesses different muscle fibers for comprehensive relief.
Apply Targeted Trigger Point Pressure
Position the roller vertically along your spine between your shoulder blades, focusing pressure on muscle tissue rather than the spine itself. Perform small oscillations—just 1-2 inches—over identified knots. Hold static pressure for 45-60 seconds while breathing deeply, never holding your breath. You should feel tension release, not increased pain.
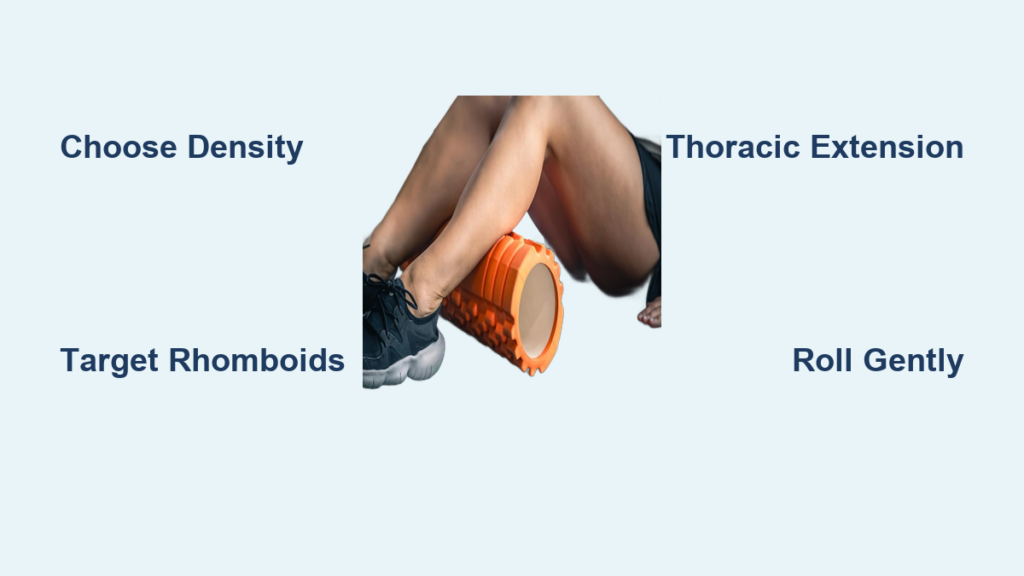
Unlock Stiff Thoracic Joints with Extension
Set Up for Safe Mobilization
Place the foam roller horizontally at T6-T7 level (roughly where your bra strap sits). Support your head with your hands, keeping elbows wide. Your buttocks must remain on the floor throughout—this prevents your lower back from compensating. Keep your neck neutral to avoid strain.
Perform Controlled Extension Movements
Slowly arch your upper back over the roller, creating a gentle curve from T1-T8 while keeping your hips stationary. Hold the end-range position for 2-3 seconds, then return to neutral. Repeat 8-12 times before moving the roller up or down your spine. If you feel any pinching, reduce your range of motion.
Progress Through Extension Levels Safely
Level 1 keeps hands behind your head with minimal extension—ideal for beginners. Level 2 extends arms overhead for moderate mobilization. Level 3 adds light resistance (like a small weight plate) for deeper joint release. Never force extension—your thoracic spine naturally has less mobility than your neck or lower back.
Release Deep Trigger Points Safely
Locate Common Pain-Generating Spots
Primary trigger points causing upper back pain include the rhomboid major between T2-T5 medial to your scapula, rhomboid minor between C7-T1, and upper trapezius from the superior scapula angle to your skull base. Middle trapezius points sit between T1-T4 between your shoulder blades—these often refer pain to your neck.
Apply Correct Pressure Duration
Start with 30-50% of your body weight on tender spots, increasing to 70-80% only if tolerable. Hold each trigger point for 30-90 seconds, maximum 2-3 sessions daily. Stop immediately if you experience sharp pain, numbness, tingling, or increased pain lasting beyond 24 hours—these indicate potential tissue damage.
Optimize Your Rolling Schedule
Acute Pain Phase (0-7 days)
Roll 1-2 times daily for 5-10 minutes total using 30-50% pressure. Focus on gentle mobilization rather than aggressive treatment. This reduces inflammation while maintaining movement in stiff joints. Avoid rolling directly on inflamed areas—work around them.
Subacute Phase (1-4 weeks)
Increase to 2-3 sessions daily for 10-15 minutes at 50-70% intensity. Target specific trigger points and incorporate thoracic extension exercises. This phase rebuilds mobility while breaking up adhesions that developed during the acute phase.
Long-Term Maintenance (4+ weeks)
Maintain 1-2 daily sessions for 15-20 minutes at 70-85% intensity. Shift focus to prevention—rolling becomes part of your wellness routine rather than pain management. Integrate with strengthening exercises to address underlying postural issues.
Integrate Post-Rolling Recovery Steps
Perform Critical Stretches Immediately After
After rolling, hold each stretch for 30-60 seconds: doorway pec stretches to counteract rounded shoulders, upper trapezius stretches by gently pulling your head toward your shoulder, and rhomboid stretches by hugging yourself and pulling shoulders forward. This “locks in” your improved mobility.
Strengthen Supporting Muscles Daily
Complete 2-3 sets of 12-15 reps for scapular wall slides (standing with back against wall, sliding arms up/down), prone Y-T-W raises (lying face down, lifting arms in letter shapes), and band pull-aparts (pulling resistance band apart at chest height). These build the postural muscles that prevent future pain episodes.
Solve Common Rolling Challenges
Boost Pressure When Needed
When your upper back stops responding to standard rolling, progress to a firmer roller or try one-leg support instead of two. Stack an additional roller or yoga block for increased intensity, or switch to a smaller diameter roller for deeper penetration into dense tissue.
Reduce Discomfort Without Sacrificing Results
If rolling hurts more than helps, reduce body weight on the roller by supporting more with your feet. Switch to a softer density roller or increase your surface contact area by rolling more slowly. Shorten duration per area and apply heat before rolling to relax tight muscles.
Track Your Upper Back Pain Progress
Implement a Simple Daily Log
Record your pain levels morning and evening using a 0-10 scale. Map pain locations on a body diagram and note triggers like specific activities. Document each rolling session’s duration, intensity, and techniques—this reveals what works best for your unique pain patterns.
Test Functional Improvements Weekly
Measure thoracic rotation by sitting and rotating left and right while noting range of motion. Perform wall angels (back against wall, arms sliding up/down) to assess scapular mobility. Take posture photos from multiple angles to visually track improvements in shoulder alignment.
Maintain Your Foam Rolling Equipment
Follow the Cleaning Protocol
Wipe your roller with a damp cloth after each use to remove sweat and skin oils. Deep clean weekly with mild soap solution, and disinfect monthly with 70% isopropyl alcohol. Replace your foam roller every 6-12 months—compressed foam loses its effectiveness and can harbor bacteria.
Foam rolling your upper back correctly delivers remarkable pain relief by addressing the muscular and joint restrictions causing your discomfort. Start gently with proper technique, progress gradually, and always listen to your body’s signals. Within weeks of consistent practice, you’ll breathe deeper, move freer, and sit taller—finally freeing yourself from that nagging upper back pain. The key isn’t just knowing how to use a foam roller for upper back pain, but implementing these techniques consistently for lasting results.