
You bent down to lift that heavy box—maybe it was heavier than expected or you twisted at the wrong moment. Now every movement sends sharp pain through your lower back, making even simple tasks unbearable. Lower back pain from lifting affects millions of people each year, whether they’re moving furniture, working construction, or simply picking up groceries. The good news? Most lifting-related back pain resolves within weeks when treated properly—and you’re about to learn exactly how to treat lower back pain from lifting effectively while preventing future injuries.
This guide delivers immediate solutions for pain relief alongside proven strategies to strengthen your back and avoid repeat injuries. You’ll discover how to differentiate between minor strains and serious injuries, implement the right treatment protocol, and return to lifting safely within weeks.
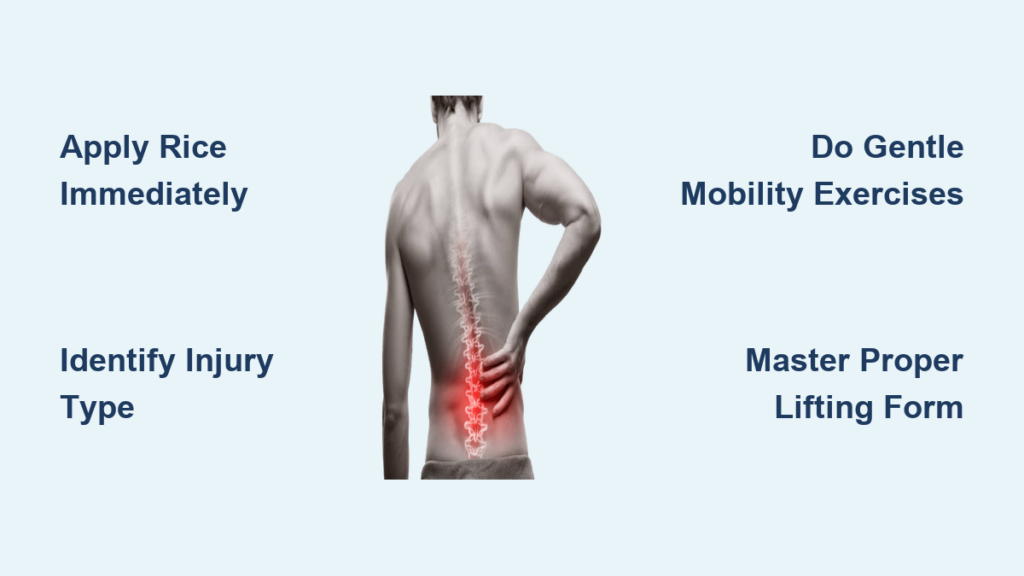
Stop Lower Back Pain Immediately After Lifting
Apply RICE Protocol Correctly Within First Hour
Rest doesn’t mean bed confinement—limit painful movements for 24-48 hours while maintaining gentle activity. Walk around your home for 5-10 minutes every hour to prevent stiffness and promote blood flow to injured tissues. Complete bed rest actually slows healing by reducing circulation to damaged muscles.
Ice application schedule for maximum effect:
– Apply ice packs for 15-20 minutes every 2-3 hours during the first 48 hours
– Always use a thin towel between ice and skin to prevent frostbite
– Commercial ice packs work well, but frozen peas conform perfectly to your back’s contours
– After 48 hours, switch to heat therapy to relax tight muscles
Critical mistake to avoid: Never apply heat during the initial 48-hour period as it increases inflammation and swelling around injured tissues.
Choose Effective Pain Management Options
Smart medication choices:
– NSAIDs: Take ibuprofen (400-600mg) or naproxen with food to reduce inflammation
– Acetaminophen: Use 500-1000mg every 6 hours for pain relief without anti-inflammatory effects
– Topical creams: Apply diclofenac gel directly to painful areas for localized relief
Dangerous medication mistakes:
– Taking NSAIDs on an empty stomach (causes stomach irritation)
– Combining multiple NSAIDs (increases side effect risks)
– Exceeding daily dosage limits (damages organs)
– Using medication to mask pain while continuing strenuous activity
Diagnose Your Specific Back Injury Type
Recognize Muscle Strain vs. Disc Injury Symptoms
Muscle strain indicators:
– Sharp pain occurring precisely when lifting
– Localized tenderness when pressing on affected area
– Muscle spasms that come and go
– Pain improves with rest and gentle movement
Disc-related injury warning signs:
– Pain radiating down your buttock or leg (sciatica)
– Worsening pain while sitting or coughing
– Numbness, tingling, or weakness in legs
– Gradual pain intensification over hours
Seek emergency care immediately if you experience:
– Numbness in your groin area (saddle anesthesia)
– Loss of bladder or bowel control
– Fever accompanying back pain
– Pain shooting down both legs simultaneously
Perform Simple Self-Assessment Tests at Home
Standing toe touch test:
– Slowly bend forward to touch your toes while keeping knees straight
– Note where you feel pain (localized back pain vs. radiating leg pain)
– Stop immediately if pain travels down your leg—this indicates nerve involvement
Single leg raise evaluation:
– Lie flat on your back with legs straight
– Slowly raise one leg while keeping it straight
– Pain before reaching 60 degrees suggests nerve compression
– Compare both sides for significant differences in pain levels
Implement Proven Recovery Exercises by Timeline
Days 1-3: Gentle Mobility to Prevent Stiffness
Pelvic tilts (3 sets of 10, hourly):
– Lie on your back with knees bent and feet flat
– Gently flatten your lower back against the floor
– Hold for 3 seconds, then release slowly
– Pro tip: Place your hand under your lower back to feel the movement
Supported deep breathing (5 minutes, 3x daily):
– Lie on back with hands resting on your abdomen
– Inhale deeply through your nose, expanding your belly
– Exhale slowly through pursed lips
– Visual cue: Your ribcage should move minimally while your belly rises
Days 4-14: Progressive Movement for Healing
Glute bridges (3 sets of 12, twice daily):
– Lie on back with feet hip-width apart and knees bent
– Drive through heels to lift hips while squeezing glutes
– Hold at the top for 2 seconds before lowering
– Warning: Stop if you feel sharp pain in your lower back
Modified cobra pose (3 sets of 5, twice daily):
– Start lying face down with elbows under shoulders
– Press up gently using your arms while keeping hips grounded
– Only lift to the point of mild stretch, not pain
– Hold for 5 seconds, then lower slowly
Prevent Future Lifting Injuries Permanently
Master Proper Lifting Form Immediately
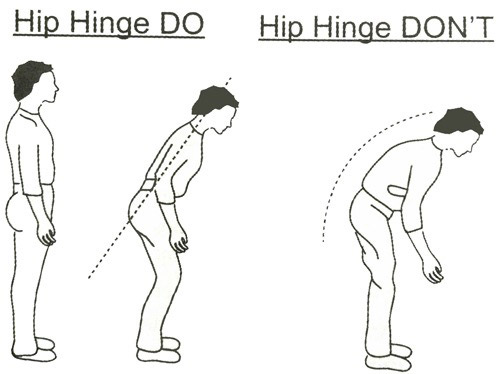
The hip hinge technique sequence:
1. Stand with feet shoulder-width apart, toes slightly outward
2. Push hips back as if closing a car door behind you
3. Bend knees slightly while keeping chest lifted
4. Grip the load close to your body’s center
5. Drive through your heels to stand, leading with your chest
Critical form errors causing re-injury:
– Rounding shoulders forward (shifts load to discs instead of muscles)
– Letting knees cave inward (creates torque on spine)
– Holding breath during lifts (increases intra-abdominal pressure dangerously)
– Twisting while lifting (places extreme stress on discs)
Establish a Non-Negotiable Pre-Lift Routine
5-minute warm-up sequence (before every lift session):
– 30 seconds each: marching in place, arm circles, hip circles
– 10 bodyweight squats focusing on hip hinge
– 5 cat-camel stretches for spinal mobility
– 20 seconds hip flexor stretch each side
Essential activation exercises:
– 10 glute bridges to engage posterior chain
– 30-second plank to stabilize core
– 10 bird-dogs each side to activate deep stabilizers
Return to Lifting Safely Without Re-Injury
Follow This Progressive Loading Protocol
Weeks 1-2: Foundation Building
– Strictly bodyweight movements only
– Perfect form before adding any resistance
– Pain-free range of motion is mandatory
– Time commitment: 15-20 minutes daily
Weeks 3-4: Stability Development
– Introduce resistance bands for controlled movement
– Practice bilateral movements like goblet squats
– Start at 50% of your previous working weight
– Critical checkpoint: Can you perform 20 perfect bodyweight squats?
Weeks 5-8: Strength Restoration
– Gradually return to barbell movements
– Begin at 50% pre-injury working weight
– Increase weight by only 5-10% weekly if pain-free
– Warning sign: Any pain during lifts requires immediate reduction
Maintain Long-Term Back Health Daily
Implement This 15-Minute Daily Maintenance Routine
Morning activation sequence:
– 10 cat-camel stretches to mobilize spine
– 10 glute bridges to activate posterior chain
– 30-second plank to stabilize core
– 10 bird-dogs to engage deep stabilizers
Evening recovery protocol:
– Hip flexor stretch: 30 seconds each side
– Hamstring stretch: 30 seconds each leg
– Piriformis stretch: 30 seconds each side
– Child’s pose: 60 seconds for spinal decompression
Workplace modifications preventing daily strain:
– Position computer monitor at eye level
– Use chair providing lumbar support
– Take standing breaks every 30 minutes
– Keep frequently used items within easy reach
Know When to Seek Professional Help
Physical therapy becomes essential when:
- Pain persists beyond 2 weeks without improvement
- You experience recurrent episodes despite prevention
- Daily activities become consistently difficult
- You’re an athlete needing sport-specific rehabilitation
Medical red flags requiring immediate attention:
- Progressive leg weakness affecting gait
- Loss of bladder or bowel control
- Fever combined with back pain
- History of cancer with new back pain
Critical takeaways for complete recovery:
1. Start treatment immediately—the first 72 hours determine healing speed
2. Stay gently active—complete rest prolongs recovery
3. Master proper form—technique matters more than weight lifted
4. Build core strength—strong stabilizers prevent 90% of lifting injuries
5. Warm up before every lift—5 minutes prevents weeks of pain
Most lower back pain from lifting resolves within 2-6 weeks when treated correctly. By following this systematic approach, you’ll not only recover fully but develop the strength and movement patterns to lift safely for life. Remember: acute pain is a warning signal, not a permanent limitation—treat it properly, and you’ll return to lifting stronger than before.