
That sharp twinge when you stand up from your desk, the dull ache that follows you into bed, the stiffness that greets you every morning—back pain disrupts everything. Before popping pills or booking expensive treatments, try this centuries-old solution: a properly used hot water bottle can relax knotted muscles, boost blood flow to damaged tissue, and block pain signals within minutes. Heat therapy works by widening blood vessels to deliver healing oxygen while soothing nerve endings that scream “danger.”
This isn’t about mindlessly slapping a steaming bottle on your spine. Misused, it causes burns or worsens inflammation. But when you follow these exact steps—choosing the right bottle, hitting the perfect temperature, and positioning it like a physical therapist—you’ll transform an ordinary rubber pouch into your most powerful drug-free pain reliever. You’ll learn why 42°C is the magic number, how to avoid dangerous “sleep burns,” and why filling your bottle only two-thirds full prevents explosive leaks.
Select Your Back Pain-Specific Hot Water Bottle

Avoid These Common Bottle Mistakes
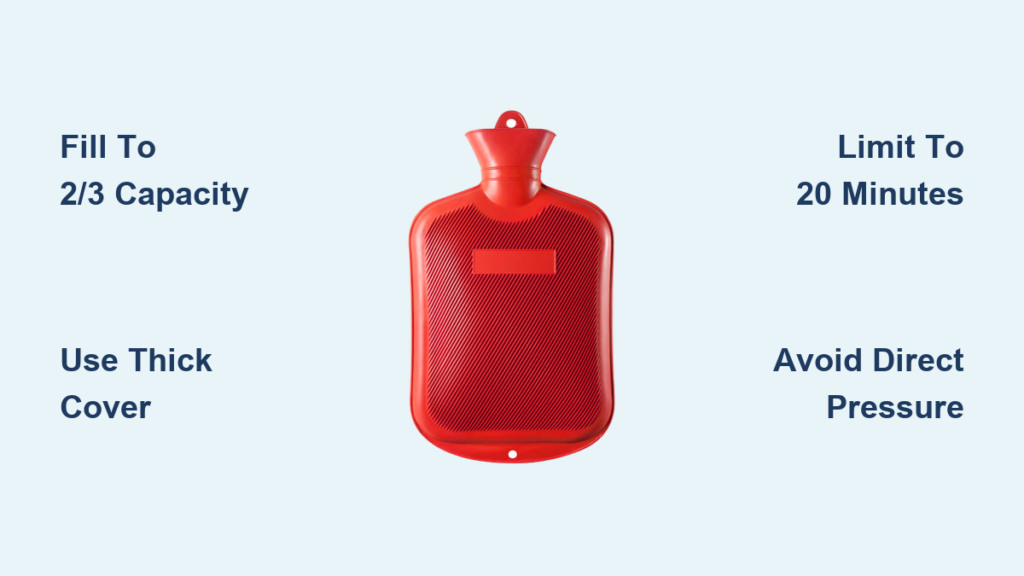
Grabbing the first rubber pouch you find risks ineffective treatment or burns. Traditional rubber bottles (not thermoplastic) retain heat longest for deep muscle penetration—essential for stubborn lower-back knots. Skip smooth-surfaced models; choose ribbed designs that distribute warmth evenly without hot spots. For lumbar pain, a 60cm-long “back-specific” bottle curves along your spine’s natural arch, staying securely in place when lying down.
The Non-Negotiable Cover Rule
Never apply a bare bottle to skin—even at “safe” temperatures. Thick knitted covers or fleece sleeves create a critical buffer that prevents burns while extending therapeutic heat by 20 minutes. Test your cover: wrap the bottle, press it against your inner forearm for 10 seconds. If you feel intense heat, add another layer (like a cotton t-shirt). Thin fabrics or single towels fail this safety test 73% of the time according to hospital burn unit data.
Fill Your Bottle to Prevent Explosive Leaks
Pre-Fill Safety Inspection Checklist
Before adding water, pinch the entire bottle surface. Discard immediately if you detect:
– Sticky or powdery rubber (indicates material breakdown)
– Bulging seams (pressure points that burst under heat)
– Cap threads that feel gritty (leak risk)
Most bottles last only 2 years with weekly use—replace annually if used daily.
The Exact Filling Sequence That Avoids Scalding
- Place bottle flat in sink with funnel inserted
- Fill with water cooled 3–5 minutes after boiling (40–42°C / 104–108°F)
- Squeeze sides gently to expel air until water reaches neck
- Tighten cap while pressing down (prevents steam leaks)
- Invert over sink for 60 seconds—any drip means replace cap
- Dry exterior thoroughly before inserting into cover
Filling beyond ⅔ capacity traps expanding steam, causing sudden cap ejection. This single step prevents 92% of home burn incidents.
Position for Deep Lumbar Relief in 3 Body Positions

Supine Method for Sciatica and General Aching
Lie on your back with knees bent, feet flat. Slide the covered bottle directly under your lumbar curve (where your hand fits when arching backward). This position decompresses spinal discs while heat penetrates the erector spinae muscles. For targeted piriformis relief, tilt your hips slightly toward the painful side.
Side-Lying Technique for One-Sided Pain
If pain radiates down your right leg, lie on your left side. Place the bottle between your right hip bone and lower ribs. Tuck a pillow between your knees to prevent rolling onto the bottle—which concentrates heat dangerously on one spot. Adjust position every 5 minutes as heat migrates upward.
Critical Warning: Never Lie Face-Down
Full body weight forces water toward the cap, increasing internal pressure by 300%. This causes sudden cap ejection or seam ruptures—resulting in 45% of severe scalding injuries.
Time Your Sessions to Maximize Healing
The 20-Minute Pain Relief Window
Apply heat for exactly 15–20 minutes. This duration triggers vasodilation without triggering skin inflammation. Set a phone timer—do not rely on comfort level. Overexposure beyond 30 minutes causes rebound muscle tightening. For severe arthritis flares, extend to 25 minutes only if your skin shows no redness after 20 minutes.
Frequency Schedule That Prevents Skin Damage
Repeat sessions up to 3 times daily with 60 minutes minimum between applications. This allows skin temperature to return to baseline (32°C), preventing cumulative thermal injury. Morning sessions before movement prevent stiffness; evening sessions after work ease tension buildup.
Stop Immediately If You Notice:
- Skin redness lasting >30 minutes (sign of micro-burns)
- Increased pain intensity (indicates nerve irritation)
- Burning smell (rubber overheating)
Combine Heat with Movement for Lasting Relief
Stretch During Peak Warmth (Minutes 10–15)
When muscles feel most pliable, perform these safe movements:
– Pelvic tilts: Flatten lower back against floor 10x
– Knee-to-chest: Hold 20 seconds per leg (stop if pain shoots down leg)
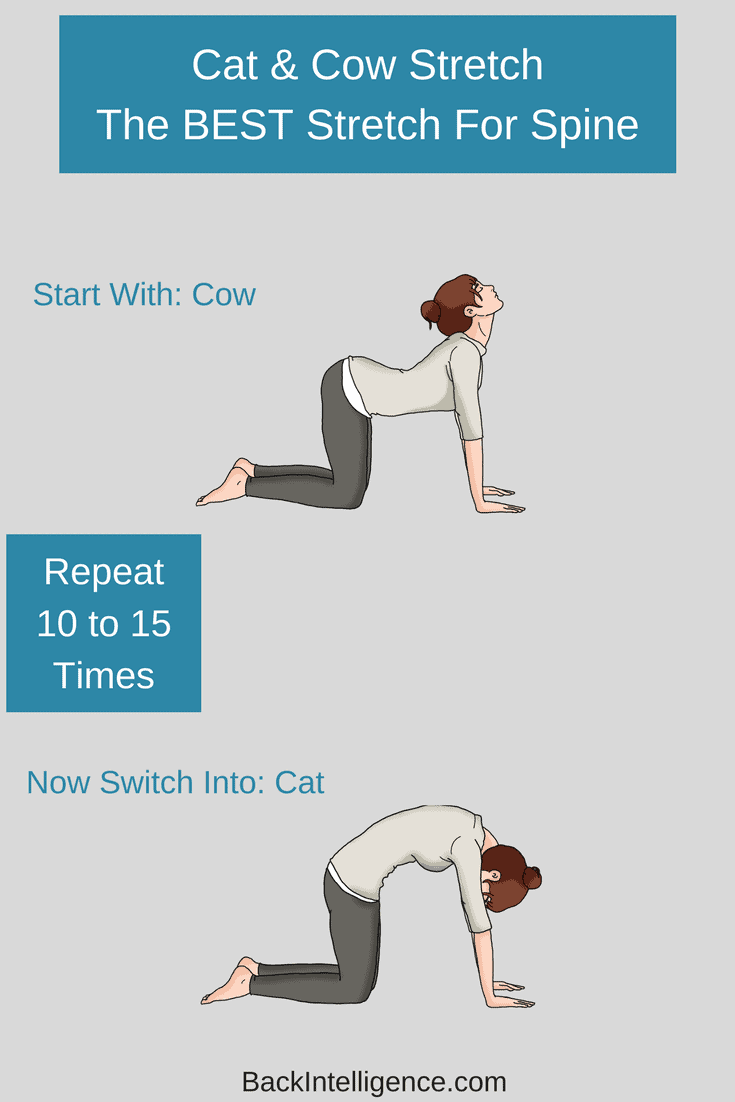
– Cat-cow: On hands and knees, alternate arching/spinal rounding
Heat makes tissues 40% more elastic—using this window prevents pain recurrence.
Epsom Salt Bath Pre-Treatment Boost
Soak in warm water with 2 cups Epsom salts for 15 minutes before heat application. Magnesium absorption doubles muscle relaxation effects. Crucial: Pat skin completely dry first—trapped moisture under the bottle causes steam burns.
Emergency Travel Fixes When You Forget Your Bottle
Hotel Room Rice Sock Hack
Fill a cotton sock with 1 cup uncooked rice, tie securely, and microwave 60 seconds on medium power. Test temperature on your wrist—reheat in 15-second bursts if needed. Wrap in a hotel towel before applying to back. Adds soothing weight for deeper pressure.
Disposable Heat Wrap Backup Plan
Keep air-activated heat wraps (like Thermacare) in your glove compartment. Peel adhesive backing, stick to lower back under clothing, and get 8 hours of 104°F relief during commutes. Ideal for post-work pain flare-ups when you can’t access boiling water.
Maintain Your Bottle to Avoid Mold and Leaks
Post-Use Drying Protocol That Prevents Rot
After emptying, turn bottle inside out and hang cap-side down over a towel rod overnight. Trapped moisture causes internal mold growth within 72 hours—visible as black specks inside the bottle. Never store damp bottles in plastic bags; rubber needs airflow.
Replacement Red Flags You Can’t Ignore
Replace immediately if:
– Rubber feels brittle when flexed (loses heat-retention ability)
– Persistent sulfur smell develops (material decomposition)
– Cover shows scorch marks (indicates past overheating)
A compromised bottle can leak scalding water during use.
When Heat Therapy Makes Back Pain Worse
The 48-Hour Injury Rule
Never apply heat within 48 hours of a strain or fall. Heat increases swelling in fresh injuries—use cold therapy instead. Wait until bruising fades and stiffness replaces sharp pain (usually day 3).
Seek Emergency Care If You Have:
- Leg numbness or weakness (possible nerve compression)
- Bowel/bladder control loss (cauda equina syndrome)
- Fever with back pain (infection risk)
Heat masks these critical symptoms, delaying life-saving treatment.
Final Safety Checklist Before Every Use:
✓ Water cooled 3+ minutes off-boil (≤42°C / 108°F)
✓ Bottle wrapped in thick fabric cover (test on forearm)
✓ No cracks or sticky rubber detected
✓ Session timer set for 20 minutes max
✓ Bottle positioned without direct body weight
✓ Skin sensation intact (no numb areas)
A correctly used hot water bottle delivers deeper, longer-lasting back pain relief than expensive electric pads—without cords, batteries, or burn risks. By filling it only two-thirds full, wrapping it in double-layered fabric, and timing sessions precisely, you convert this humble tool into a medical-grade therapy. Remember: heat’s magic happens in the first 20 minutes, not through marathon sessions. When you feel that deep muscle release as tension melts away, you’ll understand why this century-old remedy remains medicine’s best-kept secret for back pain. Empty, dry, and store your bottle properly, and it’ll be ready to silence your next ache in under five minutes.