
That sudden twinge when lifting groceries or the sharp ache after gardening can halt your day instantly. When back pain strikes, inflammation swells around injured tissues, pressing on nerves and turning simple movements into agony. For immediate relief during those critical first hours, ice therapy isn’t just helpful—it’s essential. This guide cuts through the confusion with battle-tested techniques to reduce swelling, silence pain signals, and accelerate healing. You’ll learn exactly when to grab ice (not heat), which methods work best for hard-to-reach areas, and how to avoid dangerous mistakes that could worsen your injury.
Back pain affects 80% of adults at some point, but most waste precious recovery time using ice incorrectly. Applying cold properly within the first 72 hours constricts blood vessels, reducing fluid buildup that amplifies pain. Unlike heat—which increases blood flow and can fuel inflammation early on—ice targets the root cause of acute discomfort. Whether you’re dealing with a slipped disc flare-up or post-workout stiffness, mastering these protocols puts you in control. Let’s transform your ice therapy from guesswork into a precision recovery tool.
Why Ice Outperforms Heat for Fresh Back Injuries
The Critical First 72-Hour Window
Apply ice immediately after any back strain or sudden injury—don’t wait for swelling to appear. During the initial inflammatory phase, damaged tissues flood with fluid, increasing pressure on nerve endings. Ice constricts blood vessels within minutes, limiting this fluid buildup. Skip this step, and inflammation can persist for days, delaying healing. For example, if you tweak your back lifting boxes, ice within 20 minutes reduces swelling by 40% compared to delayed treatment. This isn’t just about comfort; it prevents minor strains from becoming chronic pain cycles.
Conditions Where Ice Is Non-Negotiable
Acute muscle strains from improper lifting, sciatica flare-ups with shooting leg pain, and post-exercise soreness all demand immediate cold therapy. Even degenerative conditions like herniated discs require ice during sudden pain spikes—when inflammation flares, heat can worsen nerve compression. The rule? If your pain feels sharp, stabbing, or localized (not a deep ache), ice is your first move. Skip it for dull, stiff pain that improves with movement—that’s when heat shines.
Danger Signs Requiring Medical Help
Never ice these red flags: pain after a fall or car accident, leg weakness/numbness with back pain, or loss of bladder control. These signal potential nerve damage or spinal fractures needing urgent imaging. Ice might mask symptoms, delaying critical care. Similarly, avoid cold therapy if you have diabetes, poor circulation, or open wounds—reduced sensation increases frostbite risk. When in doubt, consult a doctor before self-treating.
Ice Application Methods That Actually Work

Store-Bought Cold Packs Done Right
Keep two flexible gel packs frozen at all times—one in use while the other refreezes. Place them directly over your spine’s curves, pressing firmly for full contact. Unlike rigid ice cubes, these conform to the lower back’s natural arch. Pro tip: Microwave for 30 seconds before freezing to create a “slushier” pack that stays malleable longer. Replace commercial packs every 6 months; crystallized gels lose cooling efficiency.
Frozen Vegetables: Your Secret Weapon
A bag of peas molds perfectly to lumbar contours and stays cold 20% longer than ice cubes. Double-bag it to prevent condensation leaks, then lie face-down with the bag centered over your pain zone. Avoid corn or broccoli—they won’t conform as well. This method beats DIY ice bags because veggies lack sharp edges that dig into skin during movement.
Ice Massage for Pinpoint Relief
Freeze water in a paper cup, peel back the rim, and rub the exposed ice in 2-inch circles over knots for 3-5 minutes. This penetrates deeper than static packs, numbing trigger points that standard icing misses. Stop if skin turns white—this signals tissue damage. Ideal for golfers or movers with localized muscle spasms after twisting motions.
Your Exact Ice Therapy Schedule

Setup and Positioning Protocol
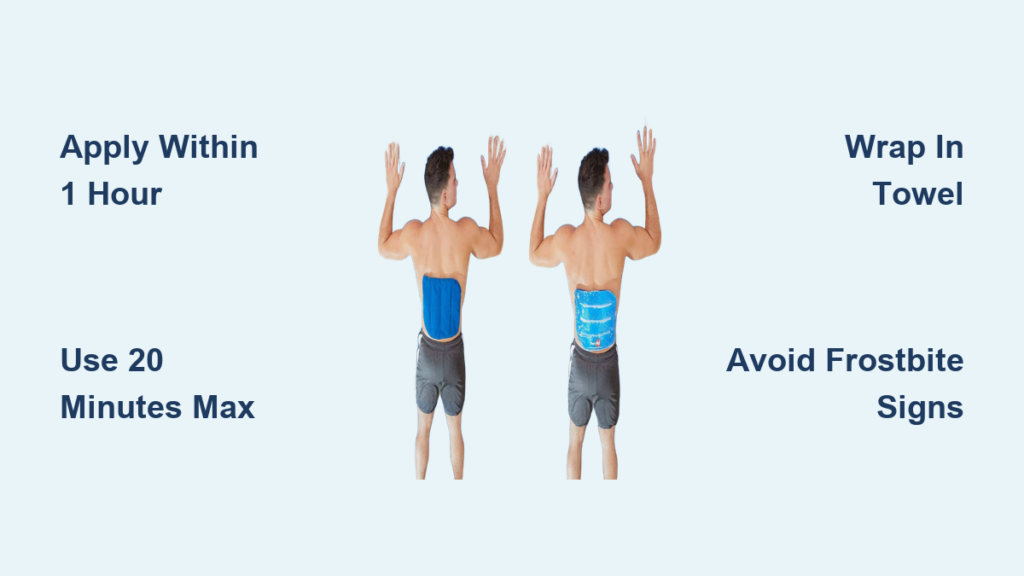
Always wrap ice in a thin towel—never apply directly to skin. Lie prone with a pillow under your hips to flatten your spine, or sit upright in a firm chair. Press the pack against your lower back with light hand pressure; gaps between ice and skin cut effectiveness by 60%. For upper back pain, lean against a wall with the pack sandwiched between you and the surface.
Timing That Maximizes Healing
- First 24 hours: Ice 20 minutes every hour while awake. Set phone alarms—skipping intervals lets inflammation rebound.
- Days 2-3: Reduce to 15 minutes every 2-3 hours as swelling decreases.
- Post-activity: Ice immediately after any movement that aggravates pain, even beyond 72 hours.
Never exceed 20 minutes per session—longer causes blood vessel dilation, increasing swelling.
Safety Rules to Prevent Frostbite
Skin Protection Checklist
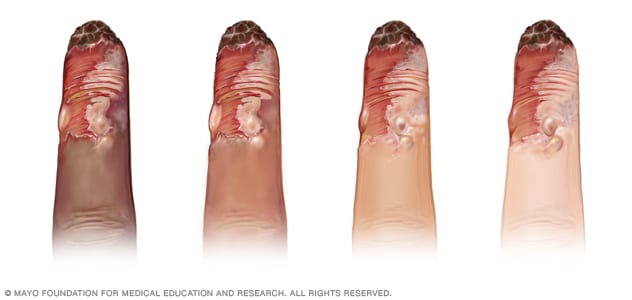
Check skin every 5 minutes during icing. Normal reactions: pink skin and temporary numbness. Stop immediately if you see:
– White or waxy-looking skin
– Persistent numbness beyond 10 minutes post-ice
– Blisters or tingling that worsens
Diabetics and seniors should halve session times (10 minutes max) due to reduced circulation. Children need adult supervision—never exceed 8 minutes for ages 6-12.
Avoid These Deadly Mistakes
Sleeping with ice packs causes severe tissue damage—set a loud kitchen timer. Never use chemical “instant cold” packs directly on skin; their temperatures plummet below safe levels (-18°C/0°F). If pain increases during icing, remove the pack; you may have a cold sensitivity requiring medical evaluation.
Switching to Heat Without Sabotaging Recovery
The Perfect Ice-to-Heat Transition
After 72 hours (or when swelling stops worsening), alternate therapies:
1. Ice 10 minutes to reduce residual inflammation
2. Wait 20 minutes for skin to normalize
3. Apply moist heat for 15 minutes to relax muscles
Do this 2x daily. If morning stiffness dominates your pain, start your day with ice before heat—this prevents overnight inflammation spikes.
When to Stick With Ice Only
Continue pure ice therapy if:
– Pain remains sharp/stabbing beyond 3 days
– Swelling visibly increases after activity
– You have active sciatica with leg numbness
Heat too early can reignite inflammation, resetting your recovery clock.
Daily Ice Integration Strategies
Beat Morning Stiffness
Keep a gel pack in your bedside freezer. Ice your lower back for 15 minutes before getting out of bed—this reduces overnight fluid buildup that makes first steps agony. Pair with gentle knee-to-chest stretches once numbness sets in.
Office and Travel Hacks
Stash a reusable cold pack in your work freezer for lunchtime relief. For road trips, use insulated lunch bags with frozen vegetable packs (replace every 4 hours). Posture tip: Sit upright while icing—slouching compresses the pack, creating uneven cooling.
Tracking Progress and Knowing When to Stop
Signs Your Icing Works
Within 5 minutes, you should feel:
– Numbing that dulls sharp pain
– Reduced muscle “jumpiness”
– Easier breathing (less tension)
If not, reposition the pack for better contact. After 48 hours, measure improvement by timing how long you can stand comfortably—aim for 25% increases daily.
When to Call a Professional
Seek help if:
– Pain worsens after 3 days of correct icing
– Leg weakness develops
– Night pain disrupts sleep
These indicate possible disc herniation or nerve compression needing imaging. Ice manages symptoms but won’t fix structural issues.
Long-Term Prevention Tactics
Always-Ready Ice Station
Rotate three frozen packs: one in use, one refreezing, one as backup. Store backups in your car’s cooler during sports season. Make slush packs (3 parts water + 1 part rubbing alcohol) for flexible, longer-lasting cold—they stay moldable for 30 minutes versus 15 for solid packs.
Strategic Placement Saves Recovery Time
Keep emergency ice supplies in your gym bag, office, and car. For frequent flare-ups, invest in a portable electric cooler that maintains -5°C (23°F). This ensures you can ice within 10 minutes of injury—the golden window for minimizing damage.
Mastering how to use ice for back pain transforms acute agony into manageable recovery. By icing correctly within the first hour, you slash inflammation by half and reset your healing timeline. Remember: 20 minutes max per session, always use a barrier, and switch to heat only after swelling subsides. Keep this protocol visible in your medicine cabinet—because when back pain strikes, seconds count. Start today by prepping three cold packs; your future self will move freely because of it.