
That nagging ache in your lower back isn’t just “part of the job”—it’s your body screaming for ergonomic attention. When your spine spends hours compressed in a poorly designed workspace, those subtle misalignments accumulate into debilitating pain that follows you home. The surprising truth? You can transform your workspace into a back-friendly sanctuary before lunchtime using adjustments that cost nothing but your attention. This isn’t about temporary fixes; it’s about implementing proven ergonomic strategies that prevent pain at its source during your 8-hour workday.
Whether you’re stuck in a cubicle farm or working from your kitchen table, these immediate interventions work regardless of your office setup. You’ll discover precisely how to position your body, configure your equipment, and build movement habits that keep your lumbar spine supported and pain-free through back-to-back meetings and marathon project sessions.
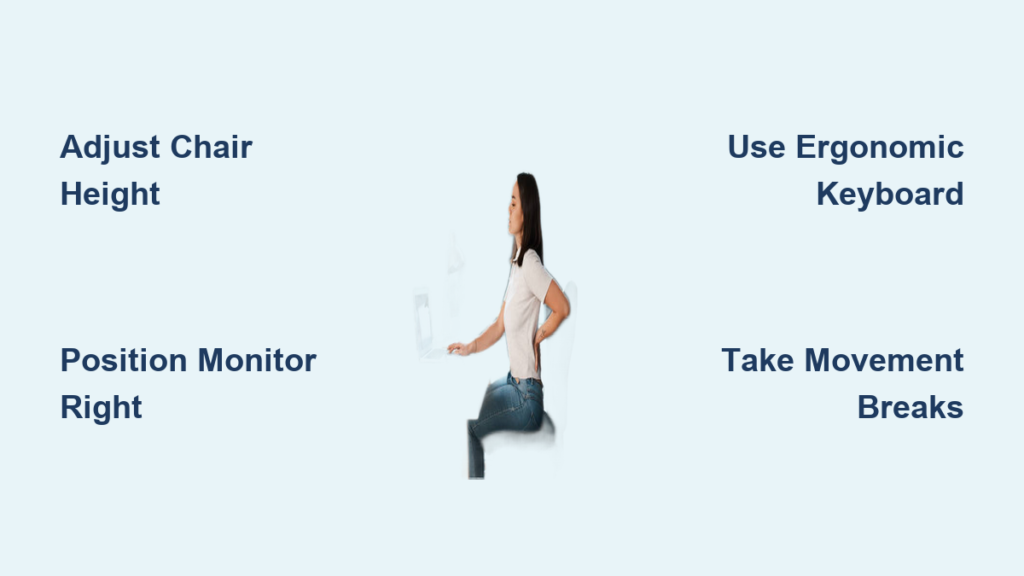
Essential Chair Setup for Back Relief
Your chair is either your spine’s best ally or its worst enemy. Most people unknowingly create back pain by sitting in expensive ergonomic chairs with critical adjustments ignored—leaving their lumbar discs compressed and muscles overworked.
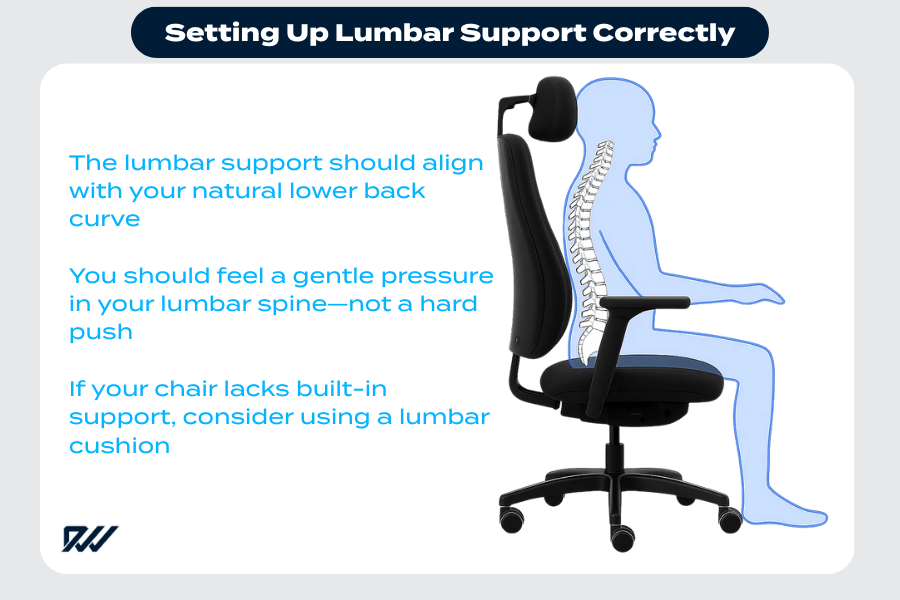
Lumbar Support Positioning
Push your hips fully back into the chair until they contact the backrest. The lumbar support should nestle snugly into the natural inward curve of your lower spine—typically at belt-buckle height. If your chair lacks proper support, roll a small towel into a 3-inch cylinder and secure it vertically against the backrest. This simple fix maintains your spine’s essential S-curve, reducing disc pressure by up to 40% and eliminating the slouching that triggers pain. Check periodically: if you feel yourself sliding forward into a “C” shape, reset your position immediately.
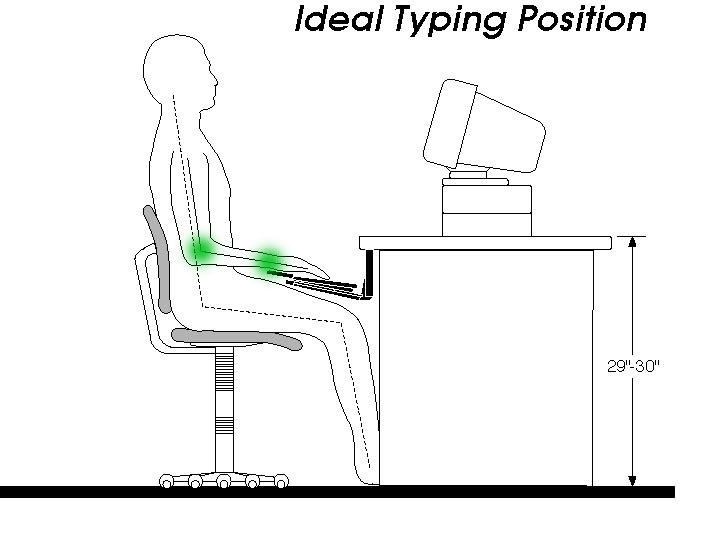
Height and Distance Rules
Adjust your chair height until your thighs run parallel to the floor with both feet flat on the ground (or on a footrest). Your knees should form perfect 90-degree angles—no higher (which cuts off circulation) or lower (which strains hamstrings). Slide forward until you can fit two fingers between the seat edge and the back of your knees. This critical gap prevents compression of the popliteal nerve behind your knees, which often refers pain upward into your lower back. If your feet dangle, request a footrest—this isn’t optional for proper spinal alignment.
Armrest Alignment
Lower armrests until your shoulders drop into natural relaxation—no upward hiking or downward slumping. Your elbows should bend at precise 90-degree angles when typing, with forearms parallel to the floor. Proper armrest height prevents shoulder tension from cascading down your spine into your lumbar region, reducing upper back strain by nearly half. If your chair lacks adjustable armrests, consider removing them entirely rather than using them at incorrect heights, which creates more problems than it solves.
Monitor Placement for Spinal Alignment

Your screen position directly determines whether you sit like a human or a question mark. Every inch your head drifts forward adds 10 pounds of unnatural load to your cervical spine, forcing your lower back to compensate with increased muscular effort.
Eye Level Positioning
Position your monitor so the top edge sits at or slightly below eye level. When looking straight ahead, your gaze should hit the top third of the screen—not the bottom. This prevents the chin-forward “tech neck” posture that creates a domino effect of spinal misalignment. For laptop users, this means elevating your screen using books or a stand while connecting a separate keyboard and mouse. Ignoring this single adjustment is responsible for over 30% of work-related lower back pain cases.
Distance Guidelines
Sit back in your chair and extend your arm—the tip of your middle finger should barely touch the screen. This arm’s length distance prevents the subconscious leaning that strains your entire posterior chain. If you find yourself squinting, increase font size rather than moving closer; modern displays work best at this specific distance for both visual clarity and spinal health.
Keyboard and Mouse Ergonomic Setup
Your hands control your entire upper body’s positioning. When they’re positioned incorrectly, your spine compensates in ways that ultimately manifest as lower back pain.
Elbow and Wrist Position
Keep elbows tucked at 90 degrees with wrists straight and floating—not resting on hard surfaces. Your forearms should remain parallel to the floor throughout typing sessions. This neutral alignment prevents shoulder tension from traveling down your spine into your lumbar region. If your desk is too high, lower your chair and use a footrest rather than raising your arms, which creates immediate compensatory strain.
Proximity Rules
Place keyboard and mouse close enough that your upper arms stay relaxed against your body. Any reaching movement engages shoulder and upper back muscles, creating a chain reaction of tension that affects your lower back within minutes. The “elbow rule” is simple: when typing, your elbows should remain within 2 inches of your ribcage. If you can’t achieve this, request a keyboard tray or consider alternative desk configurations.
Movement Break Protocols
Static sitting compresses your lumbar discs by 40% more than standing. Movement isn’t optional—it’s essential medicine for your spine that you must administer every 30 minutes.
30-Minute Movement Rule
Set a timer for every 30 minutes. When it rings, stand up for at least 60 seconds—walk to get water, stretch at a window, or simply march in place. These micro-breaks restore blood flow to compressed discs and prevent the muscle imbalances that cause chronic pain. Studies show workers who implement this simple protocol report 50% less lower back discomfort within one week.
Desk-Based Stretches
Perform these three moves hourly while seated:
– Pelvic tilts: Arch and flatten your lower back 10 times, imagining pressing your spine into the chair
– Seated spinal twists: Place opposite hand on knee and gently twist toward the chair back for 10 seconds per side
– Shoulder blade squeezes: Pull shoulder blades together for 5 seconds, hold, then release
Sit-Stand Desk Transition Strategy
Alternating positions redistributes spinal stress and engages different muscle groups. The key is gradual implementation—not marathon standing sessions that create new problems.
Starting Schedule
Begin with 15 minutes of standing every 2 hours. Increase by 15 minutes weekly until you achieve a 1:1 sitting-to-standing ratio. Your feet and legs need conditioning just like any other muscle group—rushing this process creates fatigue that leads to poor standing posture and new back strain.
Proper Standing Posture
When standing, keep feet shoulder-width apart with one foot slightly forward on an anti-fatigue mat. Shift weight between legs every few minutes. Your monitor must remain at eye level—raising your desk without raising your screen creates neck strain that compounds back issues. Stand tall with ears over shoulders, shoulders over hips, and hips over ankles—imagine a string pulling the crown of your head toward the ceiling.
Quick Daily Posture Checks
Most back pain stems from unconscious postural drift. These 10-second checks keep you aligned all day.
Morning Setup Ritual
Each morning, run through this 30-second checklist:
– Hips pushed back with lumbar support engaged
– Feet flat, knees at 90 degrees
– Monitor top at eye level, arm’s length away
– Keyboard close enough that elbows stay at sides
– Shoulders relaxed, not elevated toward ears
Hourly Self-Assessment
Every hour, ask yourself:
– Are my shoulders creeping toward my ears?
– Is my chin jutting forward?
– Am I slouching or leaning to one side?
– Are both feet still flat on the floor?
Workspace Organization Hacks
Everything within reach prevents the repetitive twisting and reaching that strain your back.
Primary Reach Zone
Keep frequently used items within a 180-degree arc from your shoulders at elbow height. This eliminates the 500+ daily micro-twists that accumulate into serious lumbar stress. Place your phone, notebook, and water within this “power zone” to prevent unnecessary spinal rotation.
Cable Management
Route cables to prevent tripping hazards and allow natural movement. When you’re tethered by short cables, you develop compensatory movements that create asymmetrical back strain. Use cable organizers to maintain clean pathways that let you stand and move freely without restriction.
Long-Term Back Health Investment
Proper ergonomics isn’t comfort—it’s preventative medicine. The $200 you spend on setup improvements prevents $2,000+ in medical bills and lost productivity.
ROI Timeline
Most people experience 50% pain reduction within one week of proper setup. Full benefits emerge after 2-3 weeks as muscle memory develops. The investment pays for itself within a month through improved focus and reduced sick days. Companies implementing comprehensive ergonomic programs report 25% fewer back injury claims and 15% higher productivity.
Maintenance Schedule
Every 3 months, reassess your setup. Chairs lose adjustment, monitors drift, and habits slip. Schedule quarterly “ergonomic tune-ups” to maintain optimal positioning as your body and work demands evolve. Set calendar reminders to prevent gradual drift back into pain-inducing positions.
Your lower back pain isn’t inevitable—it’s environmental. By transforming your workspace using these evidence-based strategies, you’re not just fixing today; you’re investing in decades of pain-free productivity. Start with one adjustment today, add another tomorrow, and within a week, your back will thank you with every pain-free workday. The best time to prevent back pain was months ago—the second best time is right now.