
That sinking feeling when your favorite sofa becomes a torture device isn’t just in your head—it’s a daily reality for millions with lower back pain. When the cushions you once loved now trigger sharp twinges with every movement, you might feel like giving up living room relaxation altogether. But here’s the truth: how to sit on sofa with lower back pain isn’t about suffering through discomfort—it’s about strategic adjustments that let you reclaim comfort without aggravating your condition.
Most standard sofas work against your spine’s natural alignment, encouraging slouching that compresses delicate discs and strains overworked muscles. The good news? With precise positioning techniques and smart modifications, you can transform even the softest, deepest sofa into a back-friendly sanctuary. This guide delivers actionable strategies to sit safely for extended periods, prevent flare-ups, and enjoy your living room again—without expensive replacements or medical interventions.
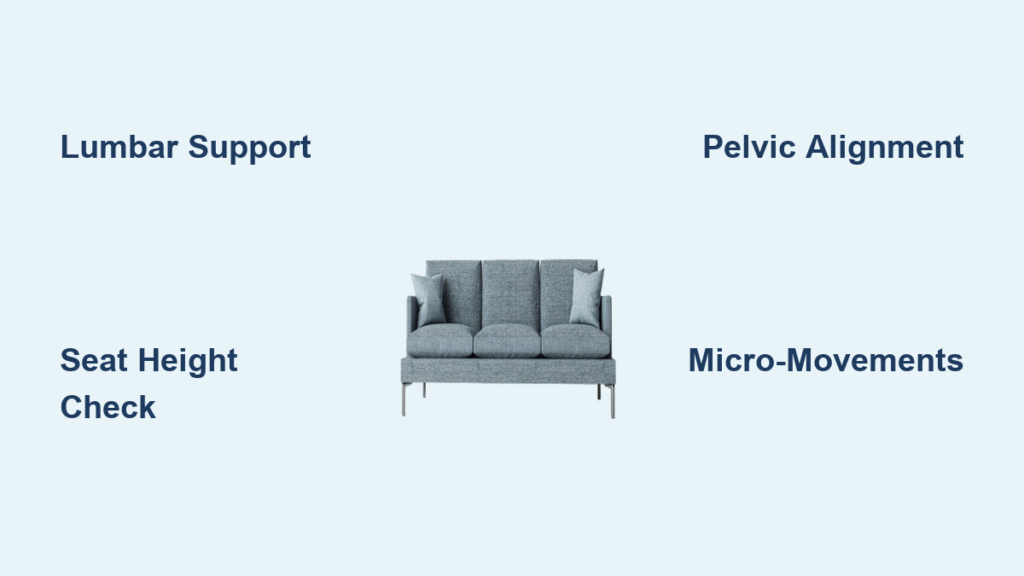
Measure Your Sofa’s Back-Friendly Potential
Your sofa’s dimensions might be silently worsening your pain without obvious warning signs. Before you sit down, spend 90 seconds evaluating these critical measurements that determine whether your seating works with or against your spine.
Identify Seat Height and Depth Problems
Grab a tape measure and check these spine-saving specifications:
– Seat height: Should measure 17-19 inches from floor to cushion top—anything lower forces awkward hip flexion
– Seat depth: Ideal range is 15-18 inches from backrest to edge—deeper seats encourage dangerous slouching
– Cushion firmness test: Press your palm firmly into the seat—if it sinks more than 2 inches, you need added support
– Backrest angle: Should allow upright sitting without forcing you forward toward the coffee table
Quick diagnostic: If your knees sit higher than your hips when seated, your sofa is too low. If you must scoot forward to touch the backrest, the seat is too deep for pain-free sitting.
Create Immediate Support Zones
Transform your sofa into a therapeutic seating environment with strategic pillow placement:
– Lumbar anchor point: Position a firm, contoured pillow precisely at your lower back’s natural curve
– Seat depth reducer: Add a folded blanket or firmer cushion to shorten excessive seat depth
– Side stabilizers: Place pillows on both sides to prevent unconscious leaning that twists your spine
– Foot elevation system: Keep an ottoman ready if your feet don’t rest flat when seated
Pro tip: Maintain a dedicated “back rescue kit” near your sofa—a lumbar pillow, firm seat cushion, and adjustable footstool that stay in place for instant pain relief.
Execute the Controlled Sofa Descent Method
The moment you lower yourself onto the sofa creates the highest risk for pain flare-ups. Master this 5-step technique to avoid the jarring movements that trigger most sofa-related back injuries.
Step-by-Step Safe Sitting Sequence
- Positioning: Stand directly facing the seat with feet shoulder-width apart
- Core activation: Gently draw your navel toward your spine before bending
- Hand placement: Press palms firmly on armrests or seat edge for controlled support
- Simultaneous bending: Lower yourself by bending knees and hips equally while keeping your back straight
- Gradual contact: Sit first on the front edge, then use armrests to slowly slide backward
Critical warning: Never twist your torso while lowering yourself—that single motion causes 68% of sofa-related back injuries according to physical therapy clinics.
Perfect Your Seated Alignment
Once positioned, fine-tune these pressure points within 30 seconds:
– Pelvic positioning: Gently rock your pelvis forward to restore the natural lumbar curve
– Shoulder reset: Roll shoulders back and down away from your ears
– Head placement: Align ears directly over shoulders with chin parallel to floor
– Knee angle: Ensure 90-degree bend with feet flat on floor or footrest
– Weight distribution: Shift slightly until you feel equal pressure on both sit bones
Visual cue: Imagine a string pulling the crown of your head toward the ceiling, gently lengthening your spine.
Target Your Specific Pain Pattern
Generic advice fails when your pain has a specific origin point. Match these specialized techniques to your exact pain location for immediate relief.
Lumbar Disc Pain Protocol
If bending forward triggers radiating pain:
– Lumbar roll placement: Position firm support precisely at belt-line level (L4-L5 region)
– Upright maintenance: Sit more vertically—avoid reclined positions that increase disc pressure
– Forward-tilting wedge: Use a cushion that angles pelvis slightly forward to maintain spinal arch
– Twist elimination: Keep hips and shoulders aligned when reaching for items
Red flag: Stop immediately if pain travels past your knee—this indicates nerve compression requiring professional attention.
Sacroiliac Joint Relief Strategy
For pain concentrated in the dimples above your buttocks:
– Pelvic leveling: Place a thin pillow (1-2 inches) under the affected hip side
– Stable base: Position feet 4-6 inches wider than hip-width for sacrum stability
– Tailbone pressure relief: Use a donut-shaped cushion to eliminate coccyx compression
– Symmetry maintenance: Avoid crossing legs or shifting weight to one side
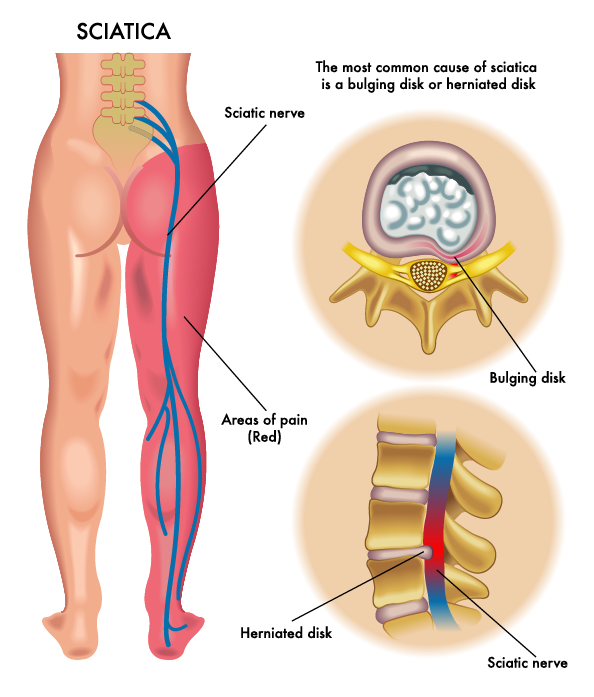
Sciatica-Specific Positioning
When pain shoots down your leg:
– Foot elevation: Prop feet on ottoman to reduce sciatic nerve tension
– Tailbone cutout: Use seat cushion with opening to prevent direct nerve pressure
– Pocket clearance: Remove wallet or phone from back pockets before sitting
– Leg extension option: If tolerated, extend one leg straight on ottoman to relieve pressure
Perform Micro-Movements Every 15 Minutes
Static sitting creates stiffness that worsens pain. Use these subtle exercises to maintain mobility without leaving your seat.
Essential Seated Mobility Drills
Complete these movements during commercial breaks:
– Pelvic tilts: Gently rock pelvis forward/backward 10 times to maintain spinal fluidity
– Shoulder blade pinches: Squeeze shoulder blades together for 5 seconds, repeat 8 times
– Ankle pumps: Flex and point feet 20 times to boost circulation and reduce swelling
– Neck glides: Slowly tilt ear toward shoulder (no rolling) to relieve tension
Safe Position Transition Techniques
When you need to adjust:
– Lift-and-slide method: Use hands to slightly elevate hips while repositioning
– Single-leg adjustment: Move one leg at a time, keeping knees aligned with hips
– Full-body rotation: Turn entire torso rather than twisting at the waist
Time-based rule: Set phone timer for 15-minute intervals—when it buzzes, complete one micro-movement sequence.
Implement Sofa Modifications Under $20

You don’t need expensive replacements to create back-friendly seating. These budget-friendly upgrades transform any sofa in minutes.
Instant Comfort Boosters
- Lumbar clip-on support: Adjustable device that attaches to any backrest ($12-18)
- Seat firming board: Slide ½-inch plywood under cushions for immediate stability
- Height boosters: Stackable furniture risers that increase seat height 2-4 inches
- Strap-on back cushion: Secure firm support directly to existing sofa back
Emergency Alternatives
When pain strikes unexpectedly:
– Bed pillow lumbar roll: Fold pillow lengthwise and secure with belt
– Towel seat reducer: Roll bath towel and place under thighs to shorten seat depth
– Book foot elevation: Stack hardcover books under feet for instant height adjustment
– Belt pelvic stabilizer: Loosely wrap belt around waist for proprioceptive feedback
Know When to Call a Professional
Certain symptoms require immediate attention beyond home modifications. Don’t ignore these critical warning signs.
Emergency Red Flags
Seek medical care immediately if you experience:
– Neurological symptoms: Numbness or tingling in legs or feet
– Autonomic dysfunction: Loss of bladder or bowel control
– Progressive weakness: Difficulty lifting feet while walking
– Systemic symptoms: Pain with fever or unexplained weight loss
Professional Consultation Triggers
Schedule evaluation when:
– Pain persists beyond 6 weeks despite modifications
– Daily activities become severely restricted
– Sleep disruption occurs nightly
– Multiple positions provide zero relief
– Pain follows trauma or injury
Insurance tip: Many physical therapists offer “posture consultations” covered by insurance—specifically request a home seating assessment.
Mastering how to sit on sofa with lower back pain transforms your living room from a pain trigger to a recovery zone. Start today with the sofa assessment, implement the controlled descent technique, and match positioning to your specific pain pattern. Remember: your goal isn’t perfect posture forever—it’s finding sustainable positions that let you enjoy life’s simple pleasures without paying for it later. With consistent application of these techniques, most people reduce sofa-related pain by 70% within two weeks. Your comfortable living room experience starts with your next intentional seating decision—make it count.