
That nagging ache in your lower back can turn simple movements into painful challenges. Whether you’re dealing with sciatica flare-ups, stiff spinal segments, or acute discomfort after sitting too long, a simple yoga block might be your most accessible pain relief tool. This therapeutic approach combines gentle spinal decompression with supported yoga poses, creating space between vertebrae while relieving pressure on sensitive discs. Best of all, you can practice these techniques at home with minimal equipment—no expensive treatments or complicated routines required. Within minutes of your first session, you’ll likely feel noticeable relief as your spine begins to decompress.
Your Lower Back Pain Relief Toolkit: What You Need
Before diving into the techniques, gather these essential items to ensure safe and effective practice. A nonskid yoga mat provides the stable foundation you need, preventing slips during positioning. Your yoga block—available in foam or cork varieties—should be within arm’s reach as you begin. Foam offers more cushioning for sensitive backs, while cork provides firmer support if you’re heavier or need more stability. Wear comfortable, non-restrictive clothing that allows full movement without binding at the waist. Choose a quiet space with enough room to move freely in all directions—your living room floor works perfectly.
Daily 5-Minute Spinal Decompression Routine for Instant Relief
This sequence forms the cornerstone of yoga block therapy for lower back pain. When practiced daily, it systematically creates space between vertebrae while reducing disc pressure. Unlike aggressive stretching that can worsen pain, this gentle approach works with your body’s natural alignment.
Why This 3-Position Sequence Creates Space in Your Spine
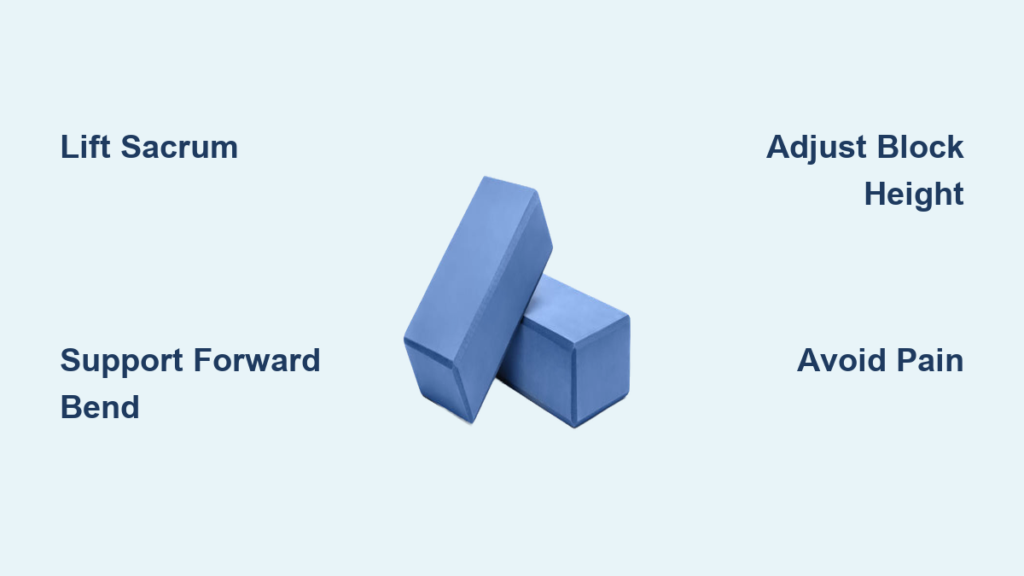
Start by lying on your back with knees bent and feet flat on the floor. Place the yoga block horizontally under your sacrum—the flat triangular bone at the base of your spine. The block gently lifts your pelvis, creating immediate space between vertebrae that relieves pressure on compressed discs. As you breathe deeply, feel the subtle separation happening along your entire lower spine. For enhanced benefits, gradually extend your arms overhead while keeping your lower body relaxed. This creates opposing directional stretch—from extended fingertips through your spine to grounded feet—maximizing decompression without strain.
How to Adjust Block Height for Maximum Comfort
Beginners: Start with the block on its lowest height setting (typically 3 inches). Hold for 3-5 minutes while breathing deeply into your lower back.
Intermediate practitioners: Use medium height (4.5 inches) and hold for 5-10 minutes. You should feel gentle traction without discomfort.
Advanced users: Try the highest setting (6 inches) but only if previous levels feel comfortable. Never force yourself higher—your body will signal when it’s ready for progression.
Critical warning: If you experience sharp pain, numbness, or tingling, immediately remove the block and lower yourself to the floor. Discomfort should never exceed a 3 on a 10-point scale.
Why Standard Forward Bends Worsen Your Back Pain
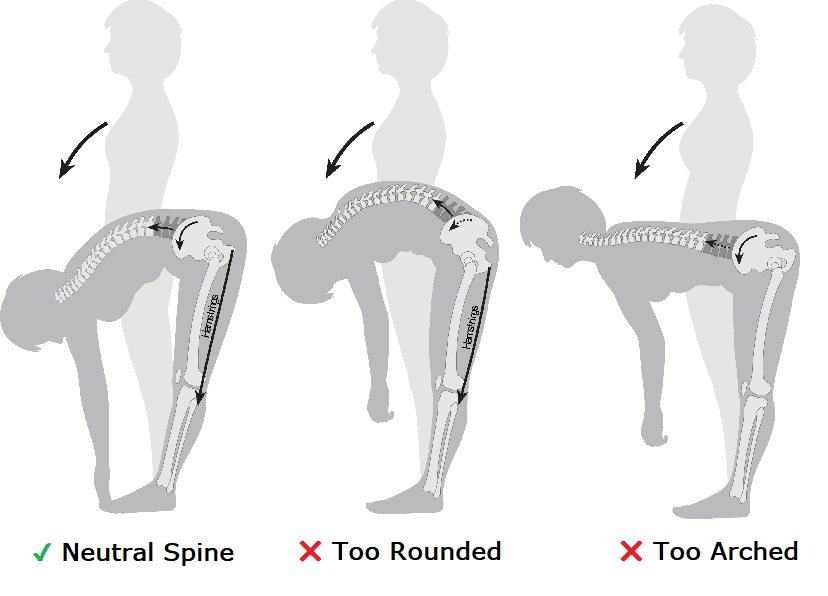
Most people unknowingly exacerbate their lower back pain through traditional forward bends. Standard yoga demonstrations often show practitioners folded completely in half with nose touching knees and perfectly straight legs—a position that’s neither realistic nor healthy for most bodies. This extreme positioning risks serious damage including lumbar disc injury from excessive rounding, sacroiliac joint damage from forced forward motion, and hip joint impingement from mechanical stress.
How to Fix Your Forward Bend with a Yoga Block

Using a yoga block transforms this potentially harmful pose into therapeutic relief. By supporting your hands at the appropriate height, the block redistributes weight from your vulnerable lower back to your stable hands and arms. This simple adjustment protects your sacroiliac joints through proper weight distribution while enabling deeper breathing by reducing torso compression. The result? A perfect balance between effort in your grounded legs and ease in your relaxed upper body.
Step-by-Step: Block-Assisted Standing Forward Bend Without Strain
- Position yourself on a nonskid mat with feet hip-width apart
- Place the block directly in front of you at medium height
- Initiate from your pelvis—allow it to tilt forward naturally as you bend
- Bend your knees when pelvic movement stops (this is crucial!)
- Place hands firmly on the block, pressing down to support torso weight
- Release your head and neck to follow your spine’s natural curve
- Hold for 5-10 deep breaths, focusing on expansion in your back body
Safe exit strategy: Before rising, bend knees deeply, rise halfway to rest elbows on knees, then complete your return to standing. This graduated approach prevents dizziness and protects your spine during transitions. Repeat this sequence 2-3 times for optimal relief.
3 Critical Mistakes That Make Your Back Pain Worse
Never force the fold—pain means you’re pushing beyond your current flexibility. Your body will adapt with consistent practice, but rushing causes injury.
Don’t lock your knees during forward bends. Maintain a micro-bend to protect joint integrity and allow proper pelvic movement.
Avoid lifting your head to look forward while folded. Let it hang naturally without strain to maintain spinal alignment.
Pain scale guidelines: Continue if pain is 0-3/10, reduce intensity if 4-6/10, and stop immediately if 7-10/10. Your comfort threshold guides safe progression.
Beyond Pain Relief: 5 Unexpected Benefits of Block Therapy
Regular practice delivers surprising secondary benefits that enhance your overall wellbeing. The gentle forward fold position activates your parasympathetic nervous system, creating immediate calming effects that reduce anxiety and mental fatigue. Many practitioners report improved digestion from the gentle abdominal compression that stimulates internal organs. The rhythmic breathing required during these poses naturally lowers heart rate and blood pressure. Women experiencing menopause find relief from hot flashes and sleep disturbances. Most significantly, when practiced before bedtime, these techniques prepare your body for deeper, more restorative sleep—breaking the pain-sleep deprivation cycle that often worsens chronic back issues.
Your 4-Week Progression Plan for Lasting Results
Week 1-2: Safe Foundation Building
Focus exclusively on proper alignment and gentle stretching. Use the highest block setting for all poses and keep hold times short (3-5 minutes for decompression, 5 breaths for forward bends). Practice daily for just 5-7 minutes total. Your primary goal is establishing correct form without triggering pain. If any position causes discomfort beyond mild stretching sensation, return to a lower block height immediately.
Week 3-4: Deepening Your Practice
Gradually lower block height as your flexibility improves and pain decreases. Extend hold times to 8-10 breaths for forward bends and 7-10 minutes for decompression sequences. Add one additional repetition to each sequence. Introduce gentle spinal twists between forward bends for comprehensive spinal care—always keeping movements small and controlled. By the end of week four, you should notice significant improvements in daily movement and reduced reliance on pain medication.
Daily Integration: Morning, Evening, and Work Break Routines
Morning routine: Begin with 5 minutes of spinal decompression upon waking, followed by gentle cat-cow stretches. Avoid forward bends immediately upon rising when discs are most hydrated.
Evening practice: Perform your forward bend sequence before bed using the lowest block height for maximum relaxation. Hold poses longer (10-15 breaths) to prepare your body for sleep.
Work break relief: At your desk, perform a standing forward bend using a sturdy box or stack of books as a block substitute. Hold for 3-5 breaths, repeating 2-3 times hourly to prevent stiffness buildup.
Final Takeaways: Your Path to Pain-Free Movement
Your yoga block isn’t just a prop—it’s a precision therapeutic tool that transforms potentially harmful movements into healing practices. Consistent daily use, even for just 5-10 minutes, delivers more relief than occasional intensive sessions. Start conservatively with the highest block setting, progress gradually based on your body’s feedback, and never push through pain. While these techniques help most people with mechanical back pain, individual conditions vary significantly. If pain persists beyond two weeks of consistent practice, worsens, or includes symptoms like leg weakness or numbness, consult a healthcare provider familiar with therapeutic yoga applications. With proper use, your yoga block can become your most trusted ally in maintaining a pain-free, mobile spine for years to come.