
That sharp twinge when tying your shoes. The constant ache that steals your sleep. If back pain has hijacked your life, you’ve likely tried pills, massages, and hot packs with fleeting relief. What if the solution lies in flipping your perspective—literally? Inversion therapy creates crucial space between compressed vertebrae, giving herniated discs room to retract and relieving pressure on pinched nerves. This isn’t just temporary relief—it’s strategic spinal decompression using gravity as your ally. But without proper technique, you risk injury instead of healing. I’ll show you exactly how to use an inversion table for back pain safely and effectively, including the critical safety checks most beginners skip and precise protocols for your specific condition.
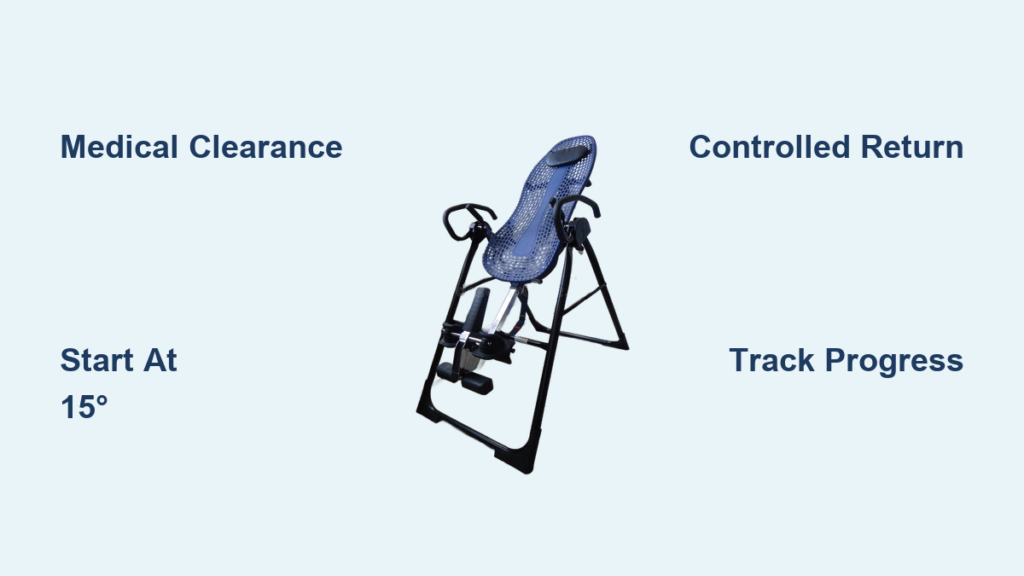
Stop Before You Flip: Medical Clearance Non-Negotiables
Disqualifying Health Conditions That Demand Doctor Approval
Don’t touch an inversion table until you’ve confirmed these red flags aren’t present. Hypertension above 140 systolic or glaucoma can cause dangerous pressure spikes during inversion. Retinal detachment history or recent strokes make blood flow changes potentially catastrophic. If you’re pregnant, take blood thinners, or have severe osteoporosis (T-score below -2.5), inversion could trigger emergencies. Even seemingly minor issues like vertigo or abdominal hernias require specialist clearance. Your physical therapist should sign off before your first session—this isn’t optional paperwork but your safety net.
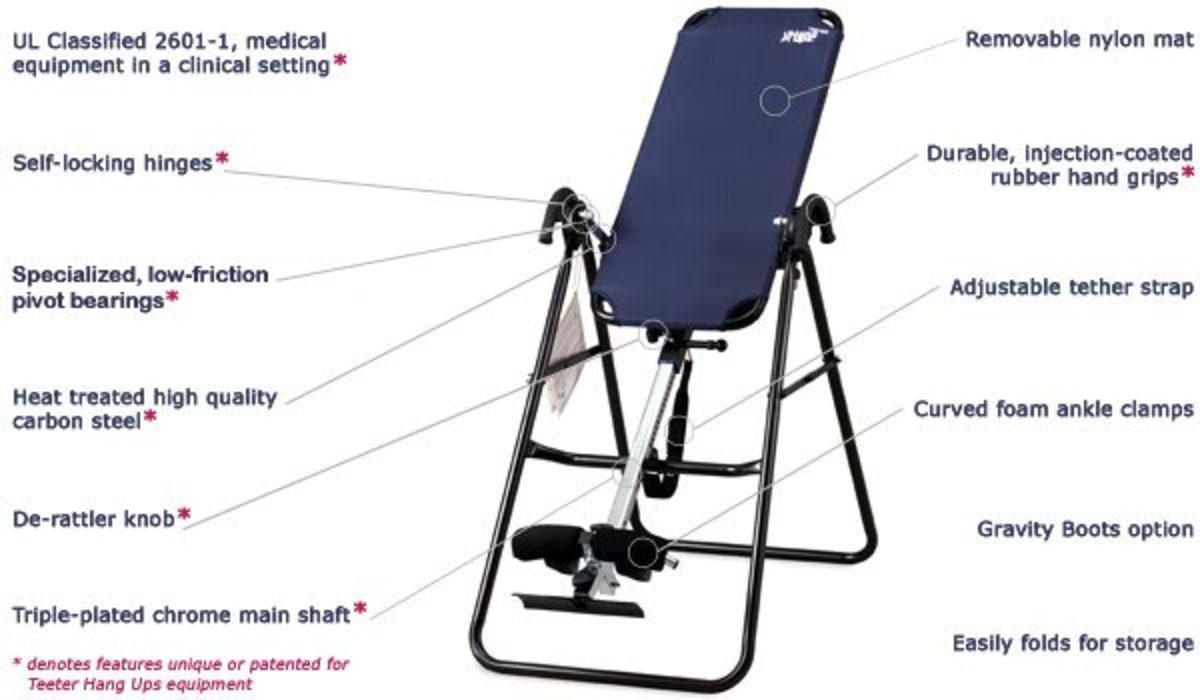
Selecting Your Inversion Table: Critical Safety Features

Buying the wrong table risks injury. Verify weight capacity exceeds your actual weight by 20% (most support 250-350 lbs). Height adjustment must cover your range—standard models fit 5’0″ to 6’6″. Skip uncertified models; demand UL, CE, or ASTM safety certifications visible on the frame. Graduated angle settings from 15° to 90° let you progress safely, while padded ankle locks with dual safety mechanisms prevent accidental release. Test the table in-store: bounce gently to check stability and ensure the ankle clamps close with audible clicks.
Perfect Your First Inversion: Zero-to-Safe Technique
Precise Setup Sequence for Pain-Free Sessions
- Adjust height: Set the main shaft so ankle clamps sit 1-2 inches above your ankle bones when standing
- Sock up: Wear non-slip athletic socks to prevent foot slippage
- Lock in: Slide feet between front/rear supports, close clamps until snug (one finger should fit underneath)
- Position: Lean back fully, arms crossed over chest to stabilize your spine
Critical mistake: Placing ankles too high in clamps causes nerve compression. Your ankle bone should sit level with the clamp’s top edge—not buried in padding.
Angle Progression That Prevents Injury
Weeks 1-2: 15-30° Incline
– Hold 30-120 seconds max, 2-3x daily
– Expect mild lower back stretching and slight head rush (normal)
– Stop immediately if pain increases
Weeks 3-4: 45-60° Incline
– Extend to 3-5 minutes, 1-2x daily
– Add gentle arm circles to enhance decompression
– Breathe deeply through nose during descent
Week 5+: 60-90° Full Inversion
– Limit to 5-10 minutes once daily
– Try partial sit-ups (lift head/chest only) for targeted traction
– Never exceed 10 minutes—over-inversion strains ligaments
Controlled Return: Avoiding Post-Inversion Dizziness
Rushing upright causes dangerous blood pressure spikes. Engage your core and push with palms against the table to control ascent speed. Pause at 30° for 10-15 seconds to let your equilibrium adjust. Remain fully upright for 30-60 seconds before releasing ankle locks—this prevents falls from blood pooling. If dizziness hits, immediately return to 30° and wait it out. Always have a spotter during your first 10 sessions.
Condition-Specific Protocols for Real Results
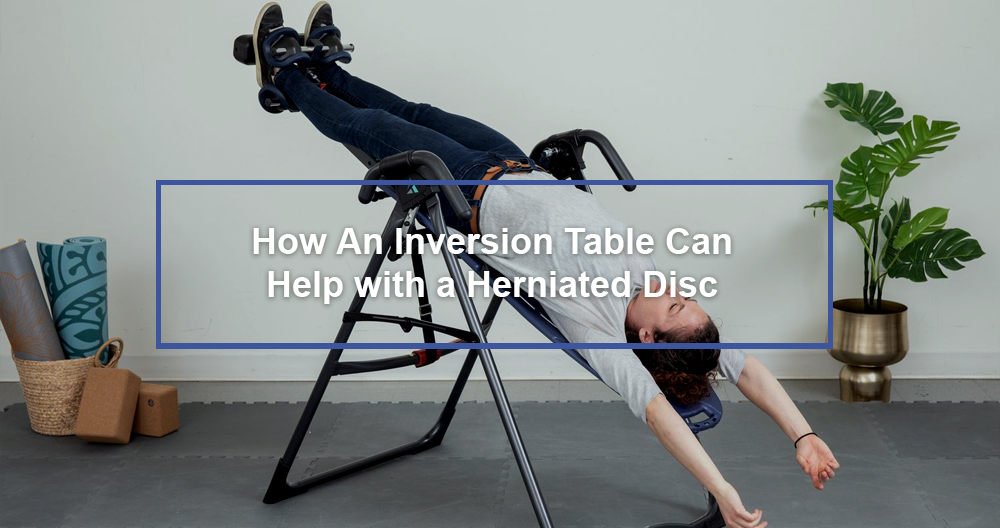
Herniated Discs: Targeted Decompression Strategy
Invert at 30-45° for 3-5 minutes while performing gentle rocking motions (tilt knees side-to-side). This creates negative intradiscal pressure to draw bulging material back toward the disc center. During acute flare-ups, do 2-3 sessions daily but never exceed 5 minutes per session. Pair with post-inversion walking—the decompression effect lasts 45-90 minutes, so move immediately to lock in spinal space.
Sciatica Relief: Nerve Gliding Technique
Start at 15° for just 60 seconds during week one. As tolerance builds, increase to 45° by week three. While inverted, rotate legs outward (knees apart, feet together) to open the sciatic nerve pathway through the piriformis muscle. Hold each rotation for 10 seconds, repeating 3x per session. Never force rotations—if shooting pain occurs, return upright immediately.
Muscle Tension Emergency Fix
For sudden lower back spasms: Apply heat for 15 minutes pre-inversion, then invert at 30-60° for 5 minutes while stretching arms overhead. The combination of heat and traction melts stubborn knots faster than massage alone. Pro tip: Sip 8oz water 30 minutes before to hydrate discs—dehydrated discs resist decompression.
Emergency Warning Signs You Must Recognize
Immediate Stop Indicators
Pain spikes exceeding 2 points on a 0-10 scale signal dangerous strain. New leg numbness or foot weakness means nerve compression is worsening. Vision blurring or throbbing headaches indicate dangerous blood pressure changes. If any occur, initiate controlled return—do not wait. Persistent dizziness lasting over 5 minutes post-session requires medical evaluation before continuing.
Stuck-Inversion Emergency Protocol
If ankle locks jam (rare but critical): Stay calm and take deep breaths. Push palms against table to create rocking momentum toward upright. If unsuccessful after 3 attempts, call for help—never kick violently. Practice manual ankle release before your first session so you know exactly where the emergency lever sits. Always keep your phone within arm’s reach during sessions.
Maximizing Long-Term Results: The Maintenance Formula
Daily Tracking That Shows Real Progress
Rate these before and after every session:
– Pain level (0-10 scale)
– Ability to touch toes (measure inches)
– Morning stiffness duration (minutes)
– Pain medication doses taken
True success markers:
– Week 2: 20% pain reduction
– Week 6: 30% improvement in toe-touch distance
– Month 3: Elimination of nighttime pain
Sustainable Relief Routine
Consistency beats intensity: 3-4 sessions weekly at moderate angles outperforms daily extreme inversion. Pair inversion with core work—do planks or bird-dog exercises on non-inversion days to stabilize your spine. Hydrate aggressively (half your body weight in ounces daily) to keep discs supple. After 3 months of consistent use, many users reduce to 2 maintenance sessions weekly while sustaining pain relief.
Final Note: Inversion therapy isn’t a magic bullet—it’s a precision tool within your pain relief arsenal. Start at 15° for 30 seconds, never skip medical clearance, and always prioritize controlled movement over angle extremes. When combined with core strengthening and hydration, this technique creates lasting spinal space where pain once lived. Your path to freedom from back pain begins not by reaching higher, but by flipping your perspective—safely and strategically.