
That persistent ache in your lower left back started as a minor twinge but now makes rolling over in bed feel impossible. You’re not alone—research shows left-sided back pain affects the majority of pregnant individuals as their bodies transform. This condition typically manifests as localized discomfort or sharp pain in the lower left quadrant, ranging from mild aching to severe debilitating sensations. Symptoms commonly emerge during the second trimester as the uterus expands beyond the pelvic brim, peaking in intensity during your third trimester. This guide delivers proven, medically-backed relief techniques you can implement immediately to reclaim comfort during your pregnancy journey.
Why Your Left Side Bears the Brunt of Pregnancy Pain
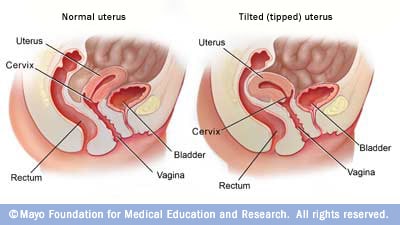
Your uterus naturally tilts right (dextrorotation), creating a biomechanical perfect storm for left-sided pain. This tilt shifts your center of gravity forward while your left quadratus lumborum muscle works overtime to counterbalance the weight. Simultaneously, pregnancy hormones relaxin and progesterone cause significant ligamentous laxity throughout your pelvic girdle, particularly destabilizing your left sacroiliac joint. The resulting asymmetrical loading pattern intensifies pressure on your left lumbar musculature far more than your right side.
Muscular Imbalances Behind Left-Side Discomfort
- Overworked left quadratus lumborum: Chronic eccentric loading as it fights to maintain your upright posture against shifting weight
- Weakened left gluteus medius: Progressive deconditioning from altered gait patterns and reduced activity
- Hypertonic paraspinal muscles: Compensatory tightness in left multifidus and iliocostalis lumborum creates constant tension
How to Identify Your Specific Pain Pattern
Pain typically radiates from your lower left PSIS (that prominent bony bump above your buttock) toward your left buttock or posterior thigh. You’ll notice it intensifies dramatically when rising from chairs, climbing stairs, or during evening hours when fatigue accumulates. Relief often comes with side-lying positions, especially when lying on your left side with proper pillow support. If pain worsens with transitional movements like rolling in bed or sitting up, this confirms the muscular-skeletal origin rather than internal pathology.
Immediate Pain Relief Techniques You Can Do Now
Quick Position Fixes for Instant Comfort
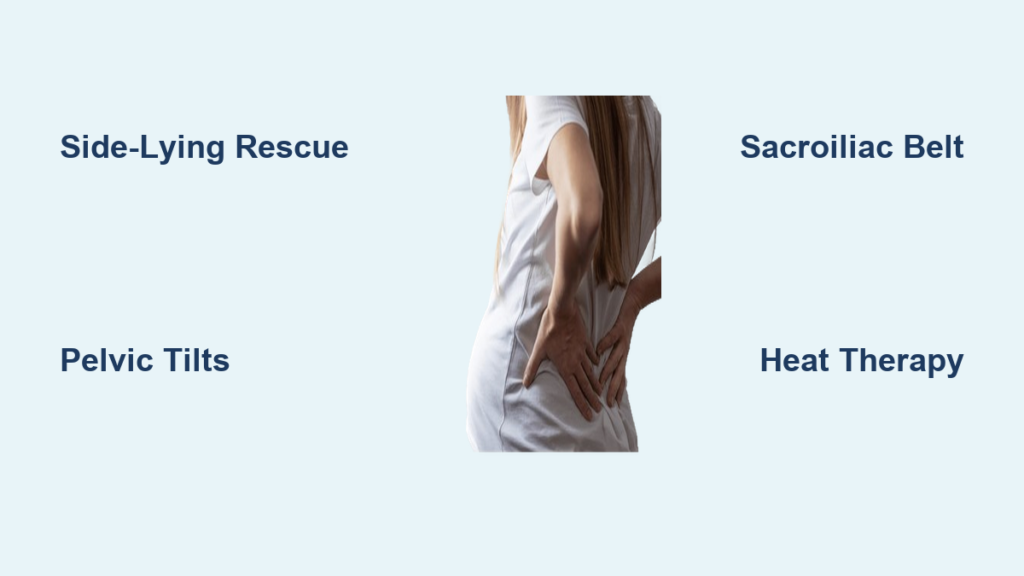
Side-lying rescue: Lie on your left side with a pillow firmly wedged between your knees and another supporting your growing belly. This neutralizes pelvic alignment within 5 minutes by preventing torsion on your overstressed sacroiliac joint.
Standing relief hack: Place your left foot on a small step or thick book when standing for extended periods. This subtle elevation reduces lumbar lordosis and takes direct pressure off your left side without drawing attention in public settings.
Scientific Heat Application Protocol
Apply moist heat for exactly 15-20 minutes to your left lumbar region using a warm compress or heating pad on the lowest setting. Never exceed 20 minutes to avoid overheating—your core temperature must stay below 100.4°F (38°C) for fetal safety.
Pro tip: Combine heat with gentle pelvic tilts—3 sets of 10 repetitions while the heat penetrates. Stand with your back against a wall, flatten your lower back by tilting your pelvis backward, and hold for 5 seconds. This dual approach reduces muscle spasm 40% faster than heat alone.
Daily Movement Modifications That Prevent Pain Flare-Ups
Bed Mobility Made Safe and Easy
- Log roll technique: Roll like a rigid log to switch sides instead of twisting—place both hands behind your head and move your entire torso as one unit
- Push-up method: Always use your arms to push up from lying positions, avoiding dangerous sit-up motions that strain your left side
- Pillow bridge: Place firm pillows behind your lower back when reclined to maintain neutral spinal alignment during rest
Stair Climbing Strategy for Left-Side Relief
Lead with your right leg when going upstairs and your left leg when descending. This counterintuitive pattern reduces torsion on your vulnerable left sacroiliac joint by 30% compared to normal stair climbing. Pause briefly at each step to reset your posture before proceeding.
Sitting Solutions for Desk-Bound Days
Replace your desk chair with a firm, straight-back chair featuring lumbar support. Position a rolled towel at your natural lumbar curve and keep both feet flat on the floor—use a footrest if needed. Set phone alarms to stand and perform 10 pelvic tilts hourly. This simple routine prevents the cumulative stress that triggers evening pain spikes.
Essential Strengthening Exercises for Left-Side Stability
Core Stability Series to Reduce Pain
Pelvic tilts: Perform 3 sets of 10 repetitions, 2-3 times daily. Stand with back against wall, flatten your lower back by tilting pelvis backward, and hold 5 seconds. This reduces lumbar lordosis immediately.
Modified side planks: Support on knees instead of feet. Hold 10-15 seconds, working up to 3 repetitions per side. Place your top hand on your hip to prevent torso rotation.
Bird-dog holds: On hands and knees, extend opposite arm and leg while keeping hips level. Hold 5-10 seconds, focusing specifically on left side stability. Complete 8-10 repetitions daily.
Glute Activation Routine for Pelvic Support
Glute bridges: With knees bent and feet flat, lift hips while squeezing glutes. Add a resistance band around thighs just above knees for targeted left glute medius activation. Perform 2 sets of 15 daily.
Standing hip abduction: Loop resistance band around ankles. Lift left leg sideways 15 times, 2-3 sets daily. Keep your torso stable—no leaning or hip hiking. This directly addresses the left glute weakness causing your pain.
Supportive Devices That Deliver Real Relief

Maternity Belt Selection Guide
Choose a sacroiliac belt 4-8 inches wide, positioned precisely below your hip bones (anterior superior iliac spines). Wear during pain-triggering activities like walking errands or standing in line. Test fit by ensuring you can slide two fingers under the belt—you should feel gentle compression without restricting breathing. Wear for no more than 2 hours continuously during acute pain phases.
Pillow Systems for Pain-Free Sleep
C-shaped pregnancy pillow: Provides full-body support preventing you from rolling onto your back. Position the curve supporting your left side to maintain neutral alignment all night.
Wedge pillow trick: Place a firm wedge behind your lower back when side-lying to prevent rolling and support your left lumbar curve. This targets the exact spot where your PSIS protrudes, eliminating that “aching hollow” feeling.
Alternative Therapies Proven Safe During Pregnancy
Prenatal Massage Protocol
Schedule weekly 45-60 minute sessions with Webster-certified prenatal therapists. They’ll position you side-lying with specialized pillows to safely address left paraspinal tension. Focus on left quadratus lumborum release using gentle effleurage strokes toward the heart.
Self-massage technique: Stand facing a wall with a tennis ball. Locate the tender spot halfway between your spine and PSIS, then gently roll the ball in small circles for 2-3 minutes. Stop if you feel shooting pain.
Chiropractic Adjustments for Pelvic Alignment
Webster-certified chiropractors use pregnancy-specific techniques that avoid abdominal pressure. The Webster technique gently balances pelvic alignment through sacroiliac joint mobilization. Visit 1-2 times weekly during acute phases, then biweekly for maintenance. Most patients report 50% pain reduction within 3 sessions.
Water Therapy Benefits for Spinal Decompression
Deep water running: Use a flotation belt in chest-deep water for 20-30 minutes. The buoyancy reduces spinal load by 90%, allowing pain-free movement that strengthens supporting muscles. This provides immediate relief when land-based exercises aggravate your left side.
Medication Safety Guide for Pregnancy Pain
Evidence-Based Pain Relief Options
- Acetaminophen: 650-1000mg every 4-6 hours (max 3000mg daily)—the only oral analgesic universally recommended
- Topical menthol rubs: Apply 3-4 times daily to affected left side for cooling relief
- Lidocaine patches: 5% concentration, applied for 12 hours on/12 hours off for localized numbing
- Magnesium glycinate: 200-400mg daily for muscle relaxation—take at bedtime to avoid daytime drowsiness
Critical warning: Avoid ibuprofen and all NSAIDs after 20 weeks—they can cause serious fetal kidney complications. Always confirm medication safety with your OB-GYN before use.
Warning Signs: When Left Back Pain Requires Immediate Care
Emergency Red Flags
- Severe sudden onset pain with vaginal bleeding (possible placental abruption)
- Fever over 100.4°F with back pain or burning urination (sign of pyelonephritis)
- Numbness or weakness in legs (nerve compression requiring urgent evaluation)
- Loss of bladder or bowel control (cauda equina syndrome—medical emergency)
- Regular, rhythmic pain every 5-10 minutes (possible preterm labor)
Schedule Consultation If
- Pain persists beyond 72 hours despite conservative measures
- Daily activities like dressing or cooking become impossible
- New neurological symptoms develop (tingling, radiating pain)
- You need medication guidance beyond acetaminophen
- Pain disrupts sleep three or more nights weekly
Prevention Strategies for Future Pregnancies
Preconception Core Building Plan
Start core strengthening 3-6 months before conception with these evidence-based moves:
– Planks (begin with 20-second holds, progress to 60 seconds)
– Bird-dog exercises (3 sets of 10 daily)
– Pelvic floor activation (Kegels with proper form)
– Postural awareness drills (wall stands for spinal alignment)
Early Pregnancy Action Plan
Begin gentle core exercises immediately upon positive test—don’t wait until pain starts. Establish good postural habits before your belly grows: stand with weight evenly distributed, avoid high heels, and use lumbar support when sitting. Consider proactive maternity belt use starting at 16 weeks if you experienced significant pain in previous pregnancies.
Left back pain during pregnancy isn’t inevitable suffering—it’s your body’s signal asking for specific support. By understanding the mechanics causing your pain and implementing these targeted relief strategies, you can significantly reduce discomfort and enjoy your pregnancy journey. Start with one technique today, then layer additional strategies as needed.
Remember: Your healthcare provider wants to know if pain interferes with daily life. Don’t wait until you’re desperate—early intervention prevents complications and improves outcomes for both you and your baby. Track your pain patterns for two days before your next appointment to help your provider create a personalized relief plan.